As someone who loves growing their own herbs and vegetables, you might be surprised to learn that having a mini greenhouse can make all the difference in creating a thriving indoor garden. Not only do they provide a warm and cozy space for plants to grow year-round, but they’re also surprisingly easy to build and maintain. With just a few simple materials like PVC pipes, plastic sheeting, and some basic tools, you can create your own mini greenhouse and start enjoying fresh produce and beautiful blooms in no time. In this beginner’s guide, we’ll walk you through the process of building and maintaining a mini greenhouse, covering everything from choosing the right materials to planning and caring for your plants. By the end of this article, you’ll be able to create a miniature oasis that will bring joy and freshness to any room in your home.
Choosing the Right Materials and Location
Choosing the right materials for your mini greenhouse is crucial, as it affects both its durability and ability to support plant growth. Let’s discuss how to select suitable materials and find an ideal location for your DIY project.
Selecting the Perfect Frame Material
When it comes to building a mini greenhouse, one of the most important decisions you’ll make is selecting the perfect frame material. You have several options, including PVC pipes, wooden frames, and metal structures.
PVC pipes are a popular choice because they’re lightweight, easy to assemble, and resistant to rot and insect damage. They’re also relatively inexpensive and can be found at most hardware stores. However, they may not provide the same level of insulation as other materials, which could affect your mini greenhouse’s temperature control.
Wooden frames offer a more traditional look and feel, and can be stained or painted to match your home’s decor. They’re also biodegradable and can be composted at the end of their life cycle. However, they may require more maintenance than PVC pipes, as they can rot or warp if exposed to moisture.
Metal structures are strong and durable, but can be heavy and difficult to assemble. They’re often more expensive than PVC pipes or wooden frames, but offer excellent insulation properties.
Consider your budget, skill level, and desired aesthetic when choosing a frame material. If you’re new to DIY projects, PVC pipes may be the best option. If you’re looking for a more traditional look, a wooden frame could be the way to go.
Determining the Ideal Location for Your Mini Greenhouse
When choosing a location for your mini greenhouse, consider a spot with direct sunlight for at least six hours a day. This will provide your plants with the necessary light for photosynthesis and growth. Avoid areas that are prone to strong winds, which can damage the structure or make it difficult to maintain.
Positioning your mini greenhouse near an exterior wall is ideal, as it allows for easy access to water and reduces the risk of overwatering. Consider placing it near a window or door that receives natural light, but avoid direct sunlight during peak hours to prevent overheating.
To maximize natural light, orient your mini greenhouse east- or west-facing. This will provide gentle morning and afternoon sunlight without intense midday heat. If possible, incorporate skylights or larger windows to bring in more light and create a brighter environment for your plants. A south-facing orientation can work as well, but be mindful of potential overheating during the summer months.
Assessing the Size and Layout of Your Space
When determining the size and layout of your mini greenhouse, it’s essential to consider how many plants you plan to grow. A general rule of thumb is to allow at least 6-8 inches of space between each plant for proper air circulation and growth. This also helps prevent overcrowding, which can lead to disease and pest issues.
Consider the types of plants you want to grow as well. For example, if you’re planning to grow compact herbs like basil or mint, they require less space than sprawling vegetables like tomatoes or cucumbers. Keep in mind that some plants may need staking or trellising to keep them upright and secure.
The available space in your home or garden is also crucial to consider. Measure the area where you plan to place your mini greenhouse and take note of any obstructions, such as windowsills or doorways. You’ll want to ensure there’s enough clearance for easy access and maintenance.
Typically, a small mini greenhouse can range from 2×2 feet to 4×8 feet in size. If you’re limited by space, consider building a smaller model or using a compact design that still provides ample growing room.
Planning and Designing Your Mini Greenhouse
When planning a mini greenhouse, you’ll want to consider factors like space, light, and ventilation to create an ideal environment for your plants. Let’s start by thinking about layout and design.
Understanding the Different Types of Mini Greenhouses
There are several types of mini greenhouses, each with its own unique features and benefits. Hoop houses, for example, are simple structures made from PVC pipes or metal frames, covered with plastic sheeting or glass. They provide excellent protection from wind and frost, making them ideal for starting seeds or hardening off young plants.
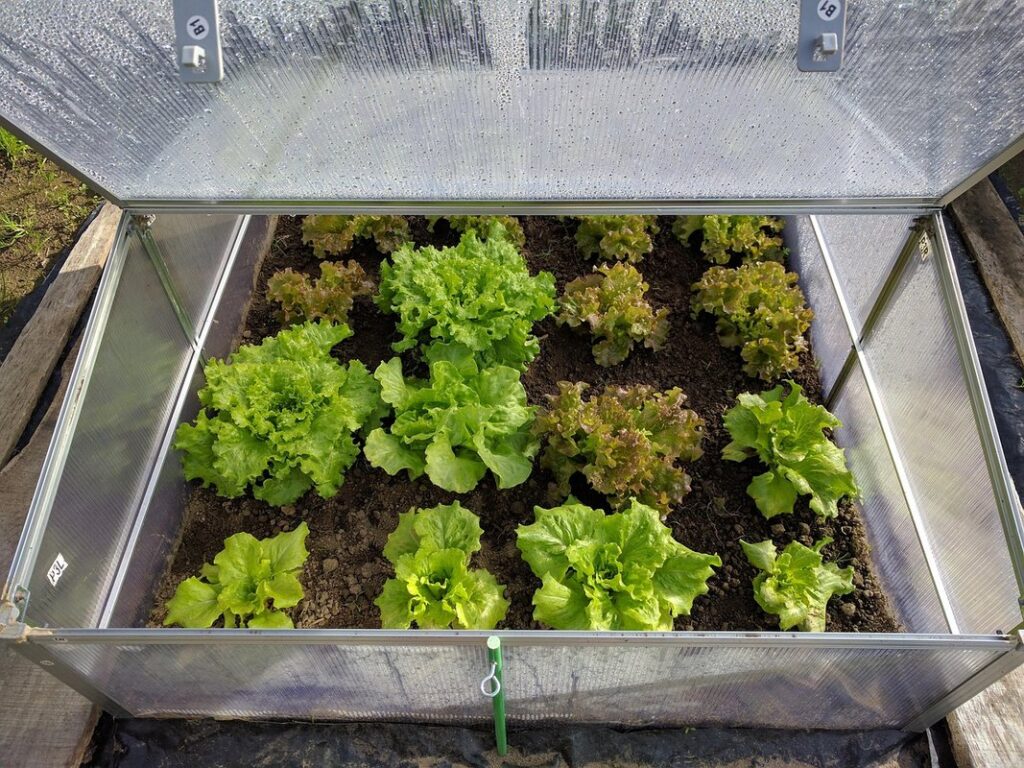
Cold frames, on the other hand, are built into the ground and use a transparent lid to allow sunlight to enter during the day. This type of mini greenhouse is perfect for extending the growing season in cooler climates, as it can trap heat from the sun and radiate it back out at night. A cold frame can also be used to force bulbs or overwinter plants that would normally go dormant.
Mini conservatories are more elaborate structures that can be attached to an existing building or stand alone. They typically have a solid roof and walls, which provide excellent insulation and protection from the elements. Mini conservatories are ideal for year-round gardening, as they can maintain a consistent temperature and humidity level, even in extreme weather conditions.
When choosing a mini greenhouse type, consider your climate, available space, and personal preferences.
Creating a Customized Plan for Your Mini Greenhouse
To create a customized plan for your mini greenhouse, start by determining your budget. Consider not only the initial cost of materials but also ongoing expenses like heating, cooling, and replacement parts. Next, select plants that thrive in indoor conditions and suit your climate zone. Research their specific needs, such as light requirements, watering schedules, and fertilization needs.
When designing the layout, prioritize airflow to prevent moisture buildup and fungal diseases. Allocate space for plants with different growth habits, like trellises for climbing varieties or dedicated areas for sprawling plants. Think about storage solutions for tools, seeds, and other supplies. Consider a shelving system or cabinets to keep your mini greenhouse organized.
Also, decide on the number of growing levels you need based on available height and desired yield. Make sure there’s enough clearance between levels for easy access and maintenance. You may also want to incorporate a tray or pan to collect excess water from irrigation systems, reducing waste and making cleanup easier. By considering these factors, you’ll create a tailored plan that meets your specific needs and ensures the success of your mini greenhouse project.
Ensuring Proper Ventilation and Temperature Control
When it comes to maintaining a healthy indoor garden in your mini greenhouse, proper ventilation and temperature control are essential. Temperature fluctuations can cause stress to plants, leading to poor growth and reduced yields. To regulate temperature levels, you can use passive techniques such as orienting the greenhouse towards the north or south to maximize natural light while minimizing direct sun exposure.
Alternatively, active methods like installing a thermostat-controlled heating or cooling system can be more effective. However, these systems require electricity and may increase your mini greenhouse’s energy consumption.
Humidity control is also crucial, as most plants thrive in environments with moderate humidity levels (40-60%). You can use a humidifier to maintain optimal humidity levels during dry periods or install vents for improved air circulation.
In terms of ventilation, ensure that your mini greenhouse has adequate gaps for airflow. This can be achieved by installing windows, vents, or using wire mesh screens. A well-designed ventilation system will help prevent the buildup of heat and moisture, reducing the risk of fungal diseases and pest infestations.
Building Your Mini Greenhouse: A Step-by-Step Guide
To build a mini greenhouse that will thrive, you’ll need to start by gathering your materials and understanding the basic framework of the structure. This section outlines each crucial step.
Assembling the Frame and Base
Begin by preparing all the necessary materials for assembling the frame and base of your mini greenhouse. This typically includes the pre-cut wooden frame pieces, corner brackets, screws, a drill press or hand drill, safety glasses, and a measuring tape.
For the base, you’ll need to cut four pieces of wood to the same length, using a miter saw or circular saw for accuracy. These will form the sides of your base, so ensure they’re square and even before proceeding. Next, attach the corner brackets to each end of these side pieces, following the manufacturer’s instructions.
Now it’s time to assemble the frame. Begin by attaching the top horizontal piece to the four vertical corner posts using screws. Make sure to pre-drill pilot holes to avoid splitting the wood. Once this is secure, add the remaining frame pieces, working your way around the structure in a logical order. Use clamps to hold everything in place while you attach the final pieces.
To ensure stability and prevent warping, make sure all joints are tight and evenly spaced.
Installing Glazing and Insulation
When it comes to installing glazing and insulation in your mini greenhouse, you have several options. For glazing, you can choose between glass panels, polycarbonate panels, or acrylic sheets. Glass is a popular choice for its clarity and durability, but it’s also heavier and more expensive than other materials. Polycarbonate panels, on the other hand, are lighter, shatter-resistant, and often less expensive.
For insulation, consider using foam board, bubble wrap, or reflective mulch to keep your mini greenhouse warm during winter months. Foam board is a cost-effective option that provides good thermal insulation, but it’s not suitable for humid environments. Bubble wrap can be used as an additional layer of protection against extreme temperatures and can be applied to the exterior of your glazing.
Some popular glazing options include 4mm or 6mm glass panels, which are often less expensive than thicker panels. However, if you live in a windy area, consider opting for a heavier-duty panel that can withstand harsh weather conditions. When selecting insulation, think about the climate and temperature fluctuations in your region to choose the most suitable option for your mini greenhouse.
You’ll want to ensure a snug fit between glazing panels and frames to minimize air leaks and prevent moisture buildup. Regularly inspect your glazing and insulation for signs of wear or damage, making repairs as needed to maintain a healthy environment for your plants.
Adding Finishing Touches: Doors, Shelves, and Accessories
When it comes to creating a functional and visually appealing mini greenhouse, adding finishing touches is crucial. Doors, shelves, and accessories can enhance the overall structure’s purpose and aesthetic. For doors, consider using glass or polycarbonate panels for optimal light transmission and durability. You can also install a magnetic catch or a simple latch to ensure easy access.
Shelves are another essential component that allows you to maximize space and showcase your plants. Choose from various materials like wood, metal, or recycled plastic, depending on your budget and desired look. Consider installing adjustable shelves to accommodate potted plants of different sizes. For added functionality, include small planters or a trellis for climbing vines.
Other accessories worth considering are LED grow lights, a watering system, and a thermometer/hygrometer combo. LED grow lights can supplement natural light during winter months or low-light conditions, while a self-watering system saves you time and effort. A thermometer and hygrometer help you monitor temperature and humidity levels, ensuring optimal growing conditions for your plants.
Caring for Your Mini Greenhouse Plants
Now that you have your mini greenhouse set up, it’s essential to provide your plants with proper care to ensure they thrive and continue to flourish indoors. This includes regular watering, pruning, and fertilizing techniques.
Understanding Soil and Fertilization Needs
When it comes to thriving plants in your mini greenhouse, soil and fertilization needs are often overlooked. However, using the right type of potting mix can make a significant difference in plant health. A well-draining mix specifically designed for indoor plants will help prevent waterlogged soil and root rot. Look for mixes containing peat moss or coconut coir, which retain moisture but also allow excess water to pass through.
To determine your fertilization schedule, consider the type of plants you’re growing. Some plants, like tomatoes and peppers, require more nutrients than leafy greens. A balanced fertilizer (e.g., 10-10-10 NPK) can be applied once a month during the growing season. However, over-fertilizing can harm your plants, so start with a small amount and adjust as needed.
Monitoring soil moisture levels is crucial to prevent underwatering or overwatering. Use a moisture meter to check the soil’s water content, especially when you’re unsure about the plant’s watering needs. You can also insert a finger into the soil up to the first knuckle; if it feels dry, it’s time to water. Some mini greenhouses come with built-in irrigation systems or smart sensors that monitor and adjust watering schedules for optimal plant growth.
Watering and Irrigation Systems
When it comes to watering and irrigation systems in mini greenhouses, you have several options to choose from. One popular choice is drip irrigation, which delivers water directly to the roots of the plants through a network of tubes and drippers. This method is efficient and reduces evaporation, making it ideal for indoor gardens where moisture levels can quickly become too high.
Another option is misting systems, which release a fine spray of water into the air to maintain humidity and cool the plants. These systems are often used in conjunction with drip irrigation or as an alternative for smaller spaces.
Self-watering planters are also a great option for mini greenhouses. These planters have built-in reservoirs that hold excess water, allowing plants to draw on it as needed. This method eliminates the need for frequent watering and can help prevent overwatering, which is common in indoor gardens where it’s easy to forget about watering schedules.
When selecting an irrigation system for your mini greenhouse, consider factors such as the size of the space, the type of plants you’re growing, and the climate in your area. For example, if you live in a dry climate, a misting system may be more effective at maintaining humidity levels than drip irrigation.
Pest Control and Disease Prevention
Common pests like spider mites, mealybugs, and scale can infest indoor plants, especially those in a mini greenhouse. These tiny insects feed on plant sap, causing yellowing leaves, stunted growth, or even death. To prevent infestations, maintain good air circulation within the greenhouse by opening vents and using fans to circulate air.
Inspect your plants regularly for signs of pests, such as white cottony patches, sticky substance, or actual insects. Isolate infected plants immediately to prevent the problem from spreading. For organic pest control, mix neem oil with water according to the product’s instructions and spray it on affected areas. This natural insecticide can be safely used indoors.
Diseases like root rot, leaf spot, and powdery mildew can also affect indoor plants. Overwatering is a common cause of these issues, so ensure you’re not watering too frequently. Waterlogged soil creates an ideal environment for fungal growth. To combat diseases, improve air circulation by pruning overcrowded areas or repotting affected plants in fresh, well-draining soil. Regularly inspect your plants’ leaves and stems for signs of disease, such as black spots or a white powdery coating.
Advanced Tips for Maximizing Your Mini Greenhouse’s Potential
Now that you have your mini greenhouse up and running, it’s time to take your indoor garden to the next level by implementing these expert-approved techniques. These advanced tips will help you optimize light, temperature, and humidity for maximum growth.
Experimenting with Hydroponics and Aeroponics
Hydroponics and aeroponics offer a controlled environment for plant growth, allowing you to precisely regulate water and nutrient delivery. This can be especially beneficial in mini greenhouses where space is limited and precise climate control is crucial.
One of the primary benefits of hydroponics and aeroponics is increased crop yields due to optimized root development. In traditional soil-based systems, roots must compete for resources like oxygen and nutrients. By providing these resources directly to the roots through a nutrient-rich solution or mist, plants can focus energy on growth rather than survival.
When transitioning from traditional soil-based gardening to hydroponics or aeroponics, you’ll need to adjust your plant selection accordingly. Not all plants are suitable for these systems; some may require additional support or have specific requirements for nutrient intake. Research the specific needs of your chosen plants and ensure you’re using a system that caters to their requirements.
To get started with hydroponics or aeroponics in your mini greenhouse, consider the following setup options:
- A simple hydroponic system using a plastic tube or net pot setup
- An aeroponic system utilizing a fine misting system for nutrient delivery
- A hybrid approach combining elements of both hydroponics and aeroponics
Integrating Technology for Optimal Climate Control
When it comes to maintaining an optimal climate inside your mini greenhouse, manual adjustments can be time-consuming and may not always be precise. Integrating technology can simplify the process while ensuring accurate temperature and humidity control. For instance, a digital thermostat allows you to set specific temperature ranges for day and night, helping prevent overheating or underheating of your plants.
You can also use humidifiers to maintain the ideal moisture levels in the air. These devices measure the current humidity level and add water vapor as needed, preventing dryness that can damage leaves or roots. CO2 monitors are another essential tool for indoor gardening. By tracking the current CO2 concentration, you can adjust ventilation rates or add a CO2 supplement to promote healthy growth.
Consider investing in a temperature and humidity sensor combo, which usually includes a wireless hub and multiple sensors. This setup allows you to monitor conditions remotely using a mobile app and receive alerts when adjustments are needed. For a more precise control over CO2 levels, you can opt for an automated CO2 controller that adds or removes CO2 based on your plant’s requirements.
When choosing technology for climate control, consider the specific needs of your plants as well as the mini greenhouse’s size and layout.
Frequently Asked Questions
Can I use a mini greenhouse for growing sensitive plants like orchids or ferns?
You can use a mini greenhouse to grow sensitive plants like orchids or ferns. However, you’ll need to ensure that the temperature and humidity levels are carefully controlled to meet their specific needs. This might involve using additional heating or cooling systems, or implementing a more complex ventilation strategy.
What if I live in an area with very harsh winters? Can I still use a mini greenhouse?
Yes, it’s possible to use a mini greenhouse even in areas with harsh winters. You’ll need to choose materials that can withstand extreme cold and wind, such as insulated polycarbonate panels or double-glazed glass. Additionally, you may want to consider using a cold frame or hoop house design to provide extra protection.
How do I know when it’s time to repurpose or replace my mini greenhouse?
The lifespan of a mini greenhouse will depend on various factors, including the materials used and how well it’s maintained. As a general rule, you can expect a mini greenhouse to last for 5-10 years before needing significant repairs or replacement. Signs that it’s time to repurpose or replace your mini greenhouse include water damage, warping or rotting of wood components, or excessive energy consumption.
Can I use a mini greenhouse in a small apartment or condo with limited space?
Yes, you can still use a mini greenhouse in a small apartment or condo. Consider using a compact design or opting for a vertical gardening setup to maximize space. Additionally, look into DIY mini greenhouses that can be assembled and disassembled as needed, making them ideal for smaller spaces.
How do I integrate my mini greenhouse with existing home systems like heating and cooling?
You’ll want to consult with a professional to ensure that your mini greenhouse is properly integrated with your home’s heating and cooling systems. This may involve installing thermostats or humidistats specifically designed for greenhouses, as well as ensuring that the ventilation system is working efficiently to regulate temperature and humidity levels.

