
Birds are incredibly resourceful creatures, but when it comes to raising their young, they need a safe haven that protects them from predators and provides optimal conditions for growth. A well-designed brood nest is crucial for bird survival rates, as it reduces predation risks and enables chicks to grow at an accelerated rate. However, building the perfect brood nest can be a daunting task, especially for inexperienced bird enthusiasts or even seasoned wildlife experts who are looking to improve their setup. In this article, you’ll learn how to design a brood nest that meets the specific needs of various bird species, build it using materials that mimic natural environments, and maintain its optimal conditions to ensure improved bird survival rates, reduced predation risks, and better growth rates by the time you’re done reading.
Understanding the Importance of Brood Nests
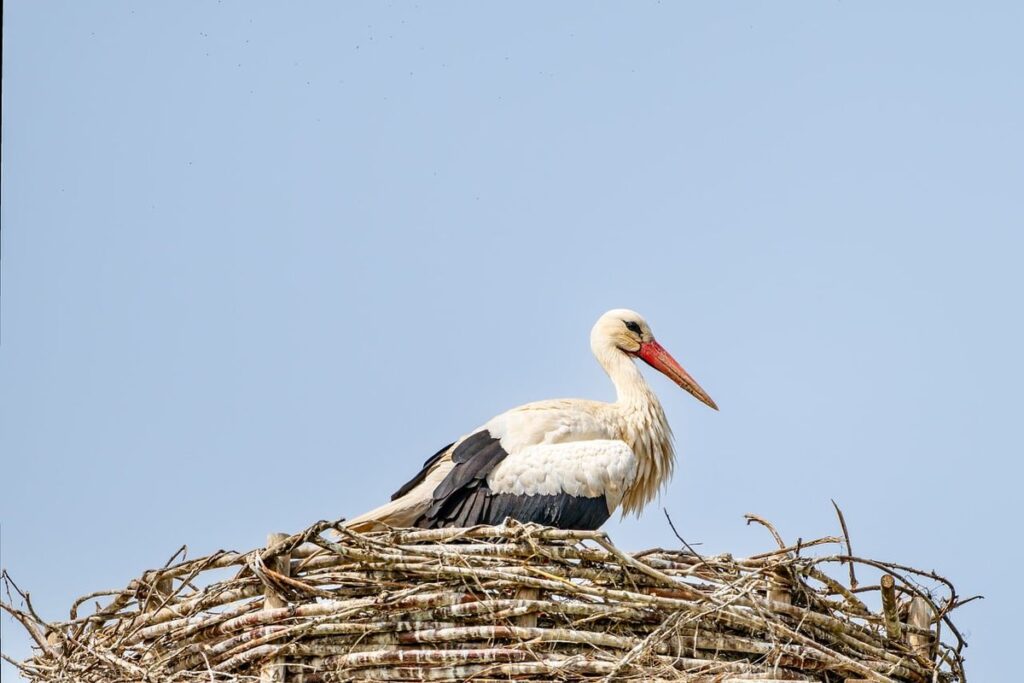
A brood nest is more than just a safe haven for your eggs, it’s also crucial for their incubation and development, playing a vital role in your chicks’ survival.
Types of Birds That Use Brood Nests
Birds such as robins, bluebirds, and wrens are known to use brood nests for raising their young. These small songbirds typically build their nests in dense vegetation, often using twigs, grasses, and other plant material to construct a cup-shaped nest. The robin, for example, is a frequent user of brood nests, often building its nest in a hidden location such as a bush or shrub.
Other birds that use brood nests include waterfowl like ducks and geese, which build their nests on the ground or in vegetation near water. These birds require more protection from predators than songbirds, so they often choose locations with dense cover or proximity to water. Turkeys are also known to use brood nests, typically building them in a hidden location such as a thicket or under a bush.
When selecting a location for your own brood nest, consider the specific needs of the birds you plan to house. For example, if you’re planning to raise songbirds like robins or bluebirds, choose a location with dense vegetation and protection from predators. If you’re planning to raise waterfowl, ensure that the location provides easy access to water and suitable nesting material.
Benefits of Using a Brood Nest for Young Birds
Using a brood nest for young birds can significantly improve their chances of survival. Research has shown that chicks raised in a well-designed brood nest have higher survival rates than those left to fend for themselves on the ground. This is because the brood nest provides a safe and stable environment, shielding the young birds from predators, harsh weather conditions, and potential diseases.
A well-constructed brood nest can also promote better growth rates among chicks. By maintaining a consistent temperature and humidity level, the brood nest allows the young birds to develop at an optimal pace. This is especially important for species that require precise temperature control, such as certain breeds of poultry.
Additionally, using a brood nest can reduce predation risks by keeping the young birds out of sight from potential predators like hawks, owls, and foxes. By providing a secure and enclosed space, you can give your chicks the best possible start in life.
Choosing the Right Location for Your Brood Nest
When selecting a location for your brood nest, it’s crucial to consider factors such as accessibility, ventilation, and protection from predators. A well-chosen site will set the stage for successful nesting.
Factors to Consider When Selecting a Site
When selecting a site for your brood nest, there are several key factors to consider. First and foremost, think about sunlight exposure. Young birds need warmth to regulate their body temperature, so choose a location that receives direct sunlight for most of the day. However, be mindful of extreme temperatures – avoid areas that receive intense midday sun or are exposed to harsh winds.
Consider the wind protection as well. A brood nest should provide a safe haven from strong gusts and precipitation. Look for a spot with some natural shelter, such as a group of trees or a rock outcropping, to block prevailing winds.
Proximity to food sources is also crucial. Birds need easy access to water and nutritious food to thrive. Choose a location near a reliable water source, such as a pond or stream, and consider the proximity to feeding areas, like grasslands or meadows. Avoid sites with standing water nearby, which can attract predators and increase disease transmission risk.
In general, aim for a site that offers a balance of sunlight, wind protection, and proximity to food sources. By carefully evaluating these factors, you’ll be well on your way to creating an optimal brood nest location.
Tips for Building a Safe and Accessible Entrance
When designing an entrance for your brood nest, safety and accessibility are crucial considerations. Different bird species have unique requirements, so it’s essential to understand their needs before building.
For example, some birds, like robins and bluebirds, prefer a narrow entrance that allows them to easily slip in and out. In contrast, larger birds such as owls and hawks require wider entrances to accommodate their larger bodies. A general rule of thumb is to provide an entrance that’s about 1-2 inches (2.5-5 cm) wide for small birds and up to 4-6 inches (10-15 cm) wide for larger species.
In addition to width, consider the height of the entrance as well. Some bird species prefer to enter at a shallow angle, while others prefer a more vertical approach. A good starting point is to build an entrance that’s around 1-2 feet (30-60 cm) off the ground. Also, ensure the entrance is positioned in a way that allows for easy cleaning and maintenance.
When deciding on the type of material to use for the entrance, opt for materials that are durable yet gentle on the birds’ feathers. A simple wooden or plastic entrance with a smooth surface is usually sufficient.
Designing Your Brood Nest for Optimal Performance
When designing your brood nest, it’s essential to consider the specific needs of your birds and the layout that will optimize their health, productivity, and overall well-being. A thoughtfully designed brood nest can make all the difference in successful birdkeeping.
The Role of Insulation in Maintaining a Stable Temperature
Insulation plays a vital role in maintaining a stable temperature within the brood nest. Young birds rely on a consistent environment to regulate their body heat and develop properly. Without adequate insulation, the temperature fluctuations can be extreme, causing stress and discomfort for the chicks.
A well-insulated brood nest can help maintain a temperature range between 90°F and 100°F (32°C to 38°C), which is essential for healthy development. To achieve this effectively, use materials with good thermal mass, such as wood or straw bales, to absorb and release heat slowly. Avoid using metal or glass, as they can conduct heat rapidly and cause temperature fluctuations.
Consider layering insulation materials to create a buffer zone between the nest and the external environment. For example, you can place a thick layer of dry bedding material like straw or shredded newspaper at the bottom of the nest, followed by a layer of insulating material like foam board or recycled denim. This will help regulate temperature and maintain a stable microclimate within the brood nest.
The Importance of Ventilation in Preventing Moisture Buildup
A well-ventilated brood nest is crucial for preventing moisture buildup, which can lead to mold growth and other issues. Moisture accumulates quickly in a closed environment, especially when combined with heat generated by the birds’ bodies. In a poorly ventilated brood nest, this excess moisture can condense on surfaces, creating an ideal breeding ground for mold and bacteria.
The consequences of inadequate ventilation can be severe. Mold growth not only compromises air quality but also poses health risks to both humans and birds. It’s essential to maintain a balance between keeping the brood warm and dry by regulating airflow. A general rule of thumb is to ensure at least one square inch of ventilation per cubic foot of brood nest volume.
To achieve optimal ventilation, you can incorporate features such as roof vents, wall openings, or mesh panels into your design. When selecting materials for these components, prioritize durability and ease of cleaning to prevent the buildup of debris and bacteria. Regularly inspecting and maintaining these features will help ensure a healthy environment within the brood nest.
Building Materials and Construction Techniques
For a safe and thriving brood, choosing the right building materials is crucial. We’ll explore the best materials to use for your nest’s framework and lining.
Sustainable Options for Building Your Brood Nest
When it comes to building a brood nest, sustainability is just as important as functionality. Choosing eco-friendly materials not only reduces waste and minimizes environmental impact but also promotes a healthier environment for your birds. One popular option is reclaimed wood, which can be sourced from old barns, fences, or other structures. This material has already been weathered to perfection, making it ideal for withstanding the elements.
Bamboo is another excellent choice due to its natural durability and resistance to pests and decay. It’s also highly renewable, requiring minimal water and pesticides during cultivation. If you’re looking for a more modern solution, consider using recycled plastic lumber (RPL). Made from 100% post-consumer waste, RPL is durable, low-maintenance, and resistant to rot and insect damage.
When working with these materials, be sure to clean and process them properly before assembling the brood nest. For example, reclaimed wood may require sanding or stripping to remove any old finishes or debris. Proper preparation ensures a safe and healthy environment for your birds, as well as a long-lasting structure that withstands the elements.
DIY vs. Professional Installation: Weighing the Pros and Cons
When it comes to building a brood nest, one crucial decision is whether to do it yourself (DIY) or hire a professional. Both options have their advantages and disadvantages.
A DIY approach allows for complete control over the design and materials used, which can be beneficial if you’re looking for a specific aesthetic or want to incorporate sustainable features. You’ll also save on labor costs, as you won’t need to pay for a contractor’s time. However, building a brood nest requires expertise in construction and knowledge of avian behavior, so mistakes can be costly.
Professional installation, on the other hand, ensures that your brood nest is built with the right materials and features for optimal performance. A professional will consider factors like insulation, ventilation, and accessibility to create a safe and functional space for your birds. While this option may seem more convenient, it can be expensive, especially if you’re working with a contractor who charges by the hour.
Ultimately, whether you choose DIY or professional installation depends on your skills, budget, and priorities. If you have experience in construction and want to save money, building your own brood nest might be the way to go. However, if you value convenience and expertise, hiring a professional could provide peace of mind and ensure that your birds thrive.
Maintenance and Upkeep of Your Brood Nest
Regular maintenance is crucial to ensure your brood nest remains a safe haven for your birds, so let’s take a closer look at how to keep it clean and well-maintained. This includes tasks like cleaning out old droppings and replacing nesting material as needed.
Regular Cleaning and Inspection Schedule
Regular cleaning and inspection are crucial to maintaining the health and well-being of your young birds. A regular schedule will ensure that debris is removed and potential issues are identified before they become major problems.
Daily: Check the brood nest for any signs of damage or wear, and remove any droppings or debris that may have accumulated overnight. This quick check can help prevent the buildup of ammonia in the nest, which can be toxic to your birds.
Weekly: Clean the entire brood nest, including all surfaces and nesting material. Use a soft-bristled brush or a gentle scrubber to remove dirt and debris without damaging any materials. Also, inspect the entrance for any blockages or damage that may be preventing your birds from accessing the nest.
Monthly: Perform a thorough inspection of the brood nest’s structure, looking for signs of wear on wooden components or other materials. Check for any gaps or cracks in the walls or floor that could allow cold air to seep in or moisture to accumulate.
Troubleshooting Common Issues with Your Brood Nest
Leaks can be identified by visible water droplets on the nest’s surface or discolored nesting material. To address a leaky brood nest, inspect the roof and walls for damaged or missing shingles, loose mortar, or gaps between the structure and surrounding vegetation. Repair any damage promptly to prevent further water infiltration.
Pest infestations often become apparent when you notice eggs or chicks being attacked by insects or birds. Check your brood nest regularly for signs of pests, such as nesting material shredded by rodents or droppings from pigeons. Remove any debris or clutter that may be attracting these pests and consider using bird-repellent materials like netting or mesh to protect your brood.
Structural issues can manifest as cracks in the walls or unevenness in the nest’s surface. Inspect your brood nest regularly for signs of wear, such as sagging beams or loose joists. Make any necessary repairs promptly to maintain the structural integrity of your brood nest and prevent further damage.
Common issues like these can be prevented with regular maintenance and inspections.
Advanced Techniques for Optimizing Brood Nest Performance
To truly master the art of building a perfect brood nest, you’ll need to learn advanced techniques that boost egg fertility and chick survival rates. We’ll share expert tips on optimizing brood nest performance.
Using Technology to Monitor Temperature and Humidity Levels
Smart sensors can be used to track temperature and humidity levels within the brood nest. These sensors are typically small, low-maintenance devices that can be easily integrated into existing nesting structures. They provide real-time data on temperature and humidity fluctuations, allowing you to respond quickly to any changes.
Some popular options for smart sensors include wireless temperature and humidity probes, which can transmit data directly to a smartphone or computer. These devices often come with built-in alarm systems that notify you if temperatures drop below 40°F (4°C) or rise above 90°F (32°C), or if humidity levels exceed 60%.
When selecting a monitoring system, consider the specific needs of your bird species. For example, some birds require precise temperature control, while others are more tolerant of fluctuations. Regularly reviewing and adjusting your monitoring setup can help you fine-tune its performance.
To get started, choose a system that integrates with your existing nesting structure or is easy to install in a new one. Consider the cost, accuracy, and user-friendliness of the sensors when making your selection. A good starting point is to invest in a basic wireless temperature and humidity probe that can transmit data directly to your phone.
Experimenting with Alternative Building Materials and Designs
When experimenting with alternative building materials and designs for your brood nest, consider incorporating eco-friendly options like reclaimed wood, bamboo, or straw bales. These materials can provide natural insulation, reduce waste, and promote a healthy environment for your young birds. For example, using recycled plastic containers as nesting boxes can help to repurpose unwanted materials while maintaining a clean and dry space.
You might also explore innovative designs that prioritize airflow and ventilation. Consider adding skylights or solar tubes to increase the amount of natural light and heat entering the nest. Alternatively, you could use a green roof design with built-in vegetation to create a self-sustaining ecosystem.
Some bird species have even been known to thrive in nests constructed from unusual materials like old tires or plastic bottles. While these alternatives may not be suitable for all situations, they demonstrate the creative possibilities available when experimenting with new building materials and designs. To get started, research different options and consider consulting with local experts or online communities to find inspiration and guidance.
Frequently Asked Questions
Can I Use a Pre-Existing Nest as My Brood Nest?
Yes, it’s possible to repurpose an existing nest as your brood nest. However, ensure the structure is sturdy and safe for young birds. Consider adding insulation or ventilation if necessary to meet the needs of your specific bird species.
What If I Notice Leaks in My Brood Nest After Installation?
Leaks can be a significant issue with brood nests. Inspect the structure carefully and identify the source of the leak. You may need to reapply waterproofing materials or make repairs to prevent further damage. Regular maintenance is key to preventing such issues.
How Do I Know When to Introduce Young Birds to Their Brood Nest?
Introducing young birds to their brood nest requires careful timing. Typically, this happens when they’re around 2-3 weeks old and have developed enough feathers for insulation. Monitor their development and introduce them gradually to the nest, ensuring it’s at a comfortable temperature.
Can I Use Solar Panels or Wind Turbines Near My Brood Nest?
While renewable energy sources are beneficial, placing solar panels or wind turbines too close to your brood nest can create safety hazards. Ensure you maintain a safe distance between these structures and the nest to avoid potential risks for young birds.
What Happens If I Notice Mold Growth in My Brood Nest During Maintenance?
Mold growth is an indication of poor ventilation within your brood nest. Address this issue promptly by improving airflow, increasing humidity levels, or using mold-resistant materials during construction. Regular maintenance will help prevent such problems from arising again.

