Canning vegetables at home can be a daunting task, especially for beginners. You may have heard horror stories about botulism contamination or improperly sealed jars causing foodborne illnesses. However, with proper knowledge and technique, canning is a safe and rewarding way to preserve fresh produce for year-round consumption. In fact, many people rely on home-canned vegetables as a cost-effective and sustainable alternative to store-bought canned goods. To ensure your canned vegetables are safe to eat and of high quality, it’s essential to understand the fundamental principles of canning, including acidity levels, jar preparation, and processing times. This article will guide you through the essential canning techniques, safety considerations, and best practices for preserving vegetables at home with confidence and peace of mind, allowing you to enjoy your harvest all year round.
Understanding the Basics of Canning Vegetables
Before you start canning, it’s essential to understand the fundamental principles that ensure your vegetables are properly preserved. This foundation will help you avoid common mistakes and achieve successful results in your canning endeavors.
Choosing the Right Equipment for Canning
To ensure safe and successful canning, you’ll need a few essential pieces of equipment. Start with a set of clean glass jars specifically designed for canning, along with lids and rings to secure them tightly. A water bath canner is also crucial – this large pot allows you to submerge your filled jars in boiling water for the recommended time.
Sterilizing your equipment is vital before use. Wash all jars, lids, and rings thoroughly with soap and hot water. Then, place them in a pot or dishwasher and boil for 10-15 minutes to kill off any bacteria that might be lurking on the surfaces. This step ensures that your equipment won’t contaminate your food.
When shopping for canning supplies, look for jars that are BPA-free and suitable for acidic foods like tomatoes. Avoid using old or damaged lids – they may not seal properly, which can lead to spoilage. For a water bath canner, opt for one with a rack to hold the jars off the bottom of the pot, preventing them from coming into contact with hot metal. By investing in proper equipment and following sterilization procedures, you’ll be well-prepared to start canning your favorite vegetables safely.
Preparing Vegetables for Canning
When preparing vegetables for canning, proper food handling techniques are crucial to prevent spoilage. Start by washing the vegetables thoroughly under cold running water to remove dirt and debris. Scrub firm-skinned vegetables like carrots and beets with a vegetable brush to remove any stubborn dirt.
Next, peel or skin the vegetables as needed – some, like cucumbers and squash, require peeling, while others, like potatoes and sweet potatoes, can be left unpeeled. For vegetables that need chopping, use a sharp knife to make clean cuts, taking care not to crush or bruise the flesh.
It’s essential to minimize handling of the vegetables during preparation to prevent damage and subsequent spoilage. Handle each vegetable gently, and store them in a cool place until you’re ready to can them. Avoid over-handling high-moisture vegetables like leafy greens, as this can cause them to become soggy and difficult to pack into jars.
Cut or chopped vegetables should be immediately packed into hot, sterilized jars, leaving the recommended headspace to allow for expansion during processing.
The Science Behind Canning: Acid Levels and pH Balance
Acidity plays a crucial role in canning as it helps prevent the growth of Clostridium botulinum, a bacterium that can cause botulism. To maintain safe acid levels, you need to understand the pH balance of different vegetables. The acidity level is measured on a scale from 0 to 14, with 7 being neutral. Most fruits and tomatoes are acidic, typically falling in the range of 3.5 to 4.5.
Leafy greens like spinach and broccoli, as well as root vegetables such as carrots, tend to be more alkaline, ranging from 6 to 8. To ensure safe canning practices, you should always check the pH levels of your vegetables before processing them. You can use pH test strips or a pH meter for accurate readings.
It’s essential to maintain an acid level of at least 4.6 in the final product to prevent botulism growth. This is achieved by adding lemon juice or vinegar to more alkaline vegetables. For example, you can add 1-2 tablespoons of lemon juice per quart of water when canning broccoli. By understanding and adjusting acidity levels, you can create safe and delicious canned vegetables that last for years to come. A general guideline for common vegetables is as follows:
- Acidic: tomatoes (pH 3.5), citrus fruits (pH 2.0-3.0)
- Neutral: green beans (pH 6.8), peas (pH 6.9)
- Alkaline: broccoli (pH 7.1), spinach (pH 7.4)
Techniques for Canning Various Vegetables
Now that you’ve mastered basic canning techniques, let’s move on to the fun part: experimenting with different vegetables and learning various methods for preparing them perfectly. This section covers essential tips for canning popular garden favorites like beans, carrots, and tomatoes.
Canning Leafy Greens and Broccoli
To can leafy greens like spinach and kale, as well as broccoli, you’ll need to follow a specific process. Begin by selecting fresh, tender vegetables with no signs of wilting or browning. Next, blanch them in boiling water for 2-3 minutes to inactivate enzymes that cause spoilage.
Immediately plunge the blanched vegetables into an ice bath to stop the cooking process and help preserve their color and texture. Once cooled, pack the leafy greens tightly into clean, hot jars, leaving about 1 inch of headspace. For broccoli, trim the florets to fit within the jar, making sure they’re not overcrowded.
When packing the vegetables, use a non-metallic utensil or your hands to remove any air pockets and ensure even distribution. This helps prevent sogginess and promotes optimal preservation. Finally, process the jars in a boiling water bath for 20-30 minutes, adjusting for altitude as necessary. By following these steps, you’ll be able to enjoy your home-canned leafy greens and broccoli throughout the year.
Canning Root Vegetables and Corn
When canning root vegetables like carrots and beets, as well as corn on the cob, it’s essential to use proper pressure canning techniques to ensure a safe and high-quality product. These dense foods require higher temperatures and pressures to kill off bacteria and create a vacuum seal.
Start by packing raw or blanched vegetables into clean, hot jars, leaving about 1 inch of headspace. Next, add a brine solution (water with added salt) to cover the contents, making sure not to touch the lid during this process. Use a pressure canner set at 10 pounds of pressure for high-altitude areas or 15 pounds for lower elevations.
For corn on the cob, trim the husks and silk, then pack the ears into jars with some water or brine solution. Process them in the pressure canner at 10 pounds of pressure for 20-30 minutes, adjusting for altitude as needed. It’s crucial to follow a tested recipe from a reliable source, like the USDA, to ensure accurate processing times and methods.
Always prioritize safe canning practices when working with dense vegetables, which are more prone to spoilage and contamination.
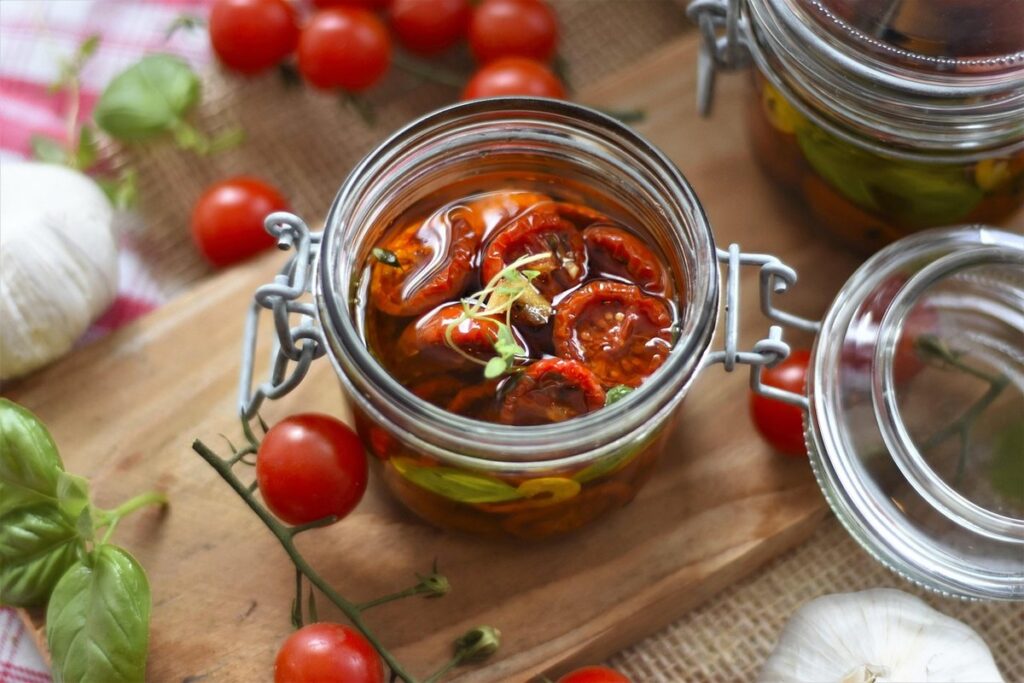
Canning Tomatoes and Other Acidic Vegetables
When canning tomatoes and other acidic vegetables like bell peppers, it’s essential to maintain their natural acidity throughout the process. This is because acidic foods are more resistant to spoilage and less prone to botulism. To ensure the acidity of these foods, start by selecting varieties that are known for their high acidity levels. Tomatoes, for example, have a naturally occurring acid called citric acid that helps preserve them.
During canning, it’s crucial not to add any acidic ingredients like lemon juice or vinegar, as this can alter the pH balance and potentially lead to spoilage. Instead, use minimal water in the canner to prevent dilution of the natural acidity. You can also consider using a pressure canner for these types of vegetables, as they require a shorter processing time than other vegetables.
Some popular acidic vegetables that can be canned include:
• Bell peppers
• Tomatoes
• Cucumbers (pickling style)
• Sauerkraut
When processing acidic vegetables in a water bath canner, make sure to follow the recommended processing times and temperatures for your altitude. Always check the manufacturer’s guidelines for specific equipment recommendations.
Safety Considerations and Best Practices
To ensure a safe canning experience, it’s crucial to follow proper procedures for handling hot jars and avoiding contamination. This section outlines essential precautions to take when preserving vegetables at home.
Preventing Botulism: Understanding the Risks
Botulism is a serious concern when canning vegetables, as it can cause severe illness or even death. The primary risk factor for botulism in home-canned goods is improper acid levels and pH balance. This can be caused by using low-acid vegetables, not adding enough acidity (such as lemon juice or vinegar), or not following tested recipes.
Symptoms of botulism include difficulty swallowing, facial weakness, and shortness of breath. In severe cases, it can lead to paralysis and respiratory failure. To prevent botulism, it’s essential to follow tested recipes that have been proven safe for home canning. These recipes typically require a specific ratio of acid to vegetables.
Proper food handling techniques are also crucial in preventing contamination. Always use clean equipment and utensils when preparing and packing vegetables. Ensure that jars are sterilized before filling and sealing them. Store sealed jars in a cool, dark place, away from direct sunlight. When using low-acid vegetables, always add enough acidity to ensure the final product has a pH level of 4.6 or below.
Regularly inspect your canning equipment for signs of wear and tear, and replace any damaged parts promptly. By following these guidelines, you can minimize the risk of botulism in your home-canned vegetables.
Ensuring Proper Canning Techniques for a Safe Product
Proper processing and storage procedures are crucial for ensuring safe canned vegetables. To verify proper canning techniques, check the product’s acidity level by using a pH meter or pH paper. The acidity level should be between 4.6 and 8.5 to inhibit bacterial growth. Next, inspect the canning equipment, including the pressure gauge, safety valve, and seals, for any signs of wear or damage.
When canning vegetables, it’s essential to follow tested recipes and guidelines provided by reputable sources like the USDA or National Center for Home Food Preservation. These organizations offer reliable information on safe canning practices and procedures. Be cautious when adapting recipes from other sources, as variations in acidity levels or processing times can impact safety.
To further ensure proper processing, pay attention to temperature and pressure readings during canning. The recommended temperatures for different types of vegetables are as follows:
- Fruits and pickled products: 212°F (100°C)
- High-acid foods like tomatoes: 10 pounds (4.5 kg) of pressure
- Low-acid foods like green beans: 15 pounds (6.8 kg) of pressure
Keep in mind that using a pressure canner for low-acid vegetables is the safest approach to prevent spoilage and foodborne illness.
Advanced Canning Techniques and Special Considerations
As you become more confident in your canning skills, it’s essential to explore advanced techniques for achieving optimal flavor and texture. This includes considerations like pressure canning, acidity levels, and unique ingredient combinations.
Using Pressure Canners for Vegetables with High Water Content
When using pressure canners for vegetables with high water content like green beans and peas, it’s essential to adjust cooking times and pressures accordingly. These vegetables release a lot of steam during processing, which can lead to undercooked or overcooked results if not managed properly.
Start by checking your pressure canner’s manufacturer instructions for specific guidance on processing high-water content vegetables. Some models may have recommended settings for these types of vegetables.
Typically, you’ll need to increase the cooking time and/or pressure to ensure that the vegetables are heated to a safe internal temperature. A good rule of thumb is to add 10-15 minutes to the standard cooking time for green beans or peas. You should also check the pressure gauge regularly to avoid overcooking.
It’s also crucial to monitor the canner’s steam release, as excessive steam can cause the pressure to drop too quickly and lead to undercooked vegetables. To avoid this, allow a slow and steady release of steam during processing. By taking these extra precautions, you can ensure that your high-water content vegetables are properly cooked and safely preserved using a pressure canner.
Canning Vegetables in a Combination Cooker or Steam Canner
Using a combination cooker or steam canner is an advanced technique for preserving vegetables. These appliances work by heating water to a high temperature and then using live steam to cook and sterilize jars, rather than relying on a boiling water bath.
The key difference between using a combination cooker or steam canner and traditional water bath canning is the ability to reach extremely high temperatures. This allows for the safe processing of vegetables with high water content, such as green beans and peas, without sacrificing texture or flavor. To use a combination cooker or steam canner, simply fill the appliance with water, bring it to a boil, then reduce heat and cover the jars.
Processing time will vary depending on the type and quantity of vegetables being canned. As a general rule, you’ll need to process for 20-30 minutes at 10 pounds pressure in a combination cooker or steam canner. Always follow the manufacturer’s guidelines for your specific appliance and consult a trusted canning resource for detailed guidance on processing times and techniques.
Remember to also consider the acidity level of your vegetables when using a combination cooker or steam canner, as this will impact processing time and safety.
FAQs: Troubleshooting Common Issues with Canned Vegetables
We’ve all been there – a batch of canned veggies that’s too salty, or mushy texture. This section addresses common issues and provides practical solutions to ensure your home-canned vegetables turn out perfectly every time.
Identifying and Addressing Contamination and Spoilage
Contamination and spoilage can occur during the canning process due to various factors. One common sign of contamination is visible mold growth on the surface of the vegetables or inside the jar. Off-odors, such as a sour or ammonia smell, can also indicate that something has gone wrong. In addition, a slimy texture or unusual coloration may be indicative of spoilage.
To prevent these issues, it’s essential to follow proper storage and handling procedures. After canning, store jars in a cool, dark place, away from direct sunlight and heat sources. Keep the room at a consistent temperature between 50°F and 70°F (10°C and 21°C). Avoid storing jars near strong-smelling foods or chemicals.
Properly sealed jars will not be affected by minor storage variations. However, if you notice any signs of spoilage, discard the jar immediately to avoid contaminating other stored items. Regularly inspect your stored jars for any visible signs of mold or discoloration. Always check the seals before consuming canned goods. If a seal is loose or compromised, do not consume the contents.
Troubleshooting Canning Equipment Issues
Faulty lids, damaged jars, and malfunctioning pressure canners are common issues that can arise when canning vegetables. To address these problems, inspect your equipment regularly for signs of wear or damage. Check lids for warping or uneven surfaces, which can prevent a proper seal. If you notice any issues with the lids, replace them immediately to ensure optimal performance.
For damaged jars, assess the extent of the damage and determine whether they’re still usable. If the crack is minor and doesn’t affect the rim or shoulder, you may be able to continue using the jar. However, if the damage is more extensive, it’s best to discard the jar entirely.
Malfunctioning pressure canners are often caused by inadequate maintenance or failure to follow manufacturer instructions. Regularly clean your pressure canner with a mixture of water and baking soda, and ensure you’re following the recommended pressure levels for your specific model. If your pressure canner is still malfunctioning after proper maintenance, consult the manufacturer’s troubleshooting guide or contact their customer support for assistance.
When purchasing new equipment, consider investing in high-quality products from reputable manufacturers. These brands often provide better performance and durability, reducing the likelihood of equipment issues down the line.
Frequently Asked Questions
What if I notice mold growth on my canned vegetables after storage?
Yes, it’s likely that your canning process was compromised due to contamination or improper storage. Mold growth indicates spoilage and is a safety risk. Discard the affected jars immediately and inspect all stored jars for similar signs of spoilage.
How do I know if I’ve maintained the correct acidity levels during canning?
Maintaining proper acidity levels involves checking pH levels using a pH meter, following tested recipes that include acidifying agents like lemon juice or vinegar, and ensuring that your vegetables are properly cooked to reach a safe acidity threshold. Consult reputable resources for specific guidelines on acidity management.
Can I reuse old jars and lids from previous canning sessions?
No, it’s not recommended to reuse equipment from previous canning sessions due to the risk of contamination and spoilage. Old jars and lids may harbor bacteria or other microorganisms that can compromise your canned goods. Replace equipment with new, sterilized items each time you can.
What if I accidentally skip a step in the canning process, like failing to properly sterilize my equipment?
Skip any steps at your own risk! Improperly sterilized equipment is a breeding ground for bacteria and other microorganisms that can cause spoilage or even botulism. If you realize you’ve skipped a crucial step, discard any affected jars and restart the canning process from scratch with freshly sterilized equipment.
Can I use a combination cooker or steam canner for high-acid vegetables like tomatoes?
While it’s technically possible to use these specialized cookers for high-acid foods, traditional water bath canners are still recommended due to their ease of use and consistent results. If you do choose to use a combination cooker or steam canner for acidic vegetables, ensure you follow the manufacturer’s guidelines carefully and maintain proper temperature controls to prevent under-processing.

