
Creating nutrient-rich compost for your vegetable garden is one of the simplest and most effective ways to improve soil structure and fertility. By doing so, you can grow healthier, more vibrant vegetables that are bursting with flavor and nutrients. Unfortunately, many gardeners struggle to create high-quality compost, resulting in weak plants and poor yields. This comprehensive guide will walk you through the process of creating nutrient-rich compost specifically designed for your vegetable garden. We’ll cover everything from selecting the right materials to building a healthy compost pile and maintaining it to ensure optimal results. By following our step-by-step instructions, you’ll be able to create your own compost and see significant improvements in your soil’s fertility, structure, and overall health, leading to a more productive and sustainable vegetable garden.
Benefits of Composting for Vegetables
Composting is a game-changer for your vegetable garden, and one of its most significant benefits is improved soil health. By incorporating compost into your soil, you’ll see healthier plant growth.
Improving Soil Structure and Fertility
When compost is incorporated into soil, it significantly improves its structure and fertility. This happens through a combination of physical, chemical, and biological changes. Compost’s high organic matter content helps to increase soil’s water-holding capacity, allowing plants’ roots to access moisture more easily. Well-structured compost also introduces beneficial microorganisms that break down nutrients in the soil, making them readily available for plant uptake.
Composting enhances aeration by increasing the number of air pockets within the soil, reducing compaction and root suffocation. This is particularly crucial for vegetable gardens where extensive root systems often develop. In addition to improved water retention and aeration, compost application can also boost nutrient availability in several ways: it introduces a diverse range of beneficial microorganisms; provides essential nutrients like nitrogen, phosphorus, and potassium; and helps regulate the pH balance.
To apply this knowledge effectively, gardeners should focus on incorporating compost at 2-3 inches deep to avoid soil compaction. They can also consider using cover crops or crop rotation to maintain a balanced nutrient supply in their vegetable gardens.
Nutrient-Rich Compost for Vegetables
When used as a fertilizer source, compost surpasses synthetic fertilizers in both effectiveness and environmental sustainability. Unlike chemical-based alternatives, compost releases nutrients slowly over time, promoting healthy plant growth without burning roots or contaminating soil. This slow release is especially beneficial for vegetables that require consistent nutrient supply.
Leafy greens like kale, spinach, and lettuce thrive when grown in well-composted soil. Tomatoes, peppers, and eggplants – heavy feeders that deplete soil nutrients quickly – also benefit from compost’s steady nutrient release. Carrots and beets, with their extensive root systems, appreciate the improved structure and fertility compost brings to the soil.
Compost can contain up to 5% nitrogen by weight, a critical macronutrient for plant growth. It also provides essential micronutrients like phosphorus, potassium, and calcium. By incorporating compost into your vegetable garden, you’ll promote balanced nutrient uptake, foster beneficial microbial activity, and reduce the need for synthetic fertilizers. When choosing a compost recipe or store-bought blend, prioritize products rich in humus – aged, decomposed plant material that’s teeming with beneficial microorganisms.
Choosing the Right Composting Method
When it comes to composting for your vegetable garden, selecting the right method is crucial. You’ll want to choose a system that suits your lifestyle and gardening goals.
Composting can be done in various ways, from indoor worm bins to outdoor piles, but some methods are better suited for busy gardeners like yourself.
Backyard Composting 101
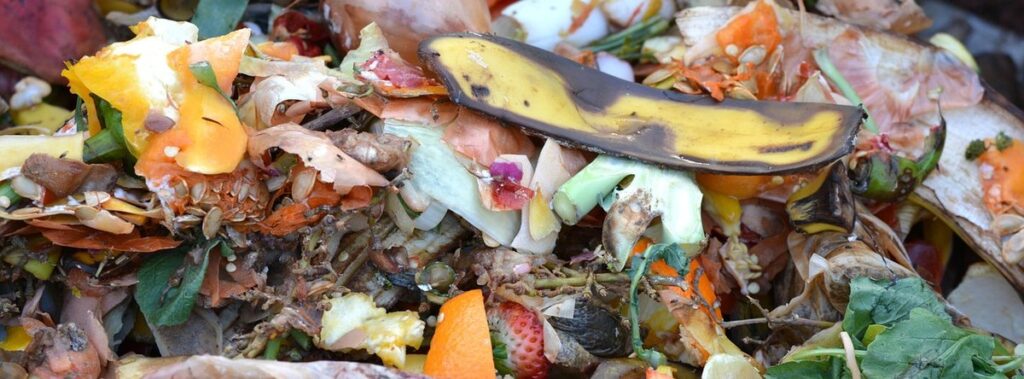
To get started with backyard composting, you’ll need a balance of green and brown materials. Green materials like kitchen scraps, grass clippings, and manure provide nitrogen, while brown materials such as dried leaves, straw, or shredded newspaper offer carbon. Aim for a mix of 2/3 brown materials to 1/3 green materials.
Maintaining the right carbon-to-nitrogen (C:N) ratio is crucial. Too much nitrogen can lead to an overabundance of ammonia, while too little can slow decomposition. A C:N ratio between 20:1 and 30:1 is generally recommended.
When adding materials, consider their water content. Shredded newspaper or cardboard tends to be dry, while kitchen scraps are often wet. Aim for a compost pile with a moisture level similar to that of a damp sponge. This will help maintain optimal microbial activity.
Monitor your compost’s temperature regularly. A healthy pile should reach 130°F – 140°F within the first few days and then drop as decomposition slows. Check for temperature by inserting a thermometer or feeling the heat emanating from the pile. If it gets too hot, turn the pile to aerate it.
Vermicomposting: The Worm Composting Alternative
Vermicomposting is a low-maintenance composting method ideal for small-scale operations. It involves using worms to break down organic matter into a nutrient-rich compost. This alternative to traditional composting methods has several advantages, including its ability to process high volumes of waste in a compact space and produce a consistent output.
One significant benefit of vermicomposting is that it can handle a wide range of materials, from kitchen scraps to shredded paper. However, it’s essential to maintain the right balance between “green” (nitrogen-rich) and “brown” (carbon-rich) materials to avoid anaerobic conditions. A general rule of thumb is to include 2/3 brown materials (e.g., shredded newspaper, cardboard) and 1/3 green materials (e.g., vegetable scraps, fruit peels).
To set up a worm bin, choose a container with good drainage and adequate ventilation. Add a 4-6 inch layer of bedding material (such as coconut coir or peat moss), followed by the worms and finally the compost ingredients. Monitor temperature and moisture levels to ensure optimal conditions for worm activity. Aim for temperatures between 55-77°F (13-25°C) and maintain consistent moisture levels by misting the bin as needed.
Compost Ingredients and Precautions
When adding new ingredients to your compost pile, it’s essential to consider what materials will enhance its nutrient-rich properties without compromising quality. This includes understanding which items are safe to add and which should be avoided altogether.
Acceptable and Unacceptable Materials
When adding organic waste to your compost pile, it’s essential to know what materials are safe and what should be avoided. Acceptable ingredients include kitchen scraps like fruit and vegetable peels, tea bags, and coffee grounds. Leaves, grass clippings, and shredded newspaper can also be added in moderation.
Unacceptable materials, on the other hand, pose a risk of attracting pests or creating odors that can harm your garden. Meat, dairy products, and oils should never be added to your compost pile as they attract rodents and create an ideal environment for pathogens to thrive. Pet waste is also a no-go, as it contains high levels of nitrogen that can cause hot spots in the compost pile.
Some materials may seem like good additions but are actually counterproductive: weeds with seeds can spread invasive species, while certain types of plastic or synthetic materials won’t break down and can contaminate your soil. Avoid adding these items to keep your compost healthy and safe for your vegetable garden.
Pests and Diseases in Compost
Common pests and diseases can arise from improper composting practices. Rodents, such as mice and rats, may be attracted to easily accessible food sources like fruit scraps or pet waste. These pests can spread disease through their droppings, which can contaminate the compost pile.
Houseflies are another pest that thrives in compost piles with high moisture levels. They lay eggs on decaying organic matter, and when the maggots hatch, they break down the material’s cellular structure, making it unusable for gardening purposes.
Fungal growths like powdery mildew, leaf spot, and botrytis can also infect composted materials. These diseases are often caused by high nitrogen levels, inadequate aeration, or excessive moisture. To prevent fungal growth, ensure your compost pile has adequate airflow and maintain optimal moisture levels between 50-60% relative humidity.
Some common signs of pest infestation include the presence of insects, unusual odors, or visible damage to surrounding materials. Regularly inspecting your compost pile can help you catch issues before they spread.
Monitoring and Maintaining a Healthy Compost Pile
Regular monitoring of your compost pile is crucial to ensure it’s working efficiently and safely, so let’s discuss how to check for signs of over- and under-processing.
Temperature Control and Turning Techniques
Monitoring temperature levels is crucial to maintaining a healthy compost pile. You can check temperatures by inserting a long-handled thermometer into the pile, avoiding areas with high concentrations of carbon-rich materials like leaves or shredded newspaper. Ideally, temperatures should reach between 130°F and 140°F (54°C and 60°C) within 24 to 48 hours after adding green materials. This process is called “heating up,” and it’s a sign that the pile is breaking down efficiently.
Regular turning of the compost pile is essential for maintaining optimal conditions. Turning helps to aerate the pile, preventing anaerobic conditions that can lead to unpleasant odors and slow down decomposition. Aim to turn your pile every 7-10 days during the active phase, which typically lasts 2-3 months. Use a pitchfork or shovel to gently mix the top layer with the bottom layer, working from one side of the pile to the other.
To maintain optimal conditions, avoid over-mixing, which can damage microorganisms and slow down decomposition. Instead, focus on gentle turning that promotes air circulation and even moisture distribution throughout the pile. This will help you achieve a balanced carbon-to-nitrogen ratio and ensure your compost is ready for use in your vegetable garden within 2-3 months.
Maintaining Optimal Moisture Levels
Maintaining optimal moisture levels is crucial to ensure the composting process runs smoothly. If the pile is too dry, it can lead to a slower decomposition rate and potentially create an environment conducive to pests. Conversely, excessive moisture can cause anaerobic conditions, resulting in unpleasant odors and reduced microbial activity.
To assess your compost’s moisture level, perform the “squeeze test”: take a handful of compost and squeeze it firmly. If water drips out, the pile is too wet. If the compost crumbles easily, it’s too dry. Aim for a consistency similar to a damp sponge – not soaking wet but also not parched.
Regularly checking and adjusting moisture levels can be done through turning or adding bulking agents like straw or shredded newspaper. For example, if your compost has become too dense due to high nitrogen inputs from food scraps, introduce some dry materials to balance it out. Be cautious of overwatering, especially during rainy periods when the pile may already be receiving excess moisture.
Composting for Specific Vegetable Needs
To get the most out of your compost, it’s essential to tailor your nutrient-rich mix to the specific needs of each vegetable variety. Learn how to create ideal compost blends for common favorites like tomatoes and leafy greens.
Root Vegetables and Heavy Feeders
Root vegetables like carrots and beets have extensive root systems that require a rich source of nutrients to grow. Heavy feeders such as tomatoes and peppers also demand a lot from the soil, but their nutrient needs are different from those of root vegetables. To cater to these specific requirements, you’ll want to create a compost that’s high in nitrogen and phosphorus.
This can be achieved by incorporating more green materials like grass clippings or vegetable scraps rich in nitrogen into your compost pile. You can also add bone meal or fish emulsion as a source of phosphorus. On the other hand, heavy feeders require a balanced diet to prevent overfertilization, which can lead to reduced yields and compromised fruit quality.
To strike a balance, consider adding 2-3 parts “green” materials to one part “brown” materials like dry leaves or straw when composting for root vegetables. For heavy feeders, aim for a mix of equal parts green and brown materials. Regularly monitoring your compost’s nutrient levels will help you adjust the ratio as needed. By tailoring your compost to meet the unique needs of these vegetables, you’ll be rewarded with healthier plants and increased yields.
Leafy Greens and Brassicas
Leafy greens and brassicas have distinct requirements when it comes to compost. These crops thrive in well-balanced compost that provides a mix of nutrients and humus. A key factor is maintaining optimal nitrogen levels, as leafy greens require more nitrogen than other vegetables. Aim for a higher carbon-to-nitrogen ratio (around 20:1) by incorporating more brown materials like dried leaves or shredded newspaper.
Include plenty of green materials rich in nitrogen, such as fresh grass clippings or fruit and vegetable scraps. Avoid adding excessive amounts of high-nitrogen waste like meat or dairy products, which can lead to an overabundance of ammonia in the compost. For brassicas, like broccoli and cauliflower, a slightly higher carbon-to-nitrogen ratio (around 25:1) is beneficial.
To create a balanced compost for leafy greens and brassicas, also consider adding small amounts of finished compost or well-rotted manure to provide essential micronutrients and improve soil structure. Regular monitoring and maintenance are crucial to ensure the compost remains balanced and free from pathogens. Turn your compost pile every 7-10 days and maintain optimal moisture levels by watering regularly but avoiding over-saturation.
Troubleshooting Common Composting Issues
We’ve all been there – you start a compost pile, only to be met with unpleasant odors, pests, or uneven decomposition. Let’s tackle these common issues and get your composting back on track.
Odor Control and Excessive Moisture
A strong odor from a compost pile can be a major issue, especially when it’s located near a vegetable garden. The smell is usually caused by anaerobic conditions, where microorganisms break down organic matter without enough oxygen. This process releases volatile compounds that give off a pungent aroma.
One common cause of anaerobic conditions is excessive moisture in the compost pile. If there’s too much water, it can drown out the beneficial aerobic microbes and create an environment where anaerobic bacteria thrive. You can check if your compost is too wet by squeezing a handful of it – if it sticks together like mud, it’s likely too moist.
To address odor control and excessive moisture, aim to maintain a balance between dry and damp conditions. Turning your compost regularly will help aerate the pile and speed up decomposition. It’s also essential to balance “green” (nitrogen-rich) materials with “brown” (carbon-rich) ones. A general rule of thumb is to have 2/3 brown materials (like dried leaves or shredded newspaper) and 1/3 green materials (such as kitchen scraps or fresh grass clippings).
Insect or Rodent Infestations
Insect infestations are a common problem in compost piles, particularly when fruit flies and other small insects lay eggs near food scraps. These eggs hatch into larvae, which feed on the decomposing organic matter and can spread disease to nearby plants. Rodent infestations can also occur, as mice and rats seek out food sources in compost piles.
To prevent insect infestations, ensure that your compost pile is balanced and not too wet or dry. Regularly turn the pile to aerate it and speed up decomposition. Covering the pile with a tarp or mesh can help keep insects at bay.
If you do notice an infestation, don’t panic. Simply remove any affected materials from the pile, disinfect your tools, and reassemble the pile without the contaminated matter. To treat fruit fly infestations, mix 1 tablespoon of apple cider vinegar with 1 quart of water and spray it around the area to attract and trap adult flies.
Some common signs of rodent infestation include gnaw marks on compost bins or nearby structures, droppings in the pile, and live rodents spotted during turnover. Consider using deterrents like peppermint oil or hot pepper sprays to repel rodents, or take more drastic measures by relocating your compost pile to a secure location.
Advanced Composting Techniques and Tools
Now that you’ve mastered the basics of composting, it’s time to take your skills to the next level by learning advanced techniques for optimizing your compost’s nutrient-rich potential. We’ll cover innovative methods and tools to enhance your compost’s effectiveness.
Bokashi Composting: A Fermentation Approach
Bokashi composting is a fermentation-based method that breaks down organic matter more efficiently than traditional composting methods. Unlike aerobic composting, which relies on oxygen to decompose materials, bokashi uses microorganisms like bacteria and yeast to ferment the waste. This process allows for faster decomposition, producing a nutrient-rich liquid fertilizer as well as a dry compost.
The benefits of bokashi composting include its ability to handle high levels of nitrogen-rich foods, such as meat and dairy products, without creating odors or attracting pests. Bokashi can also process cooked food waste, which is typically not acceptable in traditional compost piles. This makes it an ideal option for households with a lot of kitchen scraps.
To set up a bokashi system, you’ll need a fermentation container, such as a bin with a tap for the liquid fertilizer or a series of buckets with lids. Add microorganisms to the container and layer in your waste, following the manufacturer’s instructions. The mixture will undergo anaerobic fermentation, producing heat and breaking down the organic matter. This process typically takes 1-2 weeks, depending on factors like temperature and moisture levels.
Electric and Manual Aerators
When it comes to oxygenation, electric and manual aerators can be valuable additions to your composting setup. These tools work by introducing air into the pile, which helps to speed up decomposition rates and reduce odors.
Electric aerators are typically more efficient and convenient than their manual counterparts. They usually consist of a motorized unit that you insert into the compost pile, and then use a remote control or timer to cycle through periods of aeration and rest. By introducing consistent airflow, electric aerators can help break down materials faster and reduce the risk of anaerobic conditions.
Manual aerators, on the other hand, require more effort but are often preferred for smaller batches or sensitive materials. These tools typically involve using a long stick or trowel to manually turn and aerate the pile. This method can be more precise, allowing you to target specific areas that need extra oxygenation.
To get the most out of an electric or manual aerator, it’s essential to use them in conjunction with regular turning techniques. This helps ensure that materials are evenly distributed and exposed to air.
Conclusion: Maximizing Compost’s Potential for Your Vegetable Garden
Now that you’ve learned how to create nutrient-rich compost, let’s focus on maximizing its potential to give your vegetable garden a boost. We’ll explore the final steps to get the most out of your compost.
Recap of Key Takeaways
To maximize compost’s potential for your vegetable garden, recall the importance of proper temperature control and turning techniques. Aim for a balance between decomposition and oxygen flow to prevent anaerobic conditions. This means monitoring temperature daily and turning the pile regularly to maintain optimal moisture levels. Don’t forget that different vegetables have specific needs – root vegetables and heavy feeders require more robust compost, while leafy greens benefit from balanced, nutrient-rich soil.
A well-maintained compost pile also minimizes the risk of pests and diseases. Remove any unacceptable materials, like meat, dairy, or pet waste, to prevent attractants for rodents and insects. Regularly inspect your pile for signs of infestation or excessive moisture. Address these issues promptly by adjusting temperature control, adding more carbon-rich materials, or introducing beneficial microbes.
Lastly, don’t be discouraged if your compost doesn’t turn out perfectly at first – it’s a learning process. Experiment with different methods, ingredients, and techniques to find what works best for you and your garden. With practice and patience, you’ll develop the skills necessary to create high-quality compost that will transform your vegetable garden.
Encouragement for Continued Learning and Experimentation
As you continue to refine your composting practices, remember that optimal results often come from a willingness to experiment and adapt. Composting is not a one-size-fits-all process; different vegetable varieties, soil types, and microclimates require tailored approaches. Don’t be afraid to try new combinations of ingredients or techniques to see what works best for your specific garden.
Consider joining online forums or local gardening groups to connect with fellow composters who share their experiences and insights. You can also attend workshops or webinars to stay up-to-date on the latest research and innovations in composting. For example, some farmers are now using advanced tools like electric aerators to speed up decomposition and improve carbon-to-nitrogen ratios.
To make experimentation more manageable, start by identifying one area of your composting process that you’d like to improve. Is it odor control or pest management? Do you want to explore alternative ingredients or try a new turning technique? By focusing on a single goal, you can develop targeted strategies and track their effectiveness over time. Remember, the key to achieving optimal results is ongoing learning and refinement – don’t be afraid to try new approaches and adjust your methods as needed.
Frequently Asked Questions
Can I Use Compost in My Vegetable Garden Right Away?
Yes, you can use compost immediately after it’s finished breaking down, but it’s recommended to let it mature for at least a few weeks before applying it to your garden. This allows the compost to settle and any remaining particles to break down further, resulting in a smoother texture that won’t compact or mat down when watered.
How Do I Prevent Insect Infestations in My Compost Pile?
To prevent insect infestations, make sure to maintain proper carbon-to-nitrogen ratios, keep your compost pile moist but not soggy, and regularly turn the pile. You can also add a thin layer of finished compost or soil on top of the pile to deter pests.
What If I Live in an Area with High Rainfall – How Do I Compost Effectively?
When living in an area with high rainfall, it’s essential to ensure your compost pile doesn’t become too wet. Aim for a moisture level that’s similar to a damp sponge – not soaking wet but not dry either. Regularly turning the pile and using aeration tools can help speed up decomposition while minimizing the risk of anaerobic conditions.
Can I Use Compost Tea as a Foliar Spray or Should It Be Used Directly on Soil?
You can use compost tea as both a foliar spray and a soil drench, but it’s best to start with using it as a foliar spray. This allows you to target specific plant needs directly, promoting healthy growth and preventing disease. When transitioning to direct application in the soil, begin with small amounts (about 10% of the recommended dose) to ensure your plants can handle the increased nutrient load.
How Do I Know If My Compost Is Ready for Use – Are There Any Tests or Indicators?
To determine if your compost is ready, check its texture by squeezing a handful. It should feel like damp soil and hold its shape when pressed. Additionally, inspect the compost pile’s color; it should be dark brown or black with no visible signs of pests or disease. If you’re still unsure, perform a simple carbon-to-nitrogen ratio test by mixing 1 part finished compost with 2 parts water – if it breaks down easily and doesn’t form lumps, it’s ready to use.

