Adjusting your sprinkler heads is more than just a matter of tightening or loosening a few screws; it requires attention to detail to ensure optimal water distribution and lawn health. You might be surprised at how much water you’re wasting if your sprinklers are set up incorrectly, not only for the environment but also for your wallet. A proper adjustment can make all the difference in keeping your lawn lush and green, while also saving you money on your water bill.
To help you get started, this guide will cover the essential tools and safety precautions to take when adjusting your sprinkler heads. You’ll learn step-by-step how to adjust each type of head, including pop-up and impact-resistant models. By the end of this article, you’ll be able to identify common issues with water distribution and make precise adjustments for a healthier lawn.
Choosing the Right Tools and Equipment
To adjust sprinkler heads effectively, you’ll need a few essential tools on hand, including adjustable wrenches, pliers, and a screwdriver, which we’ll cover in detail. Let’s take a closer look at what you should have in your toolkit.
Essential Tools for Adjusting Sprinkler Heads
To adjust sprinkler heads successfully, you’ll need a few essential tools. The most critical one is a wrench specifically designed for irrigation systems – typically a 1/2″ drive adjustable wrench or a socket wrench with a sprinkler head attachment. This tool allows you to loosen the locknut that holds the sprinkler head in place without rounding its edges.
You’ll also need adjustable pliers, which come in handy when tightening or loosening small parts, such as the nozzle and control stem. A pair of needle-nose pliers is another useful tool for reaching into tight spaces within the sprinkler head to adjust or clean out debris.
A measuring tape or a laser level can be helpful for ensuring the sprinkler head is positioned correctly and evenly distributed across your lawn. Some adjustable heads may also require a special key, so it’s essential to check your manufacturer’s instructions before starting.
Remember that using the right tools makes all the difference in making adjustments quickly and accurately.
Safety Precautions When Working with Irrigation Systems
Working with irrigation systems can be hazardous if not handled properly. One of the primary risks is electrical shock from underground wires or exposed conduits. Be aware of the location of buried cables and avoid using metal tools that could conduct electricity.
Water pressure also poses a risk, particularly when working near sprinkler heads or valves. Improperly adjusted nozzles can cause excessive water flow, leading to accidental discharge or over-saturation of soil. To mitigate these risks:
- Use insulated tools and avoid touching electrical components.
- Inspect the irrigation system for exposed wires and maintain a safe distance from them.
- Check sprinkler head adjustment tolerances to prevent accidental over-pressurization.
Regular maintenance checks can also help identify potential hazards, such as loose connections or faulty valves. Always follow manufacturer guidelines when working with specific irrigation equipment, and consider consulting a professional if you’re unsure about any aspect of the process.
Understanding Sprinkler Head Types and Designs
When it comes to adjusting sprinkler heads, understanding the different types and designs is crucial for effective watering. There are several key styles you’ll want to familiarize yourself with.
Overview of Common Sprinkler Head Types
There are several common types of sprinkler heads used in residential and commercial irrigation systems. One of the most popular types is the pop-up sprinkler head, which rises from its housing when activated and falls back down after watering stops. These heads are often preferred for their low cost and simplicity.
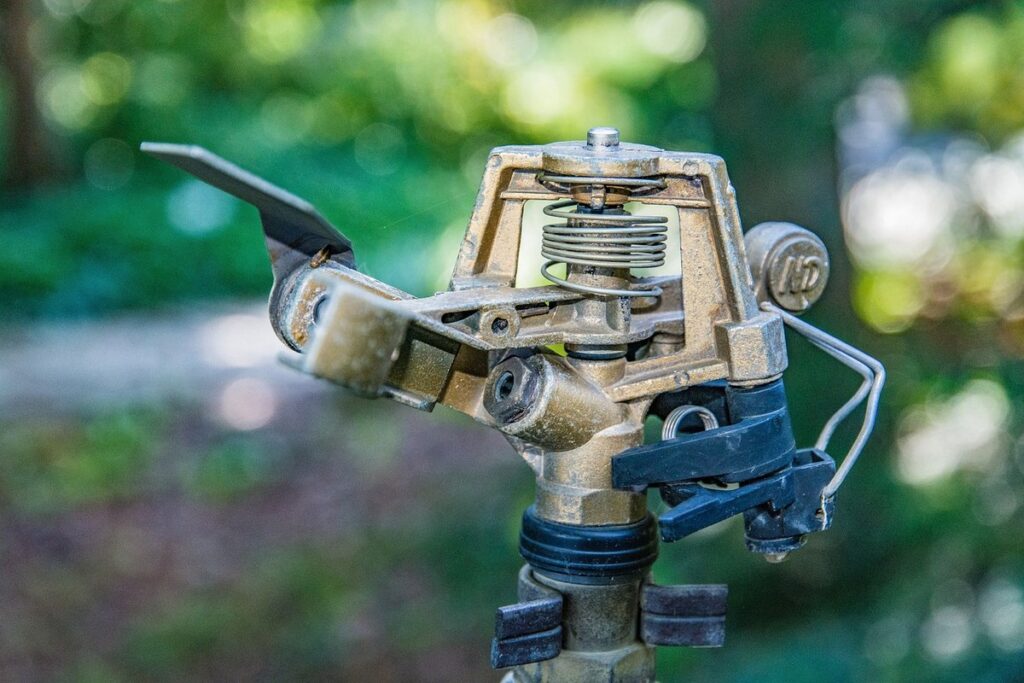
Impact sprinkler heads, on the other hand, use a rotating arm to distribute water in a circular pattern. They’re commonly used for larger areas and can be more efficient than pop-up heads in certain situations. However, they require more maintenance and can be prone to damage from debris or obstacles.
Gear-driven sprinkler heads are another option, using internal gears to rotate the nozzle and control water distribution. These heads offer high precision and are often used in commercial irrigation systems where accuracy is crucial. While they’re typically more expensive than pop-up heads, gear-driven heads can provide longer lifespan and reduced maintenance needs.
When choosing a sprinkler head type, consider factors like lawn size, soil type, and desired watering patterns. Understanding the unique features of each type can help you select the most effective and efficient option for your specific irrigation system.
Key Components of a Sprinkler Head
A sprinkler head’s ability to distribute water evenly and efficiently depends on its key components. The nozzle is responsible for dispersing the water spray, typically at a 360-degree angle. Its size and type determine the width of the spray pattern and the flow rate of water. A smaller nozzle produces a narrower, more focused spray, while a larger one creates a wider, less concentrated spread.
The riser, on the other hand, is the central stem that connects the sprinkler head to the main pipe. It provides structural support and helps maintain the proper water pressure within the system. The riser’s length and diameter influence the flow rate of water through the sprinkler head, so it’s essential to choose the right one for your irrigation needs.
The control stem is another critical component that regulates the water flow through the nozzle. Its position determines how much water enters the sprinkler head, allowing you to adjust the spray pattern and intensity as needed. When adjusting a sprinkler head, pay attention to these components and their interactions to ensure optimal water distribution and prevent overwatering or underwatering your lawn.
Pre-Adjustment Checks and Preparation
Before you start adjusting those sprinkler heads, make sure to check for any loose connections or debris that could affect the performance of your irrigation system. A quick inspection will save you time and effort in the long run.
Inspecting the Irrigation System Before Adjustment
Before adjusting sprinkler heads, it’s crucial to inspect the irrigation system as a whole. This involves checking for any broken or damaged parts that could affect the performance of the sprinklers. Start by looking at the pipes and fittings for signs of wear, corrosion, or damage. Check for leaks around couplings, elbows, and tees, as these can cause uneven water distribution.
Also, inspect the sprinkler head itself for any blockages in the nozzle or debris accumulation on the control stem. A clogged nozzle can reduce the pressure of the spray, while a dirty control stem can prevent the head from rotating freely. If you notice any issues during this inspection, address them before proceeding with adjustments.
Look for signs of wear on o-rings and gaskets, which can cause leaks or water pressure loss over time. Check the irrigation controller for proper function and ensure it’s set to the correct schedule and zone settings. A functional irrigation system is essential for effective sprinkler head adjustment.
Measuring and Marking the Sprinkler Head Location
To measure and mark the location of a sprinkler head accurately, you’ll need to use a measuring tape. Extend the tape from the sprinkler head’s base to the desired distance, ensuring it’s level with the surrounding ground. Record this measurement to reference later. You can also take note of any nearby obstructions or features that may affect water distribution.
When marking the location, use a marker or paint specifically designed for outdoor use. Apply gentle pressure to avoid marring the surface and ensure the mark is visible even when wet. For sprinkler heads installed in hard-to-reach areas, consider using a long-handled marker or a stencil with a marking tool attached.
To double-check your measurements, compare them to the manufacturer’s guidelines for the specific sprinkler head model you’re working with. This will help you ensure the adjustment is made within the recommended range for optimal performance.
Adjusting Sprinkler Heads: A Step-by-Step Process
Now that you’ve identified the issue with your sprinkler system, it’s time to adjust those heads to ensure a balanced water distribution. We’ll walk through the simple process step by step.
Loosening the Sprinkler Head Locknut
When loosening the sprinkler head locknut, you’ll need a wrench or adjustable pliers to avoid stripping the threads. Start by locating the locknut, which is usually situated at the base of the sprinkler head and secures it in place. Hold the sprinkler head steady with one hand to prevent it from moving while you work on the locknut.
Use a wrench that fits snugly over the locknut or adjustable pliers with a rubber grip to protect the sprinkler head’s finish. Turn the wrench counterclockwise to loosen the locknut, but be cautious not to apply too much pressure, which can damage the threads or surrounding components. If you’re using adjustable pliers, adjust the jaw width to fit over the locknut and then turn it counterclockwise.
Once you’ve loosened the locknut enough, you should be able to remove it completely with your fingers. However, if it’s stuck due to corrosion or mineral buildup, use penetrating oil to help break it free before attempting to loosen it further. Be prepared to re-tighten the locknut after adjusting the sprinkler head to prevent it from coming loose over time.
Adjusting the Nozzle and Control Stem
To change the spray pattern or arc of a sprinkler head, you’ll need to adjust the nozzle and control stem. Begin by loosening the locknut on the control stem with a wrench until it’s just loose. Then, use a level to ensure the nozzle is perfectly horizontal or at the desired angle.
Next, measure the distance from the center of the sprinkler head to the point where you want the spray pattern to start using a measuring tape. Mark this spot lightly on the ground with chalk. Now, adjust the control stem to align with your mark and tighten the locknut firmly in place.
When adjusting the nozzle itself, look for the small adjustment screw or clip holding it in place. Turn the screw counterclockwise to widen the spray pattern or clockwise to narrow it. As you make adjustments, check the spray pattern regularly using a sprinkler head test gauge (if available) or by observing the water distribution.
To ensure accuracy, use a level and measuring tape throughout this process. If your sprinkler head has multiple nozzles or adjustable parts, repeat these steps for each component to achieve the desired spray pattern.
Troubleshooting Common Issues with Sprinkler Heads
If you’ve encountered problems with uneven watering, broken sprinklers, or misaligned heads, we’ll walk through common issues and solutions in this section. Troubleshooting these problems will help get your system up and running smoothly again.
Identifying Causes of Inconsistent Water Distribution
Clogged nozzles and misaligned control stems are common culprits behind inconsistent water distribution. To diagnose these problems, start by checking the nozzle for blockages. Remove any visible debris or dirt with a soft brush or cloth. If clogs persist, try soaking the nozzle in warm soapy water or replace it entirely if necessary.
A misaligned control stem can also cause uneven watering patterns. Check that the stem is securely tightened and not bent. If you find any damage, consider replacing the entire sprinkler head. When inspecting the control stem, pay attention to its alignment with the valve body. Make sure it’s seated properly within its socket and not loose.
In addition to these issues, check for kinked or pinched pipes that can restrict water flow. Use a pipe inspection tool to visually identify any blockages or damage along the irrigation system’s length. Regularly cleaning and inspecting your sprinkler heads will help prevent these problems from arising in the first place.
Adjusting for Changes in Lawn Growth or Topography
When adjusting sprinkler heads for changes in lawn growth or topography, it’s essential to reassess the coverage area and adjust accordingly. This involves making precise measurements to ensure optimal water distribution.
To do this effectively, use a level to verify that the sprinkler head is aligned with the surrounding terrain. A slight deviation can lead to inefficient watering patterns or even damage to the lawn. Measure the distance between the sprinkler head and the nearest obstacle using a measuring tape. This will help you determine if adjustments are needed to avoid overspray or underspray.
Consider factors such as new garden beds, raised platforms, or slopes that may have altered the original water distribution pattern. Take note of any changes in lawn growth, including thicker areas that require more water and bare spots that need less.
When adjusting for topography, remember that a slight adjustment can make a significant difference. Move the sprinkler head 1-2 inches at a time to gauge its effect on the surrounding area. This will help you fine-tune the coverage without wasting water or causing damage.
Maintenance and Upkeep of Adjusted Sprinkler Heads
Now that your sprinkler heads are adjusted, it’s essential to maintain them properly to ensure they continue working efficiently throughout their lifespan. Regular upkeep will also extend the life of your irrigation system.
Regular Inspections and Maintenance Tasks
Regular inspections and maintenance tasks are essential to ensure your adjusted sprinkler heads continue to function efficiently and effectively. Clogged nozzles can significantly reduce water distribution, leading to uneven coverage and wasted resources. Regular cleaning of the nozzles is a simple yet crucial task that should be performed every 1-2 months, depending on usage.
To clean the nozzles, turn off the sprinkler system and remove any debris or obstructions from around the nozzle area. Use a soft-bristled brush to gently scrub away any mineral buildup or sediment inside the nozzle. Rinse thoroughly with water and inspect for any signs of wear or damage.
During regular inspections, also check for signs of wear on other components, such as the sprinkler head itself, the control stem, and the locking mechanism. Look for loose connections, worn-out O-rings, or damaged threads that may compromise the system’s performance. Make sure to replace any damaged parts promptly to prevent further issues.
Performing regular inspections and maintenance tasks will not only extend the lifespan of your adjusted sprinkler heads but also ensure optimal water distribution and savings on your water bill.
Scheduling Future Adjustments Based on Seasonal Changes
When it comes to maintaining adjusted sprinkler heads, seasonal changes can significantly impact their performance. To ensure optimal watering patterns and prevent damage from extreme weather conditions, schedule future adjustments based on lawn growth or weather patterns.
Use a calendar or planner to mark key dates for adjustments. Typically, you’ll need to adjust the sprinkler heads twice a year: once in spring when new grass is growing, and again in fall as plants enter dormancy. For example, if you live in an area with hot summers, you may want to schedule a mid-summer adjustment to account for increased evaporation.
To plan ahead, track seasonal weather patterns and lawn growth by monitoring local forecasts and taking note of changes in your lawn’s appearance. You can also adjust the frequency and duration of watering sessions based on these observations. Consider setting reminders or alerts on your phone or calendar to ensure timely adjustments are made. By staying on top of seasonal changes, you’ll maintain healthy, water-efficient sprinkler systems that save you time and resources in the long run.
Frequently Asked Questions
How often should I adjust my sprinkler heads to ensure optimal water distribution?
Yes, it’s recommended to check and adjust your sprinkler heads every 2-3 months during the growing season. This frequency ensures that your lawn receives the right amount of water, taking into account changes in weather patterns, growth rates, and topography.
Can I use a standard adjustable wrench for all types of sprinkler head adjustments?
No, not all sprinkler heads require the same type of adjustment tool. While an adjustable wrench can work for some pop-up sprinklers, gear-driven or impact sprinklers might need specialized tools like a socket wrench or pliers to avoid damage.
What if I’ve adjusted my sprinkler heads but still notice inconsistent water distribution? How do I diagnose and fix the issue?
Start by inspecting your nozzles for blockages or mineral buildup. Clean them with a soft brush or replace them if necessary. Also, check the control stem for proper alignment and adjust it accordingly. If issues persist, consider consulting a professional irrigation technician to assess and repair any underlying problems.
Can I adjust my sprinkler heads during periods of heavy rain or extreme weather conditions?
It’s best to postpone adjustments until weather conditions improve. Working with wet or soggy soil can make measurements inaccurate, while electrical shock risks increase in wet environments. Postpone adjustments for a few days after the storm passes to ensure safe and effective adjustment.
How do I know when it’s time to replace my sprinkler heads rather than continuing to adjust them?
Sprinkler heads typically need replacement every 5-7 years or sooner if damaged by weather conditions, pests, or heavy use. If you notice significant wear on nozzles, control stems, or other critical components, consider replacing the entire head to maintain optimal water distribution and prevent further damage.

