Blowing out your sprinkler system is a crucial step in winterizing your lawn care routine. If you neglect this task, water could seep into pipes, freezing and causing damage that can be costly to repair. Many homeowners don’t know how to properly blow out their systems, leading to wasted time, money, and potentially harm to the environment through unnecessary water waste. A well-done blowout ensures your sprinklers are ready for next season’s use and protects them from freeze damage. In this guide, we’ll cover what you need to do before blowing out your system, how to actually perform the task using specialized equipment, and post-blowout procedures to guarantee a safe and successful outcome for your lawn’s health. By following these steps, you’ll be able to properly blow out your sprinkler system and keep it in working order year after year.
Preparing for Sprinkler Blowout
Before you blow out your sprinklers, make sure to follow these crucial steps to ensure a safe and successful process. Proper preparation is key to avoiding costly damage and potential hazards.
Understanding the Importance of a Proper Blowout
A proper blowout is essential for a healthy and functional sprinkler system. If not done correctly, it can lead to water damage, equipment failure, and reduced system performance. When a blowout is incomplete or incorrect, it leaves behind air pockets and debris that can cause pipes to rupture or freeze during the winter months.
These issues are often costly to repair and may require expensive excavations to access damaged areas. In severe cases, improper blowouts can also lead to property damage and even pose a safety risk if water floods nearby structures. Furthermore, an improperly blown out system can compromise its efficiency, resulting in uneven watering patterns and wasted water.
To illustrate the importance of a proper blowout, consider this: most sprinkler systems are designed to withstand pressures of up to 60 PSI. However, freezing temperatures can cause water to expand by as much as 9%, which is equivalent to an additional 5-6 PSI. If air pockets or debris remain in the system after a blowout, they can exert significant pressure on pipes and fittings, leading to cracks and leaks.
A thorough blowout should involve multiple passes through the system with a specialized hose to remove all remaining water and debris. This helps prevent costly repairs down the line and ensures your sprinkler system operates at peak performance throughout the year.
Choosing the Right Time for a Blowout
When deciding on the best time for a sprinkler blowout, consider the weather conditions. Avoid blowing out systems during extremely hot temperatures, as this can cause pipes to expand and contract rapidly, potentially leading to damage or leaks. Similarly, blowing out systems after heavy rainfall can be challenging due to waterlogged soil, making it difficult to achieve adequate air flow.
The type of soil in your area is also an important factor. In areas with sandy or well-draining soil, you may need to blow out the system more frequently than in areas with clay-based soils that retain moisture longer. This is because water can seep into the soil and cause issues during the winter months when the system is not in use.
Plant growth is another consideration. If your sprinkler system serves a garden or lawn with active plant growth, it’s best to blow out the system after the plants have gone dormant for the season. This helps prevent damage from cold temperatures and ensures that the roots of newly planted trees and shrubs aren’t disturbed. Typically, this means blowing out the system in late fall or early spring when plant growth is minimal.
Gathering Necessary Equipment
Before you start blowing out your sprinklers, make sure you have all the necessary equipment within reach. This includes a compressor, air blower, and lubricant to keep things running smoothly.
Selecting a Pressure Regulator
A pressure regulator is a crucial component in the blowout process that helps control the water pressure fed into the system. Its primary function is to reduce the high water pressure coming from the municipal supply to a safe and manageable level for blowing out sprinklers. If you don’t have a pressure regulator, you risk damaging your equipment or causing damage to your irrigation system.
When selecting a pressure regulator, consider the following factors: flow rate, pressure range, and compatibility with your existing system. Typically, a pressure regulator suitable for blowouts has a flow rate between 10-20 gallons per minute and can handle pressures up to 80 pounds per square inch (psi). Ensure the regulator you choose is compatible with your hose or blowout kit, as some may require specific adapters.
It’s also essential to check the regulator’s certifications and compliance with local regulations. A well-chosen pressure regulator will help prevent damage to your equipment and ensure a successful blowout process. Keep in mind that a pressure regulator can be purchased separately or often comes bundled with a blowout kit.
Obtaining a Blowout Kit or Hose
A blowout kit or hose is a crucial piece of equipment for a successful sprinkler blowout. These kits usually consist of a high-pressure hose, lance, and other attachments necessary to clear the system of debris and water. A typical blowout hose is made of durable rubber or PVC material, with a reinforced design to withstand extreme pressures.
When selecting a blowout kit or hose, consider the size and type of your sprinkler system. For residential systems, a 1/2-inch or 5/8-inch diameter hose is often sufficient, while larger commercial systems may require a 3/4-inch or 1-inch diameter hose. You can purchase a pre-assembled blowout kit from most hardware stores or online retailers, such as Home Depot or Amazon.
Some popular brands for blowout kits and hoses include Flexhead, Rain Bird, and Hunter Industries. It’s essential to choose a reputable brand that meets your system’s specific needs. Always check the manufacturer’s instructions and recommendations before purchasing a blowout kit or hose. Additionally, consider renting a blowout kit from a local equipment rental store if you don’t plan on using it frequently.
Other Essential Tools and Supplies
When preparing for a successful sprinkler blowout, it’s essential to have the right protective gear and tools on hand. In addition to the pressure regulator and blowout kit or hose, you’ll need some basic safety equipment and supplies to ensure a safe and effective process.
Start with protective eyewear, such as safety glasses or goggles, to shield your eyes from debris that may be blown out of the system. Wear long sleeves, gloves, and sturdy pants to prevent cuts and abrasions from sharp edges or flying particles. A dust mask can also help filter out any airborne contaminants.
Other essential tools include a drain valve key for opening the mainline drain valve, a pressure gauge to monitor air flow, and a set of wrenches or sockets for disconnecting fittings. A bucket or container is necessary for catching any water that may be released during the blowout process. Finally, have some rags or towels handy for cleaning up spills and wiping down equipment.
By having these items readily available, you’ll be well-prepared to complete a successful sprinkler blowout and ensure your system remains in good working order throughout the winter months.
Disconnecting and Draining Systems
Before shutting off your sprinkler system for the season, it’s essential to disconnect and drain the pipes properly. This ensures a safe and efficient blowout process in the next step.
Turning Off the Water Supply
Shutting down the main water supply is a crucial step before attempting to blow out sprinklers. Locate the main shut-off valve for your home’s plumbing system, typically found near the water meter or where the water line enters the house. Turn the valve clockwise to shut off the water supply; you may need a wrench to tighten it fully.
Check that the valve is closed by looking for a slight drop in water pressure. You can also use a hose to check for leaks at the valve and nearby connections. If you have an automatic sprinkler system, turn off the power to the controller as well, usually found near the main electrical panel.
Once the main water supply is shut off, verify that there are no other potential sources of water entering the system. Check the meter and any nearby valves or hydrants for signs of leakage or open positions. With the water supply isolated, you’ll be able to safely proceed with disconnecting and draining your sprinkler system.
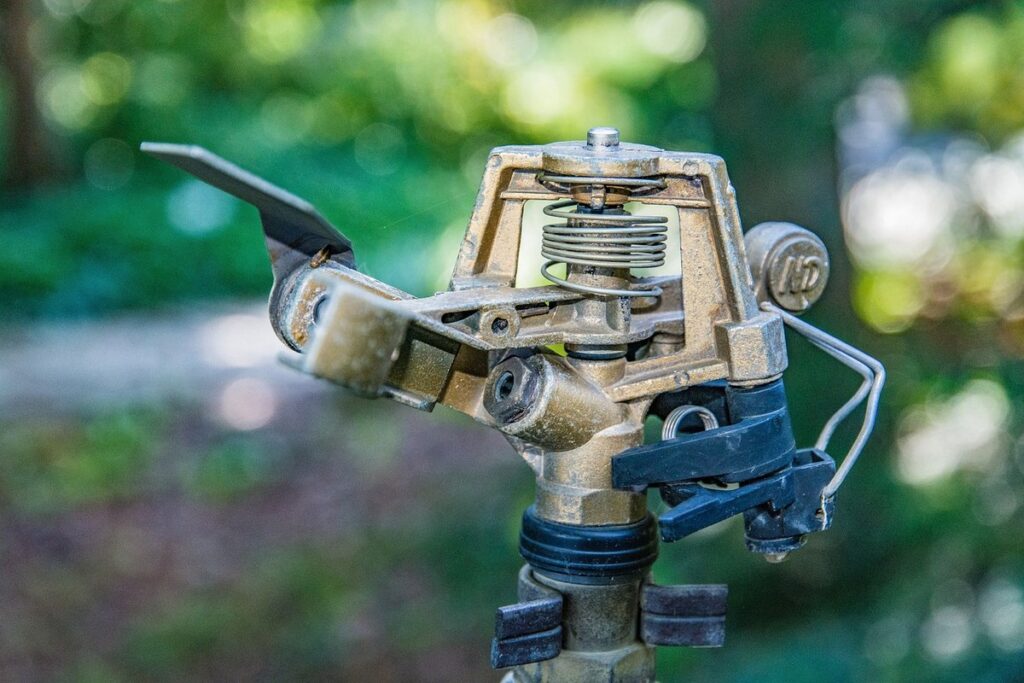
Disconnecting Sprinkler Heads and Fittings
When disconnecting sprinkler heads and fittings, safety is paramount to avoid damage to equipment and potential injuries. Begin by locating the nuts that hold each head in place. These are usually on the top of the riser pipe or attached directly to the mainline piping. Use a wrench or adjustable pliers to loosen the nut, then carefully lift the head off the riser.
Next, inspect the fittings for any signs of corrosion or damage. If you find any issues, replace the fitting before proceeding. To remove a valve or coupling, use a wrench to loosen the locking ring and slide it out. Be sure to keep track of the order in which these components are removed so that they can be easily reassembled during the next season.
It’s also essential to label each component as you disconnect it, especially if your system has many similar fittings or valves. This will save time when reassembling and ensure everything goes back in its original place. By taking a methodical approach to disconnection, you’ll avoid confusion and make the process much smoother overall.
Draining the Mainline and Backflow Preventer
The mainline is a critical component of your sprinkler system, responsible for distributing water to each zone. It’s typically connected to the backflow preventer, which ensures that contaminated water doesn’t flow back into the municipal supply. To properly drain these components, you’ll need to locate their connection points. The mainline is usually connected near the pressure regulator, while the backflow preventer is typically located near the street or at a nearby connection point.
Begin by shutting off the water supply and draining any existing water in the lines. Next, disconnect the mainline from the backflow preventer, taking care not to damage any fittings or threads. Use a wrench to loosen any additional connections, such as drain valves or blowout adapters.
When reconnecting these components in the spring, make sure to follow the manufacturer’s instructions for reassembling and tightening all connections. It’s also essential to inspect the backflow preventer regularly to ensure it remains functional and compliant with local regulations. Properly draining the mainline and backflow preventer will help prevent damage from water freezing or stagnating during the off-season, extending the lifespan of your sprinkler system.
Blowing Out the System
Now that you’ve winterized your outdoor faucets, it’s time to blow out the sprinkler system itself to prevent freezing damage and ensure a smooth spring season. We’ll walk through the process step by step.
Setting Up the Pressure Regulator and Hose
When connecting the hose to the pressure regulator and other equipment, it’s essential to follow a specific procedure to ensure safe and effective operation. Start by attaching the blowout kit or hose to the pressure regulator according to the manufacturer’s instructions. This usually involves threading the hose onto the regulator’s outlet fitting and tightening the nut securely.
Next, connect the other end of the hose to the sprinkler system’s drain valve or blowout port. Make sure all connections are secure and leak-free by checking for any signs of moisture or water pressure escaping from the fittings. Typically, a blowout kit will come with an adjustable regulator that allows you to set the desired air flow rate.
When setting up the equipment, keep in mind that most blowout kits require a minimum of 30-40 PSI (pounds per square inch) to initiate the blowout process. If your system is equipped with a backflow preventer, ensure it’s properly connected and functioning before proceeding with the blowout. Always refer to the manufacturer’s guidelines for specific requirements related to your equipment setup.
Initiating the Blowout Process
Open the main valve on the backflow preventer and allow air to escape from the system. This is typically done by opening a bleed valve located near the backflow preventer. The goal is to release any trapped air that may be present in the system, which can make it difficult to blow out the sprinklers.
Next, open the drain valves on the mainline and allow water to drain from the system. This will help reduce pressure and make it easier to blow out the sprinklers. You should hear a gurgling sound as air enters the system through the backflow preventer.
Now that you’ve released trapped air and allowed water to drain, it’s time to initiate the blowout process. Make sure all valves are fully open and allow the air to flow freely through the system. This is usually done by opening a gate valve on the mainline or at each zone controller. As air flows into the system, you’ll see sprinkler heads start to pop up as water pressure decreases.
Keep in mind that some systems may have multiple valves or configurations, so consult your specific system’s documentation for guidance on where to open these valves.
Monitoring Air Flow and Adjusting as Necessary
As you initiate the blowout process, it’s essential to monitor air flow and make adjustments as necessary. Start by listening for a hissing sound from the sprinkler heads and mainline. This indicates that air is being pushed through the system. If you don’t hear this sound, check that the pressure regulator is set correctly and the blowout kit or hose is properly connected.
A steady, moderate hiss usually signals optimal air flow. However, if the hiss is too loud or too soft, it may indicate issues with air flow or blockages in the system. To adjust for optimal results:
- If the hiss is too loud, try reducing the pressure regulator setting by 1-2 pounds per square inch (PSI).
- If the hiss is too soft, increase the pressure regulator setting by 1-2 PSI.
- Be cautious not to over-pressurize the system, as this can cause damage.
Keep in mind that some older systems may require more aggressive adjustments. It’s also crucial to pay attention to any unusual sounds or vibrations during the blowout process, which could indicate hidden issues within the system. By monitoring air flow and making adjustments as necessary, you’ll be able to achieve a successful blowout and prevent potential problems during next season.
Post-Blowout Procedures
Now that you’ve blown out your sprinklers, it’s essential to take care of a few final tasks to ensure they’re ready for next season. Let’s review the procedures to get your system winterized and stored properly.
Inspecting for Leaks and Damage
Inspect all connections and components carefully for signs of damage or leaks. Start by checking the sprinkler heads and check valves for any blockages or debris accumulation. Remove any filters or screens to inspect the sprinklers’ nozzles and pipes more easily. Next, inspect the backflow preventer and drain valve for proper function and tight seals.
Check the mainline and lateral lines for air pockets or leaks by observing water flow patterns or listening for gurgling sounds. If you notice any issues, address them promptly to avoid contamination of your drinking water supply. Also, verify that all valves are fully closed to prevent accidental water pressure buildup.
Common signs of damage include dented or bent pipes, loose connections, and damaged or corroded fittings. Be sure to replace any faulty components before reassembling the system. Keep a record of replaced parts for future reference and maintenance purposes.
Storing Equipment and Supplies Properly
After completing the blowout process, it’s essential to store your equipment and supplies properly to ensure they remain in good condition. Begin by cleaning each item with a soft brush and mild soap to remove any dirt or debris that may have accumulated during the blowout.
For hoses, coil them gently around their storage reels, making sure not to kink or twist the tubing. This will help prevent damage from moisture accumulation and reduce the risk of bacterial growth. Store hoses in a dry, well-ventilated area, away from direct sunlight and heat sources.
Pressure regulators should be stored separately from hoses, ideally in a protective case or bag to shield them from dust and moisture. Label each regulator with its corresponding valve number for easy identification when reconnecting next season.
Other equipment like blowout kits, adapters, and couplers can be stored in labeled bins or containers, making it easier to find what you need when the next blowout is scheduled. Regularly inspect your stored equipment for signs of wear, corrosion, or damage, and replace any compromised items to maintain system integrity and ensure a successful next season’s blowout.
Tips and Precautions for a Safe and Successful Blowout
Before you start blowing out your sprinklers, make sure to follow some crucial safety tips to avoid damage and injury. Proper precautions will ensure a successful blowout every time.
Safety Gear and Protective Measures
Wear protective eyewear and gloves when handling equipment and pipes. This is crucial for preventing eye injuries from debris or water spray and protecting your hands from cuts, abrasions, and cold temperatures.
When working with blowout kits or hoses, make sure they are securely attached to prevent accidental release of high-pressure air. Use a pressure gauge to monitor the system’s air flow and set the regulator accordingly. Be aware that over-pressurization can cause damage to pipes, fittings, or other equipment.
Be cautious when walking on frozen ground, as sprinkler blowouts often occur during colder months. Wear traction devices such as snow boots with good grip to prevent slipping and falling.
To protect yourself from electrical shock, ensure all control valves and pumps are turned off before starting the blowout process. Keep a fire extinguisher nearby in case of emergencies.
In extreme weather conditions, consider seeking assistance from a professional if you’re unsure about safely performing the blowout.
Troubleshooting Common Issues
When you encounter issues during the blowout process, it’s essential to address them promptly to prevent further damage. One common problem is low air flow, which can be caused by a faulty pressure regulator or clogged hoses. Check the regulator’s setting and ensure it’s set within the recommended range. If necessary, adjust the regulator to increase pressure.
Another issue is water remaining in the system after the blowout process. This can lead to freezing temperatures causing damage or even bursting pipes. To avoid this, make sure to drain the mainline thoroughly before initiating the blowout. You should also check for any blockages or kinks in the hoses that could be restricting air flow.
In some cases, you might encounter resistance while blowing out a particular section of the system. This can indicate a stuck valve or clogged filter. To resolve this, try reversing the direction of air flow and repeating the blowout process. If the issue persists, consult your system’s manual for specific guidance on addressing stuck valves.
To maintain your system’s longevity and prevent future issues, it’s crucial to inspect and clean the blowout kit after each use. Regular maintenance will help ensure a smooth blowout process in subsequent years.
Frequently Asked Questions
What if I’m short on time and can’t complete the blowout in one session?
Yes, it’s perfectly fine to break down the blowout process into multiple sessions. However, be sure to leave no water in the system for an extended period to prevent freeze damage during winter months. Also, make a note of where you left off so you can resume where necessary.
How often should I perform a sprinkler blowout, and what are the signs that it’s needed?
Performing a blowout annually is recommended, but if your area has extreme weather conditions or you’ve noticed decreased water pressure, consider doing it every 6-8 months. Signs that indicate a blowout is necessary include low water flow rates, unusual hissing sounds from valves, or visible damage to sprinkler heads.
Can I use my garden hose for the blowout process, or do I need a dedicated hose?
A garden hose can be used as an emergency solution, but it’s not ideal. A dedicated hose specifically designed for blowouts is recommended because it has a higher pressure rating and is less likely to burst under high-pressure conditions.
What if I encounter resistance while disconnecting sprinkler heads or fittings – should I force them off?
No, do not force the removal of any parts, as this can cause damage to surrounding components. Instead, use a wrench or pliers specifically designed for gripping delicate materials and work carefully around the affected area. If you’re still experiencing issues, consider consulting a professional.
How long after a blowout should I wait before inspecting for leaks and damage?
Wait at least 24-48 hours after completing the blowout to allow any trapped air to escape and settle in the system. This will make it easier to identify potential leaks or damage when inspecting the connections and components.

