Growing your own cress can be a fun and rewarding experience, especially when you’re able to harvest it in just a few weeks. Not only is cress a nutritious addition to salads and sandwiches, but it’s also incredibly easy to grow indoors or outdoors, making it perfect for gardeners of all skill levels. When choosing the right variety, consider the space you have available: some types are compact and ideal for small pots, while others can thrive in larger containers or even directly in the ground. In this comprehensive guide, we’ll walk through everything from selecting the perfect cress seeds to harvesting your crop at just the right time, as well as offer tips on how to store it so you can enjoy its peppery flavor all year round. By the end of this article, you’ll be able to successfully grow and care for your own cress crop.
Understanding Cress and Its Benefits
Cress is a nutrient-rich, fast-growing crop that deserves your attention for its numerous benefits. Let’s take a closer look at what makes cress so special.
Growing Cress: A Comprehensive Guide
What is Cress?
Cress is a fast-growing, nutrient-rich herb that belongs to the Brassica family, which also includes broccoli, cauliflower, and kale. It’s a cool-season crop that thrives in temperatures between 60°F and 75°F (15°C and 24°C), making it an ideal choice for indoor growing or early spring/late summer outdoor cultivation.
Cress is an excellent source of vitamins A, C, and K, as well as minerals like calcium and iron. It’s also low in calories and rich in antioxidants, making it a great addition to salads, sandwiches, and other dishes. The herb has a peppery flavor and a delicate texture, which pairs well with a variety of ingredients.
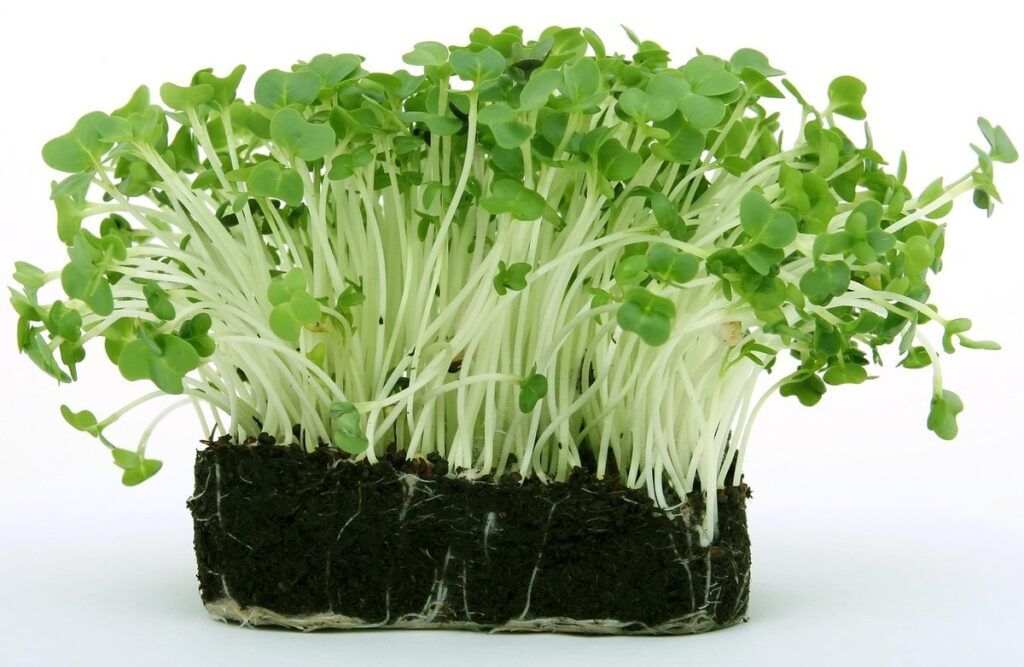
In terms of its growth habits, cress is a vining plant that can grow up to 6 inches (15 cm) tall in as little as 2-3 weeks. It prefers moist soil and partial shade, making it easy to grow on a windowsill or under a grow light. Whether you’re looking for a quick burst of flavor or a nutrient-dense addition to your meals, cress is an excellent choice.
Choosing the Right Variety
When selecting a cress variety, consider your climate, available space, and desired flavor profile. Garden cress (Lepidium sativum) is a popular choice for its peppery taste and ease of growth. It prefers cooler temperatures and well-drained soil, making it ideal for temperate climates.
Watercress (Nasturtium officinale), on the other hand, thrives in moist environments and can tolerate partial shade. Its delicate leaves have a milder flavor than garden cress. Chinese cress (Lepidium apetalum) has a more robust taste and can grow in a wider range of conditions.
Before choosing a variety, assess your growing space’s specific requirements. If you live in an area with high humidity or experience frequent rain, watercress might be the best choice due to its ability to tolerate moist environments. In contrast, garden cress is better suited for drier climates. Consider factors like available light and soil quality when selecting a variety.
If you’re new to growing cress, start with a beginner-friendly variety like garden cress. Once you gain experience, experiment with other varieties like Chinese cress or watercress.
Preparing the Growing Environment
To grow cress successfully, you’ll need to create a suitable environment that mimics its natural habitat, where it can thrive and flourish. This means replicating conditions like temperature, humidity, and light exposure.
Lighting Requirements
Cress can thrive in a variety of lighting conditions, making it an ideal crop for indoor and outdoor growing. However, optimal growth is achieved when cress receives the right balance of light intensity and duration.
When grown indoors, cress prefers bright, indirect light. Placing seedlings near an east- or west-facing window provides sufficient light without causing scorching. Avoid direct sunlight, especially in warmer climates, as this can lead to bolting and a loss of flavor. If using grow lights, aim for 12-14 hours of supplemental lighting per day.
For outdoor growing, cress prefers partial shade to full sun, depending on the climate. In cooler regions, seedlings can tolerate full sun, while in warmer areas, provide some afternoon shade to prevent scorching. A south-facing wall or a spot with dappled shade from trees works well for outdoor cress cultivation.
Keep in mind that cress is a cool-season crop and may bolt when exposed to high temperatures or intense light. To maintain optimal growth, ensure seedlings receive consistent moisture and are grown at a temperature between 60°F and 75°F (15°C and 24°C). By providing the right lighting conditions, you can enjoy a bountiful harvest of fresh, flavorful cress.
Soil and pH Requirements
Cress prefers to grow in well-draining soil with a pH range of 6.0 to 7.5. If your tap water is alkaline, you may need to use distilled or rainwater for optimal growth. A mix of peat moss and perlite provides an ideal balance between moisture retention and aeration.
For container growers, it’s essential to avoid using soil with high organic matter content, as this can lead to over-fertilization. Instead, opt for a sterile potting mix specifically designed for leafy greens. If your soil is heavy clay or sandy, you can add some compost or worm castings to improve its structure.
To prepare your soil for planting, start by loosening the top 6-8 inches of soil with a fork. This will help break up any compacted layers and allow roots to grow freely. If your soil is particularly poor in nutrients, consider applying a balanced fertilizer according to the manufacturer’s instructions.
Keep in mind that cress has a small root system and doesn’t require extensive soil preparation. However, providing a well-draining and nutrient-rich environment will result in healthier plants with more robust growth.
Sowing and Caring for Cress
Sowing cress seeds is a straightforward process, but it requires attention to detail to ensure successful germination. This section will walk you through the best practices for sowing and caring for your cress crop.
Sowing Seeds
When sowing cress seeds, you have two primary options: direct sowing into the ground or starting them off in containers. For direct sowing, choose a spot with good drainage and partial shade to full sun, depending on the variety. Sow the seeds about 1/8 inch deep and 2-3 inches apart, as they don’t require much space.
In a container, use a small pot or tray with good drainage holes to prevent waterlogged soil. Fill the container with a well-draining seed starting mix, and sow the cress seeds about 1/8 inch deep. Keep the soil consistently moist during the first few days after sowing. When using containers, you can space the seeds closer together, around 1-2 inches apart.
It’s essential to maintain even moisture levels when sowing cress seeds in both methods. Consistent moisture will help prevent the seeds from rotting and encourage healthy germination. You can use a fine spray bottle to gently water the soil without washing away the tiny seeds.
For optimal growth, ensure that the top inch of the soil remains moist but not waterlogged. A general rule is to water when the top 1-2 inches of soil feel dry to the touch.
Watering and Humidity Requirements
Cress requires consistent moisture to grow, making proper watering and humidity management crucial for healthy growth. To achieve optimal results, ensure the soil is consistently moist but not waterlogged. You can check the soil’s moisture level by sticking your finger into it up to the first knuckle; if the soil feels dry at this point, it’s time to water.
Water cress plants gently but thoroughly when the top inch of soil feels dry. Avoid getting water on the leaves or crown of the plant to prevent fungal diseases. A good rule of thumb is to water in the morning, allowing the plants to dry out slightly before nightfall.
Maintaining humidity levels also plays a significant role in promoting healthy cress growth. You can cover your cress bed with a clear plastic bag or cloche to create a humid microclimate. Alternatively, you can place the pot on a tray filled with water and pebbles to increase the surrounding air’s moisture content. This will help prevent the leaves from drying out and promote faster growth. By striking the right balance between watering and humidity, you’ll be able to grow healthy, peppery cress with ease.
Troubleshooting Common Issues
We’ve all been there – cress that won’t grow, seeds that don’t sprout, or leaves that turn yellow. Let’s tackle these common problems together and get your cress crop back on track.
Pests and Diseases
Cress is susceptible to several common pests and diseases, including aphids, whiteflies, powdery mildew, and root rot. To identify these issues early on, keep a close eye on your plants for signs of infestation or infection.
Powdery mildew, a fungal disease that causes a white, powdery coating on leaves, can be managed by improving air circulation around the plants and treating with a fungicide specifically designed for cress. Root rot, often caused by overwatering, can be prevented by ensuring the pot drains properly and not letting waterlogged soil sit for too long.
Aphids and whiteflies are tiny insects that feed on plant sap, causing curled or distorted leaves. These pests can be controlled using insecticidal soap or neem oil, applied according to the product’s instructions.
For root rot, remove affected roots by trimming them off with sterile scissors. This will help prevent further spread of the disease. To control powdery mildew, use a soft-bristled brush to gently remove as much of the fungal growth as possible before applying treatment.
When treating your cress for pests or diseases, always follow the product’s instructions and take necessary precautions to avoid harming yourself or other plants nearby.
Nutrient Deficiencies
Cress is a nutrient-rich herb, but it can still suffer from nutrient deficiencies if not provided with the right conditions. This often manifests as stunted growth, yellowing leaves, or slow development. Iron and magnesium are two of the most common micronutrients that cress may lack.
Iron deficiency in cress typically appears as yellowing between the leaf veins, while magnesium deficiency causes yellowing of the entire leaf. To address these issues, ensure your growing medium has a balanced pH range (around 6-7) and is not too alkaline or acidic. Regularly check your water’s pH level before use to prevent shocking your plants with extreme conditions.
Additionally, consider using a balanced fertilizer that contains iron and magnesium. Organic options like fish emulsion or compost tea can provide these micronutrients in a natural way. Aim for a dilution rate of 1-2 teaspoons per gallon of water to avoid over-fertilizing.
Monitor your cress closely, as nutrient deficiencies can quickly become severe if left unchecked. Keep an eye out for the first signs of trouble and take corrective action promptly to prevent further damage. By being proactive in maintaining optimal growing conditions and providing a balanced diet, you can help ensure your cress stays healthy and thrives throughout its growth cycle.
Advanced Cress Growing Techniques
Take your cress growing skills to the next level by learning advanced techniques, such as hydroponic cultivation and trellising. These methods will boost your yields and add visual appeal to your garden.
Hydroponics and Aeroponics
Hydroponics and aeroponics offer experienced growers a chance to take their cress cultivation to the next level. These soilless systems provide precise control over nutrient delivery and can increase yields significantly.
A hydroponic system involves suspending plants’ roots in a nutrient-rich solution, whereas an aeroponic system uses a fine mist of nutrients instead. When it comes to growing cress with these methods, you’ll need a well-ventilated area, as both systems require adequate air circulation to prevent fungal diseases.
To set up a hydroponic or aeroponic system for growing cress, start by selecting a suitable container – a plastic tub or reservoir works well. Next, choose a nutrient solution specifically designed for leafy greens like cress. Most commercial solutions are available in pre-mixed bottles and come with detailed instructions.
Some key considerations when transitioning to hydroponics or aeroponics include monitoring temperature, pH levels, and nutrient intake closely. Typically, cress requires more frequent nutrient replenishment than plants grown in soil, so be prepared to check your system daily. A well-designed system can reward you with faster growth rates and healthier crops – a worthwhile investment for serious growers looking to push the boundaries of their cress cultivation skills.
Cress as a Companion Plant
Cress is a versatile crop that can be grown not only for its edible leaves but also as a companion plant to benefit other plants in your garden. One of the key advantages of growing cress as a companion plant is its ability to repel pests. For example, cress can help deter aphids and whiteflies from nearby plants by releasing chemicals that repel these insects. This makes cress an excellent choice for planting alongside sensitive or high-value crops like lettuce and herbs.
In addition to pest control, cress also attracts beneficial insects like bees and butterflies, which are essential pollinators. By planting cress near your flowers and vegetables, you can create a balanced ecosystem that promotes healthy growth and minimizes the need for pesticides. When choosing companion plants, consider pairing cress with plants that benefit from its nitrogen-fixing properties, such as carrots or radishes.
Some practical tips to keep in mind when growing cress as a companion plant include:
- Planting cress around the base of tall plants like sunflowers or tomatoes to deter pests
- Interplanting cress among other greens to create a diverse and resilient crop
- Using cress as a trap crop to lure pests away from more valuable crops
Harvesting and Storing Cress
Now that you’ve grown your cress, it’s time to harvest and store it properly to enjoy its fresh flavor for as long as possible. We’ll cover the best methods for harvesting and storing cress to keep it crisp and delicious.
When to Harvest
Cress is ready to harvest when it reaches 1-2 inches in height. To determine if your cress crop has reached this stage, gently touch the plants and inspect their size. Young leaves will be delicate and soft, while older leaves may become slightly tougher.
Look for a slight change in color on the leaves as well. They will transition from bright green to a more muted tone. This visual cue can indicate that the cress is ready to be harvested.
As you approach the desired height, the stems of the plants will start to elongate and develop a slightly woody texture. This is a sign that the cress has reached its optimal size for harvesting.
Check your crop regularly during the day when it’s most visible, ideally in the morning or late afternoon. Keep an eye out for any signs of overgrowth, as this can lead to bitter flavors in the leaves. Harvesting at the right time ensures you get the best flavor and texture from your cress crop.
Storage Tips
To keep fresh cress at its best, it’s essential to store it properly. When storing cress, you can either refrigerate it immediately or use it right away in cooking. If you plan to store it, make sure to trim the stems and remove any wilted leaves before placing it in a sealed container or plastic bag. This will help prevent moisture from accumulating and promote healthy growth.
For short-term storage (up to 3 days), place the cress in the refrigerator’s crisper drawer with high humidity. Check on it regularly, as excess moisture can lead to mold and spoilage. For longer-term storage (up to a week), you can use an ice pack or wrap the container in plastic wrap to maintain a consistent temperature.
When using stored cress, gently wash the leaves under cold running water before adding them to your dish. This helps remove any potential bacteria that may have developed during storage. You can also revive wilted cress by soaking it in cold water for about 30 minutes before serving.
To get the most out of your stored cress, use it within a few days or freeze it for later use. Freeze individual leaves on a baking sheet lined with parchment paper and transfer them to an airtight container or freezer bag once frozen solid. This way, you can enjoy fresh-tasting cress throughout the year.
FAQs and Conclusion
When growing cress, many gardeners have questions about its care and maintenance. One common concern is that cress grows too slowly or doesn’t thrive in certain conditions. To address this, it’s essential to provide a consistent supply of fresh water and maintain a balanced pH level between 6.0 and 7.0.
Another question often asked is whether cress can be grown indoors. The answer is yes, but it requires adequate light. Place the pot near a sunny window or use grow lights to ensure the plant receives at least four hours of direct sunlight per day.
In conclusion, growing cress can be a rewarding experience with the right conditions and care. By following the guidelines outlined in this guide and providing your plants with what they need, you’ll be enjoying fresh cress in no time.
Frequently Asked Questions
Can I Grow Cress Year-Round?
Yes, cress is a cool-season crop and can be grown year-round indoors with proper lighting. This means you can enjoy fresh cress even during the winter months when other herbs may not thrive.
How Long Does It Take for Cress to Regrow After Harvesting?
Cress has a unique ability to regrow quickly, but it typically takes 1-2 weeks for new growth to appear after harvesting. To encourage continuous growth, make sure to harvest your cress regularly and provide optimal growing conditions.
Can I Grow Cress in Small Spaces or Containers?
Yes, cress is an ideal crop for small spaces or containers because it requires minimal room to grow. You can sow cress seeds directly into a container or start them indoors in a pot and then transplant them outside when the weather permits.
What if My Cress Is Getting Too Tall? Can I Trim It Back?
Yes, you can trim back your cress plant to maintain its desired height. Simply snip off the top growth with scissors or pinch it off with your fingers to encourage bushy growth and prevent the plant from flowering.
How Do I Know When My Cress Has a Nutrient Deficiency?
Common signs of nutrient deficiencies in cress include yellowing leaves, stunted growth, or a reduced harvest yield. To address these issues, make sure to provide your cress with well-draining soil and maintain optimal pH levels between 6.0-7.0 for healthy growth.
