Creating nutrient-rich compost is essential for any thriving vegetable garden. If your soil lacks the necessary nutrients, your crops may not grow as well as they could, leading to smaller harvests and lower yields. Improving soil structure, fertility, and microbial activity through composting can make a huge difference in the health of your plants. Unfortunately, many gardeners struggle with creating effective compost or don’t know how to incorporate it into their gardening routine. By the end of this article, you’ll be able to create your own nutrient-rich compost and learn how to improve soil structure, fertility, and microbial activity for a thriving vegetable garden. We’ll cover the basics of composting, including what materials to use and how to balance the carbon-to-nitrogen ratio in your pile.
Benefits of Composting
Composting for your vegetable garden is a game-changer, and we’re excited to share the numerous benefits it can bring to your soil and plants. From improved fertility to reduced waste, composting is a simple yet effective way to create a thriving garden ecosystem.
Improving Soil Structure and Fertility
Soil structure and fertility are crucial components of a thriving vegetable garden. Compost plays a vital role in improving both. When added to the soil, compost increases its water-holding capacity, making it easier for plants to access moisture. This is particularly important during periods of drought or when the soil is prone to drying out quickly.
The addition of organic matter from compost also enhances soil fertility by providing essential nutrients and micronutrients that plants need to grow strong and healthy. Compost contains a balanced mix of nitrogen, phosphorus, and potassium (NPK), which are released slowly as the microorganisms in the compost break down the organic matter. This slow release ensures that plants receive a steady supply of nutrients throughout their growth cycle.
Microbial activity is also supported by compost addition, promoting a diverse range of beneficial microbes in the soil. These microbes help to decompose organic matter, fix nitrogen in the soil, and suppress plant diseases. To maximize the benefits of compost for your vegetable garden, aim to add 2-3 inches of compost to the top 6-8 inches of soil before planting. This will give your plants a nutrient-rich foundation to grow on.
Reducing Waste and Environmental Impact
Reducing waste and environmental impact is a significant advantage of composting. By turning food scraps and yard waste into nutrient-rich compost, you’re diverting materials from landfills where they take hundreds of years to decompose. Composting reduces the amount of waste sent to landfills by up to 30% in some cases.
Compost also helps conserve water. Soil with adequate organic matter can hold more moisture, reducing the need for frequent watering. This is especially beneficial for vegetable gardens, which require consistent moisture levels. By using compost, you’re creating a soil structure that’s better equipped to retain water, reducing the amount of irrigation needed and minimizing evaporation.
Another key benefit is minimizing synthetic fertilizer use. Compost provides essential nutrients for plants, making it possible to reduce or eliminate chemical fertilizers altogether. A typical application rate is 2-3 inches of compost per year, which can provide enough nutrients for a season’s growth without the need for added fertilizers. This approach also reduces soil pollution and promotes healthier plant growth.
Choosing the Right Compost Method
To get started on building a thriving vegetable garden, you’ll need to choose a compost method that suits your lifestyle and space. This decision will greatly impact the quality of your finished compost.
Cold Composting
Cold composting is a low-maintenance method where organic materials are piled up and left to decompose naturally over time. This approach eliminates the need for turning or aerating the pile, making it suitable for those with limited space or mobility.
To set up a cold compost pile, start by collecting a mix of “green” materials like kitchen scraps, grass clippings, and manure, which are rich in nitrogen. Balance these with “brown” materials such as dry leaves, straw, or shredded newspaper, which provide carbon and help absorb excess moisture.
Aim for a 2:1 to 3:1 ratio of brown to green materials, and add them to the pile in layers. Avoid adding meat, dairy, or oily foods, as they can attract pests and create unpleasant odors. Once the pile is assembled, simply let it sit – no need to turn or aerate.
Cold composting takes longer than hot composting, typically requiring 6-12 months for decomposition to occur. However, this method has several benefits: it’s easy to set up and maintain, doesn’t require much space, and can handle a wide range of organic materials. If you’re new to composting or have limited resources, cold composting is an excellent starting point.
Hot Composting
Hot composting involves actively managing a compost pile to achieve high temperatures, typically between 130°F and 140°F (54°C to 60°C), which speeds up decomposition. This process requires regular turning of the pile, ideally every few days, to ensure oxygen reaches all parts of the material.
When hot composting, it’s essential to maintain the right balance of “green” materials rich in nitrogen, such as food scraps and grass clippings, and “brown” materials high in carbon, like dried leaves and shredded newspaper. A general rule is to aim for a mix of 2/3 brown materials and 1/3 green materials.
To achieve optimal temperature conditions, monitor the pile’s temperature regularly using a thermometer. When it reaches 130°F (54°C), turn the pile to aerate it, then cover it again. Repeat this process until the temperature drops below 100°F (38°C). This ensures that pathogens and weed seeds are killed off.
Maintaining high temperatures also helps to break down complex organic matter into a nutrient-rich compost more quickly. With regular turning and monitoring, hot composting can produce finished compost in as little as six weeks, making it an ideal method for gardeners who need a rapid supply of compost for their vegetable gardens.
Creating Your Own Compost
Creating a compost pile from scratch can seem daunting, but breaking it down into basic steps makes it surprisingly easy and accessible to anyone. Let’s start by building your very own compost pile from household scraps.
What to Add to Your Compost Pile
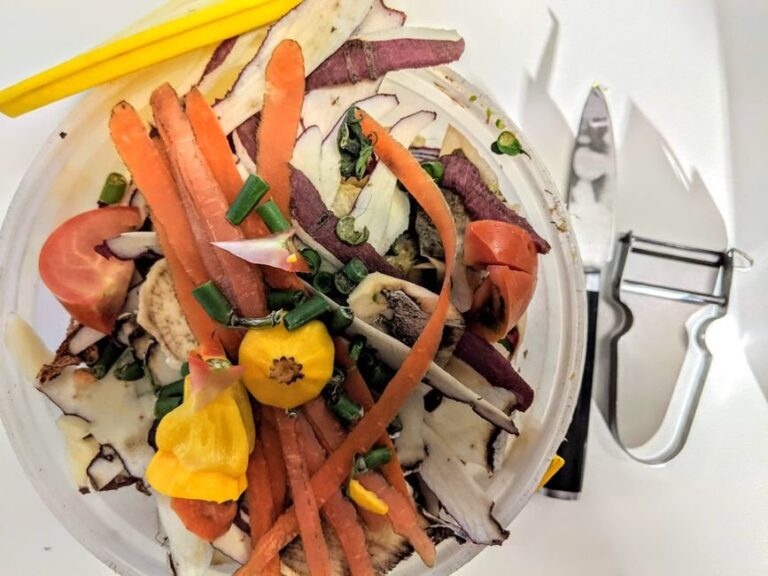
When creating a compost pile, you’ll want to add a mix of “green” and “brown” materials. Green materials are high in nitrogen and can include kitchen scraps like fruit and vegetable peels, tea bags, and coffee grounds. These items should make up about 20-30% of your total compost material.
Brown materials, on the other hand, are high in carbon and can include dried leaves, shredded newspaper, and grass clippings. These items help balance out the nitrogen-rich green materials and provide structure to the pile. A good rule of thumb is to have two-thirds brown materials and one-third green materials.
Other items that can be added to a compost pile include eggshells, which are rich in calcium and can help deter pests; shredded cardboard, which helps with moisture regulation; and manure from herbivores like rabbits or horses. Avoid adding meat, dairy, and oils to your compost pile, as these can attract pests and create unpleasant odors.
Some specific examples of how to combine different materials include layering kitchen scraps with dried leaves or mixing grass clippings with shredded newspaper. This helps ensure a balanced mix and promotes healthy decomposition.
Maintaining Your Compost Pile
Maintaining a healthy compost pile is crucial to creating nutrient-rich soil for your vegetable garden. Regular turning of the compost pile helps to aerate it, speed up decomposition, and prevent anaerobic conditions that can lead to pests and odors.
When monitoring temperature, aim for a balance between hot and cold. A temperature range of 130°F to 140°F (54°C to 60°C) indicates active microbial activity, while temperatures above 160°F (71°C) can kill off beneficial microorganisms. Keep in mind that compost piles can be divided into three main zones: the top layer, where food scraps and “green” materials break down quickly; the middle layer, where most of the decomposition occurs; and the bottom layer, which is often cooler and more mature.
To maintain a healthy balance, turn your compost pile every 7-10 days during active decomposition. This will also help to distribute heat evenly throughout the pile. To avoid pests and odors, keep the pile moist, but not waterlogged – an ideal mix should be like a damp sponge. Regularly inspect your pile for signs of pests or mold, and take action promptly if you notice any issues.
Using Compost in Vegetable Gardens
Now that you have a nutrient-rich compost, let’s talk about how to use it effectively in your vegetable garden for optimal growth and yields. This is where adding compost really makes a difference!
Benefits for Plant Growth
Using compost in vegetable gardens can significantly improve plant growth and yields. One of the primary benefits is enhanced nutrient uptake. Compost is rich in essential micronutrients like phosphorus, potassium, and magnesium that plants need to thrive. When applied to the soil, these nutrients become readily available for absorption by the roots. This leads to improved fruiting and flowering, resulting in larger and more abundant harvests.
Compost also increases soil’s water-holding capacity, allowing plants to access moisture deeper into the soil profile. This reduces the need for frequent watering, which can be especially beneficial during periods of drought or when using irrigation systems that waste water. Furthermore, compost’s high organic matter content helps build a robust microbial community in the soil. These microorganisms play a critical role in fighting off diseases and pests that can otherwise damage vegetable crops.
In practical terms, adding 2-3 inches of compost to the top 6-8 inches of soil before planting can be an effective way to provide plants with an immediate boost. Regular applications of compost throughout the growing season can also help maintain optimal nutrient levels and promote continued growth. By incorporating compost into your vegetable garden, you can reap these benefits and enjoy a more productive and resilient crop.
How to Apply Compost in Your Garden
When using compost in your vegetable garden, it’s essential to apply it correctly to maximize its benefits. One way to do this is by mixing compost into the soil before planting. Use a shovel or fork to blend 2-4 inches of compost with the top 6-8 inches of soil. This helps improve soil structure and fertility, making it easier for plants to absorb nutrients.
Another approach is using compost as a mulch. Spread a 2-inch layer of compost over the soil around your vegetable plants, leaving a small gap between the mulch and plant stems. This retains moisture, suppresses weeds, and regulates soil temperature. You can also mix compost into potting mixes for container gardens, typically in a ratio of 10-20% compost to 80-90% potting mix.
When incorporating compost into your garden, consider the type of plants you’re growing. For example, if you have heavy feeders like tomatoes or squash, use more compost (up to 50% of the soil volume) to support their nutrient demands. Conversely, for delicate herbs and leafy greens, a smaller amount (10-20%) is usually sufficient.
Troubleshooting Common Composting Issues
Don’t get discouraged if your compost pile isn’t turning out as expected – we’ll tackle common issues and provide solutions to get you back on track. From odors to pests, we’ll cover it all here.
Pests and Odors in the Compost Pile
Pests and odors can be a significant problem in compost piles. Red wiggler worms are often introduced to break down organic matter quickly, but if you’re using a hot composting method, they might not thrive. Fruit flies and fungus gnats also love the moist environment of your compost pile.
To manage pests:
- Use physical barriers like fine mesh or hardware cloth to keep them out
- Incorporate more brown materials, like straw or shredded newspaper, to reduce moisture levels
- Introduce beneficial nematodes that attack pest larvae
Odors can be caused by an imbalance in carbon-to-nitrogen ratios. If your pile is too nitrogen-rich (from green materials), it may attract pests and create unpleasant odors. Regularly turning the pile can help aerate it, but if the issue persists:
- Add more brown materials to balance out excess nitrogen
- Introduce a compost activator like kelp meal or alfalfa meal to boost microbial activity
Keep in mind that some pests are beneficial – earthworms, for instance, help break down organic matter. A balanced compost pile will attract these beneficial creatures and minimize pest problems.
Turning a Failing Compost Pile into Success
A failing compost pile can be a source of frustration, but it’s not uncommon. Often, it’s due to an imbalance of carbon-rich materials like dry leaves and nitrogen-rich materials like food scraps. Check your pile for these imbalances: are there too many ‘green’ items breaking down too quickly? Or is the pile dominated by brown materials, which can take months to decompose? You may need to add more browns, like shredded newspaper or dried grass clippings, to absorb excess moisture and provide aeration.
Another issue could be inadequate turning. Compost needs oxygen to break down efficiently. If you haven’t turned your pile in weeks, it’s likely compacted, which can lead to anaerobic conditions. Turn the entire pile every 7-10 days, ideally on a day when it’s not too wet or dry. This will introduce oxygen and speed up decomposition.
To get your pile back on track, also consider adding some bulking agents like straw or coconut coir. These materials absorb excess moisture and provide structure for microorganisms to thrive in. Finally, monitor temperature: compost piles can get quite hot when breaking down quickly. If it’s too hot (above 130°F), this could be a sign that the pile is over-oxidizing. Reduce turning frequency or add more browns to slow things down.
Advanced Composting Techniques
Now that you’ve mastered the basics of composting, it’s time to take your skills to the next level and explore more advanced techniques for creating nutrient-rich soil. Let’s discuss how to create a hot compost pile and use bulking agents effectively.
Vermicomposting (Worm Composting)
Vermicomposting is a method of composting that uses worms to break down organic matter into a nutrient-rich fertilizer. To set up a worm bin, you’ll need a container with good drainage, such as a plastic tub or wooden box. Add a 4-6 inch layer of bedding material like coconut coir or shredded newspaper, followed by a 2-3 inch layer of food scraps. Worms thrive in temperatures between 55-77°F (13-25°C), so place the bin in a shaded area.
Feed worms a mix of “green” materials like fruit and vegetable scraps, eggshells, and grass clippings, along with “brown” materials like shredded paper or cardboard. Aim for a balance of 2/3 brown to 1/3 green. Worms will consume about half their body weight in food daily, so start with a small population (around 1 pound) and add more as the bin matures.
After 2-4 months, harvest the castings by removing the worms and letting them go back into the wild or into another bin. Castings are rich in nutrients like nitrogen, phosphorus, and potassium, making them an excellent fertilizer for vegetable gardens. Use a 1:10 ratio of castings to soil when fertilizing plants, applying it at planting time or during transplanting.
Bokashi Composting
Bokashi composting is a unique and effective method of breaking down organic waste. This Japanese technique uses microorganisms to ferment food scraps, creating a nutrient-rich liquid fertilizer and a compacted mass that can be added to the soil or used as mulch. The process involves mixing kitchen waste with bokashi bran, which contains beneficial microbes, in a bin or bucket.
The fermentation process typically takes 1-2 weeks, during which time the mixture will emit a strong smell. However, this is a natural part of the process and indicates that the microorganisms are actively working to break down the waste. Once the fermentation is complete, the liquid fertilizer can be drained off and used immediately, while the compacted mass can be buried or added to the soil.
To incorporate bokashi composting into your system, you’ll need a dedicated bin or bucket and a supply of bokashi bran. It’s essential to maintain good hygiene practices when handling the fermented mixture, as it can be acidic and may cause skin irritation in some individuals. By adding bokashi composting to your comprehensive composting system, you can create a more diverse range of nutrients for your vegetable garden.
Frequently Asked Questions
How Long Does It Take for Compost to Break Down?
It takes anywhere from several months to over a year for compost to fully break down, depending on factors such as the type of materials added, temperature, and moisture levels. A well-maintained compost pile can produce finished compost in as little as 6-8 weeks.
Can I Use Compost with Weeds in It?
Yes, compost with weeds in it is still useful for your vegetable garden, but be sure to remove any recognizable weed seeds or roots before applying the compost. This will prevent unwanted growth and ensure a healthy growing environment for your vegetables.
Is There a Best Time of Year to Start Composting?
There’s no specific best time to start composting, as it can be done year-round. However, many gardeners find that colder months are ideal for building up a large pile, which will then break down during the warmer months when plants need the nutrients most.
How Do I Know If My Compost is Finished?
Finished compost should have an earthy aroma, crumbly texture, and be free of recognizable materials. To check if your compost is ready to use, perform a “squeeze test”: finished compost should hold its shape but break apart easily when pressed.
Can I Use Compost in Containers or Indoor Gardens?
Yes, you can use compost in containers or indoor gardens, either by mixing it into potting soil or using it as a fertilizer. This will provide your plants with essential nutrients and improve overall soil health, even in smaller growing spaces.

