Growing healthy basil indoors can be a challenge, but with the right techniques, you’ll be enjoying fresh pesto and caprese salads in no time. One of the key reasons people grow basil indoors is to have access to this fragrant herb year-round, regardless of the weather or season. However, many indoor basil plants struggle to thrive due to inadequate lighting, overwatering, and pests like spider mites and mealybugs. To overcome these common issues, it’s essential to choose a variety that’s well-suited for indoor growing, such as ‘Genovese’ or ‘Thai Basil’. In this comprehensive guide, we’ll cover the fundamentals of growing basil indoors, including selecting the right variety, providing optimal lighting and watering conditions, managing pests, and techniques for successful propagation. By the end of this article, you’ll be equipped with the knowledge to grow a bountiful harvest of healthy, fragrant basil in your own home.
Choosing the Right Variety
When growing basil indoors, selecting the right variety can be just as crucial as providing optimal conditions. Let’s look at some popular options that thrive in indoor settings.
Understanding Basil Types
When it comes to growing basil indoors, choosing the right variety is crucial for success. There are several types of basil, each with its unique characteristics and uses. Sweet basil (Ocimum basilicum) is one of the most popular varieties, known for its sweet and slightly spicy flavor. It’s ideal for pesto sauces and caprese salads.
Thai basil (Ocimum basilicum var. thyrsiflora), on the other hand, has a more robust flavor with hints of anise and spice. This variety is commonly used in Thai and Vietnamese cuisine, adding depth to soups and stir-fries. Lemon basil (Ocimum x citriodorum) has a distinctive citrusy scent and flavor, making it perfect for lemon-based dishes.
Consider the space you have available for growing and the climate of your indoor environment when selecting a variety. For example, Thai basil requires more humidity than sweet basil, so if you live in a dry climate, it may not be the best choice. Additionally, think about the type of dishes you plan to make with your homegrown basil – do you want a more subtle flavor or something bolder? By choosing the right variety for your needs, you’ll be well on your way to growing delicious and fragrant basil indoors.
Selecting Healthy Seedlings
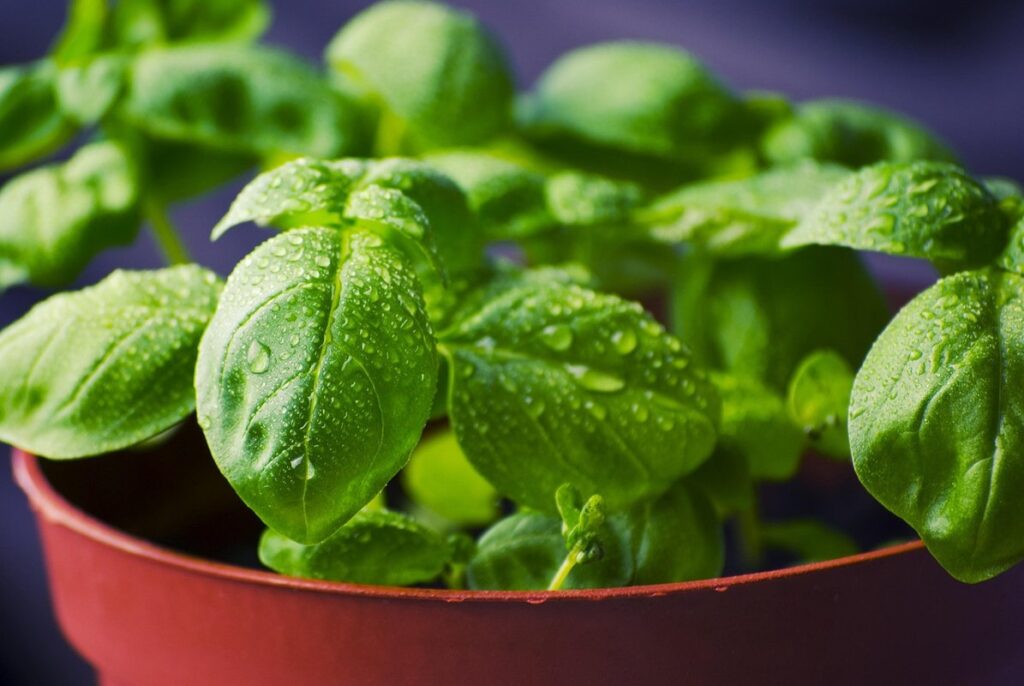
When selecting healthy seedlings from a nursery or store for indoor basil growing, look for signs of robust growth and vibrant green leaves. A healthy seedling should have at least two sets of true leaves, with the first set being larger and more developed than the second. Avoid seedlings with yellowing or wilted leaves, as this can indicate overwatering or root bound conditions.
Inspect the seedling’s roots by gently removing it from its pot. Healthy roots should be white, firm, and have a good spread within the soil. Look for signs of pests like aphids, spider mites, or mealybugs on the underside of leaves or stems. Check for any visible diseases such as powdery mildew, root rot, or leaf spot.
Some common issues to watch out for include seedlings that are leggy or have an uneven growth pattern. These can be signs of inadequate light or inconsistent temperature control. If you notice any of these red flags, it’s best to select a different seedling. When in doubt, ask the nursery staff about the seedling’s origin and growing conditions. This can help ensure you’re getting healthy, disease-free plants that will thrive indoors.
Preparing Your Growing Space
Before you start growing basil indoors, it’s essential to prepare a suitable space for your plants. This includes choosing the right location and setting up the necessary equipment.
Lighting Requirements
Basil plants require a lot of light to grow well, especially when grown indoors. In fact, they need at least 4-6 hours of direct sunlight per day. However, if you don’t have a sunny windowsill or if the weather is cloudy outside, supplemental lighting can be used. Grow lights are an excellent option for indoor basil cultivation, and they come in various types, including LED, fluorescent, and incandescent.
When using grow lights, make sure to position them 6-8 inches above the plants to avoid burning their leaves. You can also place your potted basil near a sunny window, ideally on an east- or west-facing side to minimize scorching from direct sunlight. Keep in mind that south-facing windows receive more intense light and may require additional shading during peak hours.
It’s worth noting that most indoor spaces don’t provide the necessary light for basil growth. If you’re unsure about the light conditions in your growing space, consider measuring the light intensity with a light meter or using an app to help determine the best lighting setup for your plants.
Temperature and Humidity Control
Basil thrives in warm temperatures between 65°F to 75°F (18°C to 24°C), with an optimal range of 70°F to 72°F (21°C to 22°C). Maintain a consistent temperature within this range, as sudden changes can cause stress and affect growth. If you live in an area with extremely cold winters or hot summers, consider investing in a space heater or air conditioner to regulate the temperature.
Humidity is another crucial factor for basil growth. Aim for a relative humidity of 40-60%. Basil prefers higher humidity but can adapt to lower levels as long as they are consistent. To maintain optimal humidity levels, you can place the pot on a tray filled with water and pebbles or use a humidifier nearby. Avoid overwatering, which can lead to root rot and other issues.
Some indoor spaces, such as basements or north-facing rooms, may be naturally too humid for basil growth. In these cases, consider using a dehumidifier to control moisture levels. On the other hand, dry environments like sunrooms or south-facing windows may require more frequent watering to compensate for lower humidity. Regularly monitor your growing space’s temperature and humidity levels to make adjustments as needed and ensure optimal conditions for your basil plants.
Planting and Soil Preparation
To grow healthy basil indoors, it’s essential to start with a solid foundation: proper planting and soil preparation techniques will make all the difference in your results. This is where we’ll explore those crucial steps.
Seed Starting Techniques
When starting basil seeds indoors, you have two primary options: using seed trays or directly sowing seeds into pots. Seed trays are ideal for large quantities of seeds, as they allow for even germination and easy transplanting. Fill the tray with a good quality potting mix, moisten it gently but thoroughly, and sow the seeds about ¼ inch deep.
To prevent overcrowding, sow two to three seeds per cell and then thin them out once they have two sets of leaves. Keep the seed tray in a warm location with temperatures between 70°F to 80°F (21°C to 27°C). You can also use clear plastic bags or cloches to create a mini-greenhouse effect.
For directly sowing seeds into pots, choose a container that is at least 6-8 inches deep. Fill the pot with a well-draining potting mix and sow the seeds about ¼ inch deep. Water gently but thoroughly, making sure not to wash away the tiny seeds. Keep the soil consistently moist during the germination period, which typically takes 7-10 days.
Some basil varieties can be directly sown into larger containers, while others may benefit from being started in seed trays first and then transplanted. Research the specific needs of your chosen variety for optimal results.
Soil Selection and Mixtures
When growing basil indoors, it’s essential to choose a potting soil that drains well and doesn’t retain too much water. This is because basil roots can rot if the soil becomes waterlogged, leading to root decay and ultimately killing the plant. Look for potting mixes specifically designed for indoor plants or seed starting, as they tend to have better drainage properties.
If you prefer to create your own homemade mixture, a simple recipe involves combining equal parts peat moss, vermiculite, and perlite. These ingredients help retain moisture while preventing water from collecting in the soil. Add a small amount of compost or worm castings for extra nutrients. Avoid using regular garden soil, as it can compact and prevent roots from growing freely.
A good homemade mixture should have a pH level between 6.0 and 7.0, which is slightly acidic to neutral. Basil thrives in slightly acidic conditions, but it’s not picky about pH levels. If you’re unsure about your tap water’s pH level, consider using a water filter or letting the water sit for 24 hours before use.
For optimal growth, aim for a mix that retains moisture but drains excess water quickly. A well-draining potting soil or homemade mixture will help prevent root rot and ensure healthy basil plants indoors.
Watering and Fertilization Techniques
To grow healthy basil indoors, you’ll need to master two essential skills: watering and fertilizing your plant at just the right times. Let’s break down the techniques for optimal results.
The Importance of Consistent Moisture
Basil roots are highly susceptible to root rot if the soil is too wet for an extended period. Consistent moisture levels, on the other hand, promote healthy growth by allowing the roots to absorb oxygen and nutrients efficiently. Basil plants grown indoors often suffer from inconsistent moisture due to forgetfulness or overwatering.
To prevent this issue, check the soil moisture daily by sticking your finger into the soil up to the first knuckle. Water only when the top 1-2 inches of soil feel dry. Avoid getting water on the leaves to minimize the risk of fungal diseases. Instead, pour it directly onto the soil.
Basil prefers a slightly moist environment with high humidity, typically between 40-60% relative humidity. You can increase humidity around your plant by placing it on a tray filled with water and pebbles or using a humidifier nearby. Monitor your basil’s specific needs and adjust the watering schedule accordingly. For example, if you’re growing basil in a warm environment (above 75°F), you may need to water more frequently than in cooler conditions.
Organic Fertilizers and Compost Tea
When it comes to fertilizing indoor basil plants, many gardeners reach for synthetic options. However, these can be detrimental to plant health and the environment. Instead, consider using organic fertilizers like fish emulsion or bone meal, which provide essential nutrients without harsh chemicals.
Another excellent option is compost tea, a liquid solution made by steeping compost in water. This process releases beneficial microbes that promote healthy root growth and resistance to disease. To make your own compost tea at home, start by brewing 1-2 cups of compost in 5 gallons of water for 24 hours. Strain the mixture before using it as a foliar spray or adding it to the soil.
When selecting an organic fertilizer, look for products that are certified by organizations like OMRI (Organic Materials Review Institute) or the USDA National Organic Program. These labels ensure that the product meets strict standards for organic production and content. Avoid fertilizers with added chemicals or fillers, which can harm your plants in the long run.
Some popular homemade fertilizer mixtures include a 1:10 ratio of fish emulsion to water or a 1:20 ratio of bone meal to water. Experiment with different combinations to find what works best for your indoor basil plants.
Pests and Diseases Management
Growing basil indoors comes with its own set of challenges, including pesky pests and diseases that can quickly spread. Here’s how to identify and manage common problems that might affect your indoor basil plants.
Common Indoor Basil Pests
Spider mites, mealybugs, and aphids are among the most common indoor basil pests. These tiny insects can cause significant damage to your plants by sucking sap, spreading disease, and weakening their defenses. Spider mites, for example, spin fine webs on the leaves and stems of affected plants, leaving behind a characteristic yellowish or bronzy discoloration.
To manage infestations, inspect your plants regularly for signs of pests. Check the underside of leaves, where mealybugs often hide, and look for clusters of tiny eggs or moving insects on the stem. Isolate infected plants to prevent the spread of pests to other areas of your growing space.
If you catch an infestation early, treat affected plants with a neem oil spray or insecticidal soap according to the product’s instructions. For severe infestations, consider replacing the plant entirely. To prevent re-infestation, maintain good air circulation around your plants and avoid overwatering, which can attract pests.
Some common signs of indoor basil pest infestations include:
- Tiny eggs or moving insects on stems
- White, cottony patches on leaves (mealybugs)
- Fine webs on leaves or stems
- Yellowish or bronzy discoloration on affected areas
Identifying and Treating Basil Diseases
Powdery mildew and root rot are two of the most common diseases affecting indoor basil plants. Powdery mildew appears as a white, powdery coating on leaves, often accompanied by yellowing or curling leaves. To treat powdery mildew, remove infected leaves and increase air circulation around your plant. You can also use a fungicide specifically designed to combat powdery mildew.
Root rot is caused by overwatering, which leads to root decay and ultimately kills the plant. Check for root rot by gently removing the plant from its pot and inspecting the roots. If you notice soft, mushy roots or a foul odor, it’s likely due to root rot. To prevent further damage, stop watering your basil immediately and repot it in fresh soil.
Some signs of both diseases include yellowing leaves, droopy stems, and reduced growth rates. Regularly inspect your plant for these symptoms and take action promptly if you notice any issues. Keep in mind that prevention is key: maintain good air circulation, avoid overwatering, and ensure proper drainage to reduce the risk of disease.
Harvesting and Propagation
Now that your basil plant is thriving, it’s time to learn how to harvest its leaves and propagate new plants from cuttings, ensuring a continuous supply of fresh flavor. We’ll walk you through both processes.
When to Harvest Your Basil
When basil leaves start to feel slightly tender to the touch and develop a faint sheen, it’s a clear sign they’re ready for harvesting. This usually occurs when the plants are around 6-8 inches tall. Check the lower sets of leaves; if they’ve begun to turn a light greenish-yellow or have developed tiny white flowers, it’s time to pick them.
To harvest your basil without damaging the plant, use scissors or pinch off individual leaves with your fingers. Cut or pinch just above a node – the small joint where a leaf meets the stem. This will encourage new growth and prevent the plant from flowering prematurely. For continuous harvesting, take only the top sets of leaves, leaving at least two nodes intact.
If you’ve been growing your basil for a while, you may notice that some stems are thicker than others. These can be harvested more frequently, as they’re typically producing more leaves. However, don’t over-harvest; removing too many leaves at once can shock the plant and reduce future yields.
Methods for Basil Propagation
Basil propagation is a straightforward process that can be achieved through several methods. One of the most popular and effective ways to propagate basil is by using stem cuttings. To do this, simply snip off a 2-3 inch section from a healthy stem, removing lower leaves to prevent moisture loss. Then, place the cutting in a glass of water or a propagation tray filled with water, making sure the node (where the leaf meets the stem) is submerged.
Once roots have developed, usually within 1-2 weeks, transfer the cutting into a pot filled with well-draining soil. Basil can also be propagated through division, which involves separating established plants to create new ones. Carefully dig up the entire plant, gently separating the roots and replanting them in separate pots.
Leaf propagation is another viable option for basil enthusiasts. To propagate using leaves, choose healthy leaves from mature plants and place them on top of a pot filled with moistened soil or a propagation tray. Keep the soil consistently moist but not waterlogged, as this can lead to root rot. Roots should develop within 1-2 weeks.
Frequently Asked Questions
What if I notice my basil leaves are turning yellow or getting scorched despite having sufficient light?
Yes, this can happen due to overwatering. Check your soil moisture regularly and ensure you’re not providing too much direct sunlight, which can cause stress to the plant.
Can I grow basil indoors without using a potting mix specifically designed for indoor plants?
While it’s not ideal, you can use regular garden soil in a pinch. However, keep in mind that garden soil can be too dense and may lead to waterlogging issues. Consider making your own well-draining potting mix by combining garden soil with perlite or vermiculite.
How often should I fertilize my indoor basil plants, especially if I’m using compost tea?
Yes, you can fertilize your basil plants as frequently as once a week during the growing season (spring-fall). When using compost tea, start with a weaker solution and gradually increase the strength based on your plant’s response.
What are some common mistakes to avoid when propagating basil through stem cuttings, and how can I prevent them?
One of the most common mistakes is not providing enough humidity around the cutting. To prevent this, you can place the cutting in a propagation tray with a clear plastic cover or use a cloche to maintain a humid microclimate.
Can I grow multiple varieties of basil indoors at the same time, and how do I keep them from cross-pollinating?
Yes, you can grow multiple varieties side by side. To prevent cross-pollination, make sure to separate your plants by at least 12-18 inches, and avoid having multiple flowering plants in close proximity to each other.

