Growing your own pomegranate from seed can be a thrilling experience, but it requires careful planning and attention to detail. You’ve probably tried growing store-bought pomegranates before only to have them wither away without bearing fruit. The good news is that growing pomegranate seeds can yield a rich harvest if done correctly. To achieve this success, you need to choose the right variety of seed, prepare it properly for germination, and transplant it into a suitable environment. Our comprehensive guide will walk you through each step of this process, covering everything from selecting the ideal seed stock to successfully transplanting your young tree. By following our instructions, you’ll be able to grow pomegranate seeds and enjoy their sweet fruit in no time.
Choosing the Right Variety
When growing pomegranate seeds from scratch, selecting the right variety is crucial for success. With hundreds of varieties to choose from, we’ll help you narrow down your options and pick a winner that suits your needs.
Selecting Seed-Producing Varieties
When selecting pomegranate varieties for seed production, it’s essential to choose types that not only produce viable seeds but also exhibit desirable characteristics such as flavor, fruit size, and growth habits. Some popular varieties used for propagation are ‘Wonderful’, ‘Granada’, and ‘Fuyu’. ‘Wonderful’ is a widely cultivated variety known for its large, juicy fruits and sweet flavor, making it an excellent choice for seed production.
Other notable varieties include ‘Nana’, which produces smaller but sweeter fruits, and ‘Pomarium’, a dwarf variety suitable for container growing. When selecting a variety, consider the intended use of the resulting tree. For example, if you’re looking to grow pomegranates for fresh consumption, choose a variety with a sweet flavor profile like ‘Wonderful’. If space is limited, opt for compact varieties such as ‘Nana’ or ‘Pomarium’.
It’s also crucial to note that some varieties are bred specifically for their ornamental value rather than fruit production. Avoid these if you’re looking to grow pomegranates for seed. Instead, focus on selecting varieties with documented seed production and desirable traits. This will increase the chances of successful propagation and ensure the resulting trees meet your needs.
Understanding the Importance of Selection
When selecting seeds for growing pomegranates from scratch, it’s crucial to choose high-quality seeds from a reputable source or a mature tree with desirable traits. This may seem obvious, but many novice growers make the mistake of using low-quality seeds that can lead to weak and unproductive trees.
Seed quality is often determined by factors such as the parent tree’s disease resistance, climate adaptability, and fruit quality. For instance, if you’re growing pomegranates in a region prone to frost, look for seed sources from trees known to be cold-hardy. Similarly, if you want to grow a variety with specific flavor or texture characteristics, choose seeds from a mature tree that exhibits these traits.
Some reputable seed suppliers specialize in collecting and distributing high-quality pomegranate seeds from around the world. These seeds are often harvested from mature trees grown using sustainable practices. If you’re unable to find reputable seed sources, consider growing your own pomegranates and saving seeds from desirable trees on your property. This approach ensures that your seeds have adapted to your local climate and will thrive in your specific conditions.
Preparing the Seeds
Before you can successfully grow pomegranate seeds, it’s crucial to select and prepare them for planting. This process may seem intimidating, but don’t worry, we’ll guide you through each step carefully.
Removing the Aril and Scouring the Seeds
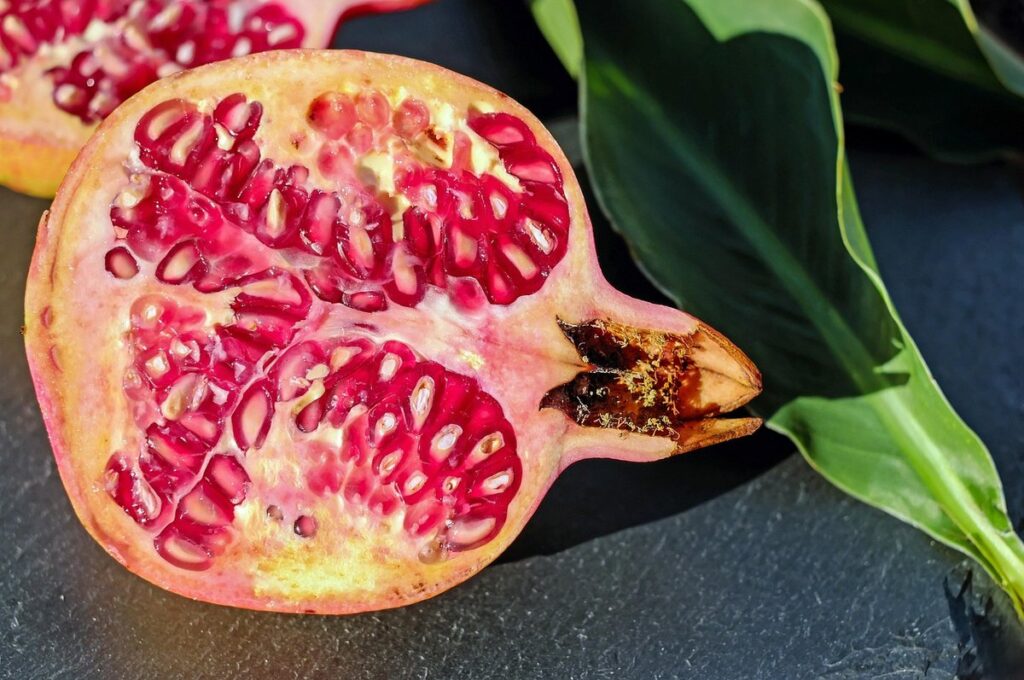
To extract the seeds for germination, you’ll need to remove the aril and scour the seeds themselves. The aril is a juicy, fleshy layer surrounding each seed; it’s an important part of the fruit but doesn’t contribute to growth. Hold the pomegranate seed under running water, gently prying the aril away with your fingers or a blunt instrument like the back of a spoon.
Once separated, you’ll be left with a smooth, hard seed. Inspect each one for any visible damage or mold, discarding any that are compromised. For cleaning, soak the seeds in warm water (around 90°F) for several hours. Then, use fine-grit sandpaper or a nail file to gently scour away any remaining pulp or debris. This process helps remove potential obstacles to germination.
When handling pomegranate seeds, be sure to keep them moist, but not submerged, as excessive water can cause rot. Dry seed cleaning techniques like air-drying or paper towels can also be effective, especially for larger batches. By following these steps and taking care with your seed preparation, you’ll be ready to move on to the next stage of growing pomegranate seeds from scratch: seed stratification and storage.
Seed Stratification and Storage
After removing the aril and scouring the seeds, you’ll need to store them properly to maintain viability. Pomegranate seeds can be sensitive to temperature fluctuations, humidity, and light exposure. For stratification, store the seeds in a sealed container or plastic bag with moist peat moss or vermiculite at 35-45°F (2-7°C). Keep the container away from direct sunlight and heat sources.
If you plan to store the seeds for an extended period, maintain high humidity by placing the container in a plastic bag with a damp cloth. Check on the seeds periodically to ensure the peat moss or vermiculite remains moist but not waterlogged. A small minority of pomegranate varieties require cold stratification, typically lasting 30-60 days. Research your specific variety’s requirements before storing the seeds.
In general, it’s best to store pomegranate seeds at a consistent temperature between 35-45°F (2-7°C). Avoid placing them near heating vents or radiators, as this can cause rapid temperature changes that may damage the seeds. If you’re unsure about the storage conditions for your specific variety, consider consulting with an experienced grower or nursery professional. By following proper stratification and storage methods, you’ll increase the chances of successful germination when the time comes to sow the seeds.
Germinating Pomegranate Seeds
To successfully grow pomegranates from scratch, you’ll need to start by germinating those tiny seeds – a process that requires patience and the right conditions. Begin by placing the seeds in a cup of water.
Optimal Conditions for Germination
Pomegranate seeds require a precise balance of temperature, moisture, and soil quality to germinate successfully. The ideal temperature range for germination is between 65°F (18°C) and 75°F (24°C). Avoid placing the seed tray near drafty windows or air conditioning vents, as this can cause temperature fluctuations that hinder germination.
In terms of soil type, a well-draining potting mix is essential. A mix with a pH between 6.0 and 7.0 will provide optimal conditions for germination. Some gardeners also swear by using a seed starting mix specifically designed for tropical plants like pomegranate.
Moisture levels are equally crucial. Water the seeds gently but thoroughly after sowing, making sure not to overwater or underwater. Keep the soil consistently moist during the first few weeks of germination, but avoid waterlogging, which can lead to fungal diseases. Most varieties take 1-3 months to sprout, depending on temperature and moisture conditions.
To ensure optimal growth, maintain a humidity level above 50% in the surrounding area. You can cover the seed tray with a clear plastic bag or a cloche to create a mini-greenhouse effect, maintaining high humidity while preventing fungal diseases.
Seed Starters vs. Direct Sowing
Starting pomegranate seeds in a controlled environment versus direct sowing into the ground has its advantages and disadvantages. A seed starter provides optimal conditions for germination, such as consistent moisture, precise temperature control, and protection from pests and diseases. This can lead to higher success rates, especially when working with sensitive or difficult-to-grow varieties.
In contrast, direct sowing allows seeds to develop their root system in the natural soil environment, which can be beneficial for hardy varieties that thrive in local conditions. However, this method requires a specific window of optimal weather and moisture conditions, which may not always be available.
To make an informed decision, consider the specific needs of your pomegranate seed variety. If you’re unsure about the best approach or lack experience with seed starting, start with a small batch in a controlled environment to gauge success before moving to direct sowing. This will help you understand the unique requirements of your seeds and minimize potential losses due to environmental factors.
Transplanting and Caring for Young Trees
Now that you’ve got your young pomegranate seedlings established, it’s time to transplant them into larger containers or directly into the ground. This section will cover the essential care and handling of newly transplanted trees.
When to Transplant Seedlings
Root development is a crucial factor to consider when determining if seedlings are ready for transplanting. Pomegranate seedlings typically develop their root system within 4-6 weeks after germination, during which time they’ll start producing new roots and developing a taproot. Check the seedling’s root growth by gently removing it from its pot or cell pack. If you notice a robust root system with a well-developed taproot, it’s ready for transplanting.
A good rule of thumb is to transplant when the seedling has reached 4-6 inches in height and has at least two sets of leaves. This allows the young tree to establish itself more easily in its new environment. Keep in mind that transplanting should be done during a cooler part of the day, ideally early morning or late afternoon.
When assessing if your seedlings are ready for transplanting, look out for signs such as:
- A robust root system with a well-developed taproot
- Two sets of leaves or more
- The seedling has reached 4-6 inches in height
Transplant your seedlings at this stage to ensure they have the best chance of establishing themselves successfully.
Soil and Climate Requirements
Young pomegranate trees require specific soil and climate conditions to thrive. When selecting a location for transplanting, consider the tree’s hardiness zone and the average low temperature of your area. Pomegranates are generally adapted to USDA zones 6-10, but some varieties can tolerate cooler temperatures.
In terms of soil, pomegranate trees prefer well-draining, slightly acidic soil with a pH between 5.5 and 6.5. Avoid planting in areas with standing water or where water tends to collect. If your native soil is heavy clay or sandy, mix in organic matter like compost or perlite to improve drainage.
For frost protection, choose a location that provides some shelter from harsh winds and extreme temperature fluctuations. You can also consider using row covers or other frost-protection methods if you live in an area with frequent frosts. Typically, pomegranate trees are sensitive to prolonged periods of cold temperatures below 25°F (-4°C), so it’s essential to protect them during the winter months.
When transplanting, make sure the soil is not too wet or dry. Water your tree thoroughly before and after transplanting to help it establish a strong root system.
Pest and Disease Management
As you care for your young pomegranate seedlings, it’s crucial to stay vigilant against pests and diseases that can harm their growth. This section will walk you through effective management strategies to keep them healthy.
Common Pests Affecting Young Trees
Young pomegranate trees are susceptible to various pests, which can cause significant damage if left unchecked. Aphids, whiteflies, and spider mites are common culprits, feeding on sap and spreading disease. Root maggots and caterpillars also target young trees, burrowing into the soil or devouring leaves.
To identify these pests, inspect your tree regularly for signs of infestation, such as sticky honeydew droplets, distorted leaves, or actual insects on the plant. For organic control methods:
- Use neem oil or insecticidal soap to deter aphids and whiteflies.
- Apply horticultural oil to smother spider mites.
- Hand-pick root maggots and caterpillars, or use a sticky trap to capture them.
For long-term prevention, practice good garden hygiene by removing weeds that can harbor pests. Encourage beneficial insects like ladybugs and lacewings, which prey on pomegranate pests. Finally, maintain a balanced soil ecosystem through composting and mulching. This will help promote a healthy tree with a strong defense system against pest infestations.
Fungal Diseases in Young Trees
Fungal diseases can be a significant threat to young pomegranate trees, especially during their first few years of growth. One of the most common fungal diseases is root rot, which occurs when the roots are exposed to excessive moisture and warm temperatures. Look for signs such as yellowing leaves, wilting, or a soft, mushy texture on the trunk or branches.
Other fungal diseases include powdery mildew and leaf spot, which can cause white or gray powdery patches on the leaves, or small, circular lesions with a dark center. To prevent these diseases, maintain good air circulation around your young trees by pruning nearby plants and keeping the area weed-free. Regularly inspect your trees for signs of disease and remove any infected branches to prevent the spread.
Use fungicides only as a last resort, as they can harm beneficial microorganisms in the soil and contribute to long-term ecosystem problems. Instead, focus on sanitation practices such as removing weeds, debris, and fallen leaves from around the tree base. Keep the area around your young trees well-watered but not waterlogged, and avoid over-fertilizing, which can stress the roots and make them more susceptible to disease.
Advanced Techniques for Enhanced Success
Now that you’ve got a healthy pomegranate seedling, it’s time to take your skills to the next level and learn advanced techniques for optimal growth.
Grafting and Budding
Grafting and budding are advanced propagation techniques used to enhance success rates or achieve specific traits when growing pomegranate trees from seed. Grafting involves joining a piece of stem (scion) from one tree onto the root system of another (rootstock), while budding is similar but uses a single bud instead of a section of stem.
The primary advantage of grafting and budding is that they allow you to combine the desirable traits of two different trees, such as disease resistance or improved fruit quality. For example, you could graft a scion from a pomegranate tree known for its high-quality fruit onto a rootstock with excellent disease resistance. This can be particularly useful when growing pomegranates in areas with challenging climate conditions.
To graft or bud a pomegranate tree, you’ll need to select compatible rootstocks and scions, then carefully join the two pieces together using specialized techniques. It’s essential to research specific guidelines for pomegranate propagation, as different varieties may require unique approaches. Some nurseries also offer grafted or budded trees, which can be a convenient option if you’re new to these techniques.
Micropropagation
Micropropagation involves using tissue culture techniques to rapidly multiply high-quality seedlings with desirable characteristics. This method is particularly useful for propagating pomegranate varieties that are difficult to grow from seeds or have specific traits such as disease resistance.
To initiate micropropagation, you’ll need a laboratory setup or access to a facility equipped with the necessary equipment and expertise. A small sample of shoot tissue is taken from a mature tree and placed in a sterile culture medium where it’s allowed to grow and multiply. This process can take anywhere from 2-6 weeks, depending on factors like temperature and nutrient availability.
Once the shoots have reached a suitable size, they’re transferred to a greenhouse or growth chamber for further development. Regular monitoring is essential to ensure the health and quality of the seedlings. Some nurseries and research institutions have successfully employed micropropagation in pomegranate cultivation, yielding consistent results with desirable traits. If you plan to pursue this method, it’s crucial to source high-quality mother plant material and follow strict aseptic techniques to avoid contamination.
Frequently Asked Questions
Can I Grow Pomegranate Trees in Containers?
Yes, it is possible to grow pomegranate trees in containers as long as you provide them with sufficient space for root growth and ensure the container has good drainage. Make sure to choose a large enough pot (at least 14-16 inches deep) and use a well-draining potting mix.
What if My Seeds Don’t Germinate After Stratification?
Don’t worry, it’s not uncommon for seeds to have low germination rates. Check the seed storage conditions: is the temperature too high or too low? Are the seeds exposed to direct sunlight? Try adjusting these factors and give the seeds another try. You can also consider using a different variety of pomegranate seeds.
How Long Does It Take for Pomegranate Trees to Produce Fruit?
Pomegranate trees typically take 2-5 years to mature after transplanting, but this timeframe can vary depending on factors like climate, soil quality, and tree care. With proper conditions, your tree should start producing flowers and fruit within a few years of planting.
Can I Use Pomegranate Seeds from Store-Bought Fruit?
While it’s technically possible to use seeds from store-bought pomegranates, the success rate may be lower due to unknown seed quality and potential genetic diversity. For best results, try using seeds from a mature tree with desirable traits or purchase high-quality seeds specifically designed for propagation.
What If I Notice White Patches on My Young Tree’s Leaves?
White patches on young trees can indicate fungal diseases like powdery mildew. Inspect the leaves carefully and remove any affected areas to prevent further spread. Use fungicides as a last resort, but prioritize good air circulation and reduce watering to minimize moisture-related issues.
