Top bar hives have gained popularity among beekeepers in recent years, offering a unique approach to managing colonies that prioritizes bee health and natural behavior. Unlike traditional Langstroth hives, top bar hives allow bees to build their combs freely, creating a more natural environment that promotes healthy growth and high yields. However, this alternative method requires specialized knowledge and equipment to implement effectively.
As you consider expanding your backyard apiary or switching from traditional hive systems, it’s essential to understand the ins and outs of top bar hives. In this guide, we’ll walk you through the process of building, managing, and harvesting top bar hives, covering topics like choosing the right equipment, monitoring colony health, and optimizing honey production. By the end of this comprehensive guide, you’ll be equipped with the knowledge to successfully manage your own top bar hive and improve bee health and yields in your apiary.
What Are Top Bar Hives?
Top bar hives are a type of beehive that mimics natural bee behavior, offering a more hands-off approach to beekeeping. They’re perfect for hobbyists and experienced beekeepers alike.
The Concept and History of Top Bar Hives
The concept of top bar hives has its roots in traditional beekeeping practices from Africa and Asia. In these regions, beekeepers have long used horizontal bars to manage their colonies, often with great success. The design was later adopted by European beekeepers, who modified it to suit their needs. One key feature that sets top bar hives apart is the absence of frames, which reduces congestion and allows for more natural comb formation.
In the early 20th century, a few pioneering beekeepers in Europe began experimenting with this unique design. They discovered that by using bars instead of frames, bees could build their combs more efficiently and effectively. This led to improved honey production and healthier colonies. The benefits of top bar hives were soon recognized by beekeepers around the world.
A notable figure in the development of modern top bar hive designs is Arthur Loiseau, a French beekeeper who developed the “Warre hive.” This design features a series of bars that are placed on top of each other to create a single, cohesive comb. The Warre hive has since become popular among backyard beekeepers due to its simplicity and effectiveness in managing colonies.
Key Benefits for Beekeepers
Top bar hives offer several benefits for beekeepers. One key advantage is improved bee health. By allowing bees to build their own comb and determine the size of their cells, top bar hives reduce the risk of disease and pests that can be introduced through purchased frames or foundation. This approach also promotes natural fanning patterns and ventilation, which can help regulate temperature and humidity within the hive.
In addition to improved bee health, top bar hives can increase yields for several reasons. First, bees are able to build their comb in a more efficient manner, with each cell optimized for honey production. Second, top bar hives often have more open space for foraging and brood rearing, which can lead to increased populations and higher honey production.
Better management options are also a key benefit of top bar hives. Without the need for frames or foundation, beekeepers don’t have to worry about managing and replacing these components. This simplifies the maintenance process and reduces the risk of introducing pests or diseases into the hive.
Design and Components of Top Bar Hives
Top bar hives are made up of several key components, each designed to work together to provide a healthy environment for your bees. We’ll take a closer look at what makes these hives tick and how they’re constructed.
Frameless vs. Framed Designs
The design of a top bar hive can significantly impact its performance and the beekeeper’s experience. Two common designs are frameless and framed top bars. Frameless designs feature individual top bars without frames, allowing for more honey storage space and easier cleaning. However, they often require more time-consuming inspections to check for brood distribution. Framed designs, on the other hand, have built-in frames that provide better support for comb growth but can be more labor-intensive to install and maintain.
When choosing between frameless and framed designs, consider your specific beekeeping needs and preferences. If you prioritize ease of inspection and are comfortable with more frequent checks, a frameless design might suit you best. In contrast, if you prefer a more straightforward setup and are willing to invest time in initial installation, a framed design could be the better option. Additionally, some top bar hive designs offer adjustable frames or hybrid combinations that blend elements from both approaches.
Materials and Construction
When building a top bar hive, you’ll want to choose materials that are durable, resistant to pests and decay, and easy to work with. Western red cedar is a popular choice due to its natural resistance to rot and insects, while reclaimed wood can add a unique character to the hive. Other options include pine, fir, and cypress.
A sturdy top bar hive requires careful construction to ensure that it can support the weight of the honeycomb and withstand various weather conditions. Use galvanized or stainless steel nails to avoid rusting and ensure a secure connection between components. When assembling the hive’s frame, consider using a 1-inch wide by 3/4-inch thick top bar to provide adequate support for the comb.
When constructing your top bar hive, also think about ventilation and drainage. Consider adding small gaps or vents above the bars to improve air circulation and prevent moisture buildup. A waterproof roof or lid can help protect the hive from rainfall and extreme temperatures. By using the right materials and construction techniques, you can build a durable and long-lasting top bar hive that will serve your bees well for years to come.
Setting Up and Managing Top Bar Hives
When it comes to managing top bar hives, setting them up correctly is crucial for a healthy colony. In this next part of our guide, we’ll walk you through the process.
Initial Setup and Installation
When preparing your top bar hive site, consider a location with full sun and good air circulation. Clear the area of debris and vegetation, then level the ground to ensure stability. A spot near a water source is beneficial, but not essential.
For installation, position the hive so that the entrance faces east or southeast to protect against prevailing winds. Place it on a solid foundation or base, ensuring it’s level and secure. You can use a concrete slab, bricks, or wooden blocks – just avoid placing it directly on soil to prevent moisture buildup.
Next, introduce your bees for the first time by opening the hive entrance and placing them inside. This can be done using a nuc (nucleus colony) box containing 3-4 frames of bees, or by installing an established top bar hive with existing colonies. Be cautious when handling bees during this process, and consider wearing protective clothing.
Remember to check your local regulations regarding beekeeping in your area before starting. Ensure you have all necessary equipment, including a smoker and brush, on hand for managing the bees once they’re settled.
Monitoring and Maintenance Schedule
Regular inspections are crucial for maintaining healthy colonies. You should inspect your top bar hives every 7-10 days during peak seasons to monitor for signs of disease, pests, and queen issues. This involves opening the hive and observing the brood pattern, checking for any unusual odors or sounds, and verifying that the queen is present and laying eggs.
Cleaning is another essential task, usually done once a month. Remove excess honey and debris from the top bars to prevent mold growth and ensure easy access for the bees. Be cautious not to disrupt the comb or disturb the bees during this process.
Regular repairs are also necessary to maintain the hive’s integrity. Check the hive’s structure and components regularly, repairing any damage or wear on the bars, frames, or other parts. This includes re-waxing or replacing worn-out top bars and ensuring proper fitment of the lid and frames.
A simple checklist can help you stay organized: inspect for disease and pests, clean excess debris, check for queen issues, verify brood pattern, repair any damage to hive components. By following this schedule, you’ll be able to identify potential problems early on and take corrective action before they become major issues.
Population Management and Harvesting
For top bar hive keepers, managing population growth is a delicate balance between nurturing your bees and ensuring their colony’s long-term health. We’ll discuss strategies for maintaining optimal populations and sustainable harvesting practices.
Understanding Top Bar Hive Bee Behavior
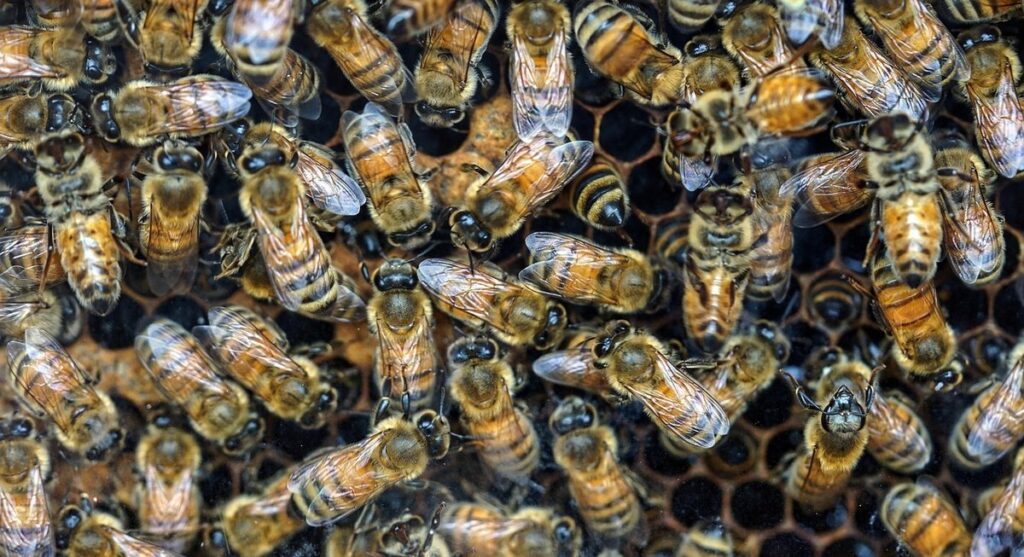
When you inspect a top bar hive, you’ll notice how bees occupy their space. They cluster together, forming a dense ball of bodies as they warm and protect the brood. This clustering pattern is essential for maintaining a stable temperature within the hive, usually around 92-95°F (33-35°C), ideal for brood development.
As the colony grows, you’ll observe honeycomb growth on the bars below. Bees build it from the bottom up, starting with the first bar and moving upwards as needed. This incremental approach allows them to control the amount of space allocated to different areas within the hive. You may notice that some bars are more heavily framed than others, indicating where bees have chosen to store honey or pollen.
A key aspect of top bar hive design is its flexibility in accommodating changing bee behavior. Unlike frame-based hives, which often require frequent manipulation and reorganization, top bar hives allow bees to build their comb freely. This freedom of movement enables the colony to adapt and respond to various environmental factors, ultimately promoting healthier and more resilient populations.
Harvesting Honey and Beeswax
When it’s time to harvest honey and beeswax from your top bar hive, prioritize the health of your colony. Harvesting too much honey can stress the colony, leading to reduced populations or even die-off. Start by monitoring the bees’ behavior – if they’re preparing for winter by storing honey in cells near the top bars, it’s likely time to harvest.
Inspect each cell closely before removing any honeycomb. Check for queen cups, which indicate a new queen is about to emerge, and avoid harvesting from frames with developing brood or pollen stores. Harvesting too much can also disrupt the ecosystem – ensure you leave enough honey and resources for the colony to survive winter.
Typically, top bar hives require less frequent harvesting than traditional Langstroth hives due to their more natural design. However, regular inspections will help you determine when it’s safe to harvest. Consider using a centrifugal extractor or crush-and-strain method to extract honey without damaging the comb. For beeswax, carefully cut out full combs and melt them down for use in candles or cosmetics.
Common Challenges and Troubleshooting
As you set up and maintain your top bar hive, it’s common to encounter issues that can affect the health of your bees. This section addresses some of these common challenges and offers practical solutions to keep your hive thriving.
Issues with Swarming and Loss
Swarming is a common issue with top bar hives, as it can be challenging for bees to establish a strong queen and population. One reason for swarming is an overcrowded hive, which can lead to a weak queen or the need for her to leave with a swarm of worker bees in search of better living conditions. To prevent this, beekeepers must regularly inspect their hives and split them when necessary to give the new queen and workers room to grow.
Disease and pests can also be a problem in top bar hives. Without the frame constraints found in Langstroth hives, it’s easier for pests like mites and small hive beetles to move through the hive. Regular inspections can help identify these issues early on, and using integrated pest management techniques can minimize their impact. Additionally, some top bar hive designs incorporate features that make it harder for pests to thrive.
Beekeepers should also be aware of signs of disease in their hives, such as a large amount of dead or dying bees, or abnormal behavior like shaking or thrashing. Regular cleaning and disinfecting of the hive can help prevent the spread of disease, and removing any infected frames or comb is crucial for maintaining overall health.
Strategies for Overcoming These Challenges
When issues arise, having a plan in place can make all the difference. To prevent swarming and loss, monitor your hive regularly for signs of overcrowding, such as an increased number of frames being drawn out or excess honey stores. Regular inspections also help identify potential problems early on.
One effective strategy is to keep a strong queen by splitting the hive when it reaches 50-75% capacity. This approach can be especially useful in areas with high swarming pressures. Another tactic is to provide plenty of ventilation, as overheating and moisture buildup are common causes of stress that may lead to swarming or disease.
To maintain healthy populations, adopt a flexible management strategy that takes into account the unique needs of your hive at different times of year. For example, you might harvest honey more frequently during the nectar flow, then reduce harvesting when stores are lower. By being responsive to changing conditions and taking proactive steps, you can mitigate common challenges and keep your top bar hive thriving.
Advanced Top Bar Hive Techniques
As you’ve gained more experience with top bar hives, it’s time to take your skills to the next level by mastering advanced techniques for maximizing honey production and improving hive health.
Integrated Pest Management (IPM)
In top bar hives, Integrated Pest Management (IPM) involves using natural methods to control pests and diseases. This approach recognizes that a balanced ecosystem is essential for healthy bee colonies. To implement IPM in your top bar hive, you should first monitor your bees regularly to detect any issues early on.
When you spot pests or diseases, identify the root cause – is it due to poor nutrition, inadequate ventilation, or other factors? For example, American Foulbrood (AFB) often results from poor hygiene and overcrowding. Once you’ve pinpointed the issue, take corrective action. This might involve introducing beneficial insects like ladybugs or lacewings to control pest populations.
A few key IPM strategies for top bar hives include:
- Using essential oils (e.g., tea tree oil) to repel mites and other pests
- Maintaining a diverse forage source to ensure bees have access to a broad range of nutrients
- Ensuring proper ventilation in the hive to prevent moisture buildup
By adopting these natural methods, you can create a healthy environment that encourages your bees to thrive. Remember to also prioritize preventive measures – such as regular inspections and good beekeeping practices – to minimize the likelihood of pest issues arising in the first place.
Innovative Designs and Modifications
Beekeepers have developed various innovative designs and modifications to enhance top bar hive efficiency and performance. One notable example is the use of adjustable top bars, which allow for precise control over honeycomb orientation. This feature enables beekeepers to optimize comb growth, reduce congestion, and promote easier honey harvesting.
Some top bar hives also incorporate movable frames or inserts, which facilitate the inspection and management of individual combs. These innovations enable beekeepers to monitor brood patterns, detect potential issues early on, and make informed decisions about hive maintenance. The “Warre” top bar hive design, for instance, features a series of removable drawers that allow beekeepers to inspect each comb without disturbing the colony.
Other modifications include the use of built-in ventilation systems, which help regulate temperature and humidity levels within the hive. This can be particularly beneficial in areas with extreme weather conditions or high temperatures. Additionally, some top bar hives feature integrated queen excluders or spacers, which help maintain a healthy balance between brood growth and honey production.
Frequently Asked Questions
Can I Use Top Bar Hives in Cold Climates?
Yes, top bar hives can be used in cold climates as long as the hive is well-insulated and protected from wind. Consider adding extra insulation around the hive or using a heated top bar to keep the bees warm during extreme cold snaps.
How Do I Prevent Swarming with Top Bar Hives?
Preventing swarming requires careful monitoring of your colony’s population growth. Regularly inspect your hive for signs of overcrowding and take steps to control the population by splitting the colony or rehousing the queen bee.
What Happens if My Bees Outgrow Their Hive?
If your bees outgrow their top bar hive, consider upgrading to a larger hive with more bars or adding additional hives to accommodate the expanding colony. Ensure the new hive is properly sized and equipped for the growing population.
Can I Use Top Bar Hives with Other Bee Species Besides European Honey Bees?
Top bar hives can be used with other bee species such as Italian bees, Carniolan bees, and even certain bumblebee species. Research specific needs and requirements for the targeted species before setting up a top bar hive.
Is It Possible to Use Top Bar Hives in Urban Areas Without Causing Disturbances?
Yes, it’s possible to use top bar hives in urban areas without causing disturbances by choosing a suitable location with minimal foot traffic and noise pollution. Consider consulting local beekeeping associations for advice on setting up apiaries in densely populated areas.