Starting a new beehive can be both thrilling and intimidating, especially for those who are just beginning their journey into beekeeping. You may have heard about the importance of pollinators in maintaining healthy ecosystems, but few know that keeping bees is not only environmentally beneficial but also a rich hobby with many rewards. As you consider establishing your own hive, it’s essential to understand local regulations and obtain any necessary permits before bringing home your first colony. To get started, you’ll need to acquire the right equipment, including protective gear, smokers, and honey extractors. This article will guide you through these crucial steps, connecting you with resources in your area and providing a foundation for building a thriving community of beekeepers. By the end of this post, you’ll have a solid understanding of what it takes to establish and maintain a successful beehive.
Getting Started with Beekeeping
If you’re new to beekeeping, setting up your apiary is a crucial first step that requires careful planning and preparation. Let’s start by covering the essential equipment and supplies you’ll need to get started.
Choosing the Right Equipment
When starting a beekeeping hobby, it’s essential to invest in quality equipment. This includes a beehive, smoker, and protective suit. For beginners, a single hive is sufficient, but some experienced beekeepers prefer multiple hives for experimentation and comparison.
A standard Langstroth hive is a popular choice due to its durability and ease of maintenance. The National Beekeeping Association recommends new beekeepers start with a 1-2 deep hive configuration to accommodate both brood and honey storage. When selecting a smoker, look for one that produces a consistent, gentle stream of smoke. This will help calm the bees during inspections.
Protective suits are also crucial for safe handling of bees. Opt for a suit with built-in veil, gloves, and a zipper closure. Avoid cheap, thin materials that may not protect you from stings. Consider purchasing a starter kit that includes a hive tool, frame grip, and other essential tools. Online retailers like Mann Lake, Betterbee, or Amazon often carry a wide range of beekeeping equipment from reputable manufacturers. When shopping in person, inspect the product for any damage or defects before making a purchase.
Understanding Local Regulations
Before installing a beehive, it’s essential to check with local authorities about any regulations governing beekeeping in your area. Permits and licenses may be required, and some municipalities have specific rules regarding hive placement, size, and number of hives per property.
In the United States, for example, the USDA regulates honey bee imports and exports, while individual states may have their own laws and regulations regarding beekeeping. Some cities or counties may require a permit to keep bees, especially if you live in an urban area.
Local health departments might also schedule inspections of your hive to ensure it’s free from pests and diseases that could affect the local population. Familiarize yourself with any specific requirements for:
- Regular inspections (typically every 1-3 months)
- Hive registration or permit fees
- Minimum distances between hives and neighboring properties
- Prohibited areas for beekeeping, such as national parks or nature reserves
Knowing what to expect from local regulations can save you time, money, and potential headaches down the line. Take a few minutes to research your area’s specific requirements and plan accordingly when setting up your beehive. This might involve reaching out to your local government office, beekeeping association, or neighboring beekeepers for guidance.
Joining a Beekeeping Community
Joining a local beekeeping community is one of the most important steps you can take as a beginner. Not only will it connect you with experienced beekeepers who can offer valuable advice and guidance, but it’s also a great way to learn from their experiences and gain insights into the world of beekeeping. By joining a community or club, you’ll have access to resources such as online forums, meetings, and workshops that can help you navigate the challenges of beekeeping.
Consider attending local beekeeping association meetings or events to meet other beekeepers in person. Many associations offer beginner-friendly sessions where you can ask questions and learn from experienced beekeepers. You can also look for online groups on social media platforms like Facebook or Reddit, which often have dedicated forums for discussing beekeeping-related topics.
Some benefits of joining a local community include:
- Access to expert advice and guidance
- Opportunities to participate in workshops and training sessions
- Connections with other beekeepers who share similar interests and goals
- Regular updates on best practices and new developments in the field
By becoming an active member of your local beekeeping community, you’ll not only gain valuable knowledge but also build relationships that can last a lifetime.
Setting Up Your Hive
Before you start collecting honey, it’s essential to set up your hive correctly. This step-by-step guide will walk you through the process of assembling and preparing your beehive for its new inhabitants.
Preparing the Location
When selecting a location for your beehive, it’s essential to prioritize safety and suitability. Bees are most active during warm sunlight hours, so choose a spot that receives direct sunlight for at least six hours a day. This will not only promote the health of your colony but also facilitate easy monitoring.
Avoid placing your hive near any standing water sources or areas prone to flooding. Water is an essential resource for bees, but proximity to a reliable source can lead to them becoming too dependent on human-provided water, which may be lacking in nutrients. Instead, position your hive at least 10 feet away from any nearby water features.
Wind direction is also crucial when choosing a location. Bees are more vulnerable to wind during strong gusts or sustained breezes. Ideally, place your hive downwind of any potential wind sources, such as neighboring buildings or hills. This will help minimize the impact of wind on your colony’s stability and health.
Assembling and Installing the Hive Stand
Before starting to assemble and install the hive stand, ensure you have all the necessary components and tools. Check the manufacturer’s instructions for any specific requirements. The typical hive stand consists of a base plate, legs, and sometimes additional supports or corner brackets.
Begin by laying out the base plate on a flat surface, ensuring it is free from debris and moisture. Next, attach the legs to the base plate using screws or bolts provided. Make sure they are evenly spaced and securely fastened. If your stand includes additional supports or corner brackets, attach them according to the manufacturer’s instructions.
When installing the hive stand at the desired location, take care to ensure it is level and stable. A slight slope can affect the hive’s ventilation and overall bee health. Use shims or adjust the legs as needed to achieve a perfectly level surface. Once installed, double-check that all components are securely attached and the stand can support the weight of your beehive.
Consider the height of the hive stand relative to your personal comfort when inspecting the bees. A typical height range is between 18 and 36 inches off the ground.
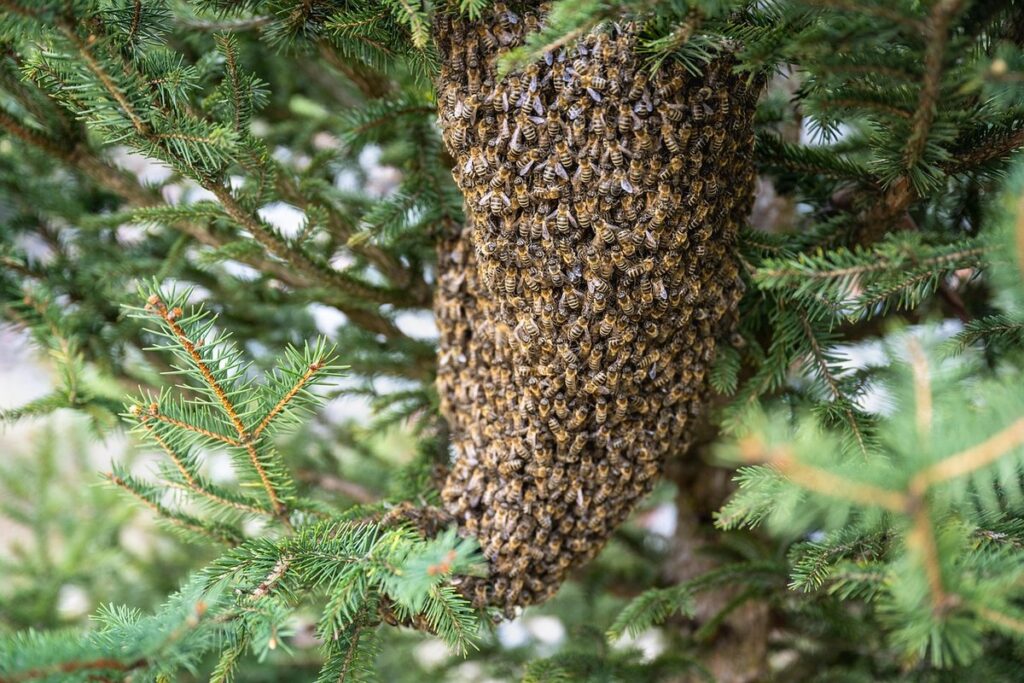
Adding Bees to Your Hive
When acquiring bees for your hive, consider purchasing from a reputable supplier who can provide you with healthy, well-mated colonies. This will ensure a smoother integration process and reduce the risk of disease or pests. Typically, bee suppliers will have a few options available: nucs (nucleus colonies), package bees, or full hives.
For new beekeepers, it’s often recommended to start with a nuc, which typically contains 3-5 frames of bees, including a queen. This smaller unit allows for easier integration and gives you the opportunity to observe your colony’s growth before expanding. Before introducing the bees to their new home, prepare the hive by installing the hive stand and assembling any necessary equipment.
On the day of introduction, remove the inner cover and place the nuc or package bees directly into the hive body. Gently shake the bees onto the frames and secure them with a queen excluder. Leave the hive undisturbed for 24-48 hours to allow the bees to settle in. Keep an eye on the colony’s activity, monitoring for signs of aggression or disease.
Caring for Your Bees
As you tend to your hive, it’s essential to understand the specific needs of your bees, from monitoring their health to ensuring they have a steady food supply. This involves regular inspections and adjustments to keep them thriving.
Monitoring Bee Health
Regular inspections are crucial to monitoring bee health. You should aim to visit your hive at least once a week during peak season, inspecting for signs of disease and pests. Look for unusual odors or sounds coming from the hive, as these can indicate an issue. Check the bees’ behavior, too – if they seem lethargic or agitated, it may be a sign that something is wrong.
Some common signs of disease include deformed wings, discolored brood (bee larvae), and excessive dead bees around the hive entrance. You should also keep an eye out for pests like mites, small hive beetles, and wax moths. These can cause significant damage to your colony if left unchecked.
To monitor bee health effectively, it’s essential to know what a healthy hive looks like. A thriving colony will have a strong, consistent buzz, and the bees should be actively flying in and out of the hive. The brood pattern should be even and well-distributed throughout the comb. If you notice any irregularities or signs of trouble, take action promptly by consulting with an experienced beekeeper or taking steps to address the issue yourself.
When inspecting your hive, wear protective clothing to prevent stings, including a veil, gloves, and suit. Use a smoker to calm the bees before opening the hive.
Managing Pests and Diseases
Common pests and diseases affecting bees can be a significant challenge for beginners. American Foulbrood (AFB) is one of the most devastating bacterial infections, caused by Paenibacillus larvae. It’s highly contagious and can wipe out entire colonies within weeks. Signs include discolored or sunken brood cells. If you suspect AFB, immediately destroy the infected hive.
Varroa mites are another common problem, feeding on bee hemolymph and spreading diseases like AFB. You’ll notice excessive mite populations by looking for bees with deformed wings or legs. Regular inspections during peak mite periods (summer and fall) can help catch issues early.
Preventative measures include introducing a strong, healthy queen to boost the colony’s immune system. Use integrated pest management techniques, such as sugar dusting or essential oil treatments, in combination with regular inspections and hive cleaning. For example, combine 1 tablespoon of diatomaceous earth powder with 2 tablespoons of sugar per pound of bees, then distribute it evenly throughout the hive.
When treating pests like mites, always read and follow label instructions for any chemicals used.
Maintaining a Healthy Hive
A healthy hive is a sign of happy, productive bees. To maintain this balance, ensure proper ventilation by installing a screened bottom board and leaving space between the hive’s back and the wall for airflow. A temperature range of 45°F to 95°F (7°C to 35°C) is ideal; above or below this range can lead to issues with brood health.
In terms of feeding, follow a regular schedule: provide a constant source of water, and supplement nectar-rich food during periods of nectar flow scarcity. This typically occurs in late spring and early summer when flowers are scarce, but bees will store excess honey for lean times.
Regular inspections also help identify potential problems before they become major issues. Check the hive’s temperature by placing your hand on the side – it should feel like a warm oven. If it feels too hot or cold, consider adding insulation or rearranging the hive’s layout.
To keep pests and diseases at bay, maintain cleanliness throughout the year. Remove excess debris, clean any damaged equipment, and replace worn-out components promptly. Regularly inspect for signs of disease or pests, such as American Foulbrood or Varroa mites.
Harvesting Honey and Other Products
Once you’ve mastered the basics of beekeeping, it’s time to reap the rewards of your hard work by harvesting honey and other valuable products from your beehives. We’ll show you how to extract and process these precious resources safely and effectively.
Understanding the Harvesting Process
When it’s time to harvest honey from your hive, you’ll need to prepare a few essential pieces of equipment. This includes an extractor, which can be manual or electric, and a centrifuge for separating the honey from the wax cappings. You’ll also need some basic tools like a hive tool for prying open frames and a scraper for removing excess wax.
To extract honey from frames, start by carefully removing each frame from your hive and brushing off any loose bees. Next, place the frames in the extractor and spin them slowly to release the honey. You can then use a centrifuge to separate the honey from the wax cappings. For smaller operations, it’s also possible to use a manual extractor or crush-and-strain method.
Once you’ve extracted the honey, it’s time to bottle it. This involves filtering the honey through a series of fine-mesh filters to remove any remaining particles or debris. You can then fill clean, sterilized bottles with the filtered honey and seal them tightly for storage.
Making Bee-Related Products
When it comes to making bee-related products, you’ll find a variety of creative and practical uses for items harvested from your beehive. Beeswax candles, for instance, are a popular choice among beekeepers due to the natural wax’s pleasant scent and ability to burn clean. To get started, gather some melting equipment and follow this basic recipe: combine 1 pound of beeswax with 10-15 drops of essential oil (such as lavender or eucalyptus) in a double boiler.
Another product you can create is lip balm using beeswax and honey. Simply melt 2 tablespoons of beeswax, 1 tablespoon of coconut oil, and 1 teaspoon of honey in a microwave-safe bowl. Stir until smooth, then pour into small containers for use. Propolis tinctures can also be made by steeping propolis chips in a carrier oil like almond or jojoba. This natural antiseptic has antibacterial properties and can be applied topically to soothe cuts or wounds.
Some beekeepers choose to create more complex products, such as salves or creams, using a combination of beeswax, honey, and other natural ingredients. These products are often used for skin care due to their moisturizing and soothing properties.
Advanced Techniques and Considerations
As you gain more experience with beekeeping, it’s time to take your skills to the next level by exploring advanced techniques for improving hive health and increasing yields. We’ll cover some crucial considerations to keep in mind when refining your practice.
Splitting Your Hive
When a hive reaches its maximum population size, usually around 60,000 to 80,000 bees, it’s essential to split the colony to maintain its health and productivity. This process is called swarm control or splitting, and it prevents the hive from becoming overcrowded. Overcrowding can lead to a decline in honey production, reduced queen performance, and increased disease susceptibility.
To identify when your hive needs splitting, monitor its growth rate and population size regularly. Check for signs of swarming behavior, such as bees flying erratically or building large numbers of swarm cells within the hive. You may also notice an increase in brood production, which can indicate that the queen is laying too many eggs.
To split your hive, you’ll need a new hive stand and equipment. Choose a healthy subset of 10,000 to 20,000 bees, including a strong forager population, a few frames with brood, and an established queen. Place this subset in the new hive, leaving some space between the two hives to prevent overcrowding. Ensure both hives have adequate food storage and water sources before splitting.
Splitting your hive requires careful planning to avoid disrupting its delicate social structure. However, it’s a crucial step in maintaining a healthy colony and ensuring successful beekeeping practices.
Integrated Pest Management
Integrated pest management (IPM) is a holistic approach to controlling pests in your beehive. This method considers the entire ecosystem and seeks to maintain a balance between the bees’ health and the presence of unwanted insects. By using natural predators, parasites, or other methods, you can manage pests without resorting to chemical treatments.
Some common natural predators that help control pest populations include ladybugs, lacewings, and parasitic wasps. These beneficial insects prey on aphids, mites, and other small pests that can harm your bees. To encourage their presence, create a diverse and thriving ecosystem around your beehive by planting a variety of flowers that attract pollinators.
When using IPM, it’s essential to identify the pest species accurately before introducing natural predators or control methods. This may involve consulting with an experienced beekeeper or conducting research on the specific pests affecting your bees. A small minority of beekeepers also use essential oils or neem oil to repel pests, but be cautious when applying these substances and follow the recommended dilution ratios.
A simple IPM strategy involves introducing beneficial insects early in the season, monitoring their presence, and making adjustments as needed. By adopting this approach, you can reduce chemical treatments and create a healthier environment for your bees.
Long-Term Planning and Goals
As you continue to learn and grow as a beekeeper, it’s essential to think about the long-term future of your operation. This involves setting clear goals for yourself and tracking progress towards achieving them. Start by identifying what you want to achieve with your bees – do you want to increase honey production, expand your apiary, or focus on producing high-quality bees for sale? Once you have a clear idea of your goals, create a plan to achieve them.
Developing a long-term plan will also help you adapt to changing circumstances. This might include dealing with unpredictable weather patterns, managing pests and diseases, or adjusting to changes in local regulations. Consider keeping a beekeeping journal to track your progress and note any challenges or successes. Regularly reviewing your goals and plans will ensure that you stay on track and make adjustments as needed.
Some key areas to consider when planning for the long-term include:
- Setting realistic targets and timelines
- Identifying potential risks and developing strategies to mitigate them
- Continuously monitoring and improving your beekeeping techniques
- Adapting to changes in local conditions, such as weather patterns or pest populations
Frequently Asked Questions
Can I raise bees in a small backyard with limited space?
Yes, it is possible to keep bees in a small backyard if you have at least 10 square feet of space dedicated to the hive and a suitable location for the hive stand. However, be aware that hives require regular inspections, which can be challenging in confined spaces.
What if my bees become aggressive or defensive?
This is not uncommon, especially during peak seasons or when the hive is under stress. Common causes include disease, pests, or an overabundance of honey supers. To address this, you may need to reconfigure your hive’s layout, use a different type of hive stand, or take other measures to reduce stress on the colony.
How do I handle equipment maintenance and cleaning?
Regularly inspecting and maintaining your equipment is crucial for bee health and your own safety. Clean all equipment thoroughly after each inspection, and store it in a dry place away from direct sunlight. Replace any worn-out or damaged parts promptly to avoid contamination or injury risks.
What if I notice signs of pests or diseases in my hive?
Monitor your hive regularly for signs of pests or diseases such as mites, American foulbrood, or nosema. If you detect any issues, consult with local experts or online resources for guidance on treatment and prevention strategies. Early intervention can often prevent the spread of disease or infestation.
Can I use integrated pest management (IPM) methods if I’m a beginner?
While IPM is an advanced technique, some elements like introducing beneficial insects or using natural repellents can be adapted by beginners with caution. However, it’s essential to understand that IPM requires significant knowledge and experience in beekeeping. Focus on building your foundation before exploring more complex management strategies.

