Growing nutritious fodder for your backyard chickens is a simple yet effective way to boost their health, energy levels, and egg production. Many chicken keepers overlook the importance of providing a balanced diet that meets their flock’s needs, but with fodder, you can give them exactly what they require to thrive. Fodder is essentially any type of food grown specifically for animals, in this case, chickens, using sprouting or hydroponic methods. Not only does it provide essential nutrients and fiber, but it also adds variety to their diet. If you’re looking for ways to improve the overall health and productivity of your flock, learning how to grow fodder for your chickens is a great place to start. In this article, we’ll show you exactly how to get started with growing nutritious fodder that will take your chicken’s feed to the next level.

Choosing the Right Crops
When selecting crops for fodder, consider your climate, available space, and the nutritional needs of your chickens to ensure a thriving and productive harvest. This will help you make informed decisions about which crops to grow.
Types of Crops Suitable for Chicken Feed
Grasses like ryegrass, oats, and wheat grass are popular choices for chicken feed due to their high protein content and ease of growth. Legumes such as alfalfa, clover, and beans are also nutrient-rich options that can be used to supplement a flock’s diet. Other crops suitable for chicken feed include sunflowers, pumpkin, and squash.
Grasses have the advantage of being easy to establish and maintain, but they may require more frequent harvesting than legumes. Legumes, on the other hand, tend to be more drought-tolerant and can provide a longer harvest period, but they may require more nitrogen-rich fertilizers to thrive.
When selecting crops for chicken feed, consider the nutrient profile of each option. For example, alfalfa is high in calcium and protein, making it an excellent choice for young or laying hens. In contrast, oats are lower in protein but higher in fiber, making them a good option for older birds or those with digestive issues.
Some crops to avoid include those that are toxic to chickens, such as potatoes and rhubarb. It’s also essential to ensure that the crops you choose are free of pesticides and other chemicals that could harm your flock.
Considerations for Crop Selection
When selecting a crop for fodder production, several key considerations come into play. Climate is a primary factor to consider, as some crops are more tolerant of heat or cold than others. For example, oats and barley are well-suited to cooler climates, while sorghum and millet can thrive in warmer conditions. Soil quality is also crucial; choose crops that match your soil’s pH and nutrient levels.
The needs of the chickens being raised should also influence crop selection. Different species have different nutritional requirements, so it’s essential to choose a crop that meets these needs. For instance, laying hens require more calcium than meat birds, so a crop rich in this mineral may be beneficial. Additionally, consider the growth rate and maturity date of the crop. Some crops mature quickly, while others take longer, which can impact your fodder production schedule.
In terms of specific criteria to evaluate, consider factors like:
• Disease resistance: Choose crops that are resistant to common poultry diseases.
• Nutritional value: Select crops high in protein, fiber, or other essential nutrients for your flock.
• Ease of growth: Opt for crops with minimal requirements for care and maintenance.
Factors Affecting Crop Yield and Quality
Weather conditions play a significant role in determining crop yield and quality. Extreme temperatures, either too high or too low, can impact photosynthesis and plant growth. Prolonged droughts can lead to nutrient deficiencies, while excessive rainfall can cause root rot and other water-borne diseases. Regular monitoring of weather forecasts allows you to prepare for potential issues.
Pest management is another critical factor affecting crop yield and quality. Common pests include aphids, whiteflies, and spider mites, which can spread disease and deplete plant nutrients. Implementing integrated pest management (IPM) strategies, such as introducing beneficial insects or using physical barriers, can help mitigate these risks.
Nutrient availability also impacts crop yield and quality. Soil testing is essential to determine nutrient levels and adjust fertilization accordingly. Most crops require a balanced mix of nitrogen, phosphorus, and potassium, but specific needs may vary depending on the type of crop and growth stage. For example, leafy greens like kale and spinach require more nitrogen than grain crops like oats and barley.
A well-balanced fertilizer application can make a significant difference in crop yield and quality. Typically, you’ll want to apply fertilizers at planting time and again during the growing season.
Preparing the Fodder
When growing fodder for your flock, preparing the seed and soil is a crucial step to ensure optimal growth. Let’s start by setting up our seeds for success.
Harvesting and Processing Techniques
When harvesting fodder crops, it’s essential to use equipment that minimizes damage and preserves the crop’s nutritional value. A sickle bar mower or a flail mower are good options for cutting tall crops like oats or barley, while smaller-scale operations may prefer hand shears or pruning shears for more delicate crops.
Processing techniques also play a crucial role in preparing fodder for chickens. For example, you can use a fodder crimper to flatten the crop and make it easier for your birds to access its nutrients. Alternatively, you can simply chop or shred the crop using a machine designed specifically for this purpose.
To ensure that your harvested and processed fodder is safe and palatable for your flock, be sure to handle the crop gently to avoid bruising or damaging the leaves. It’s also important to store the fodder in a cool, dry place to prevent spoilage and maintain its nutritional value. A good rule of thumb is to use the fodder within 24 hours of harvesting.
When processing, keep the following tips in mind:
- Use sharp blades to minimize damage and preserve nutrients.
- Process small batches at a time to avoid overcrowding equipment.
- Monitor moisture levels to prevent mold growth.
- Keep storage areas clean and well-ventilated.
Storing and Transporting Fodder
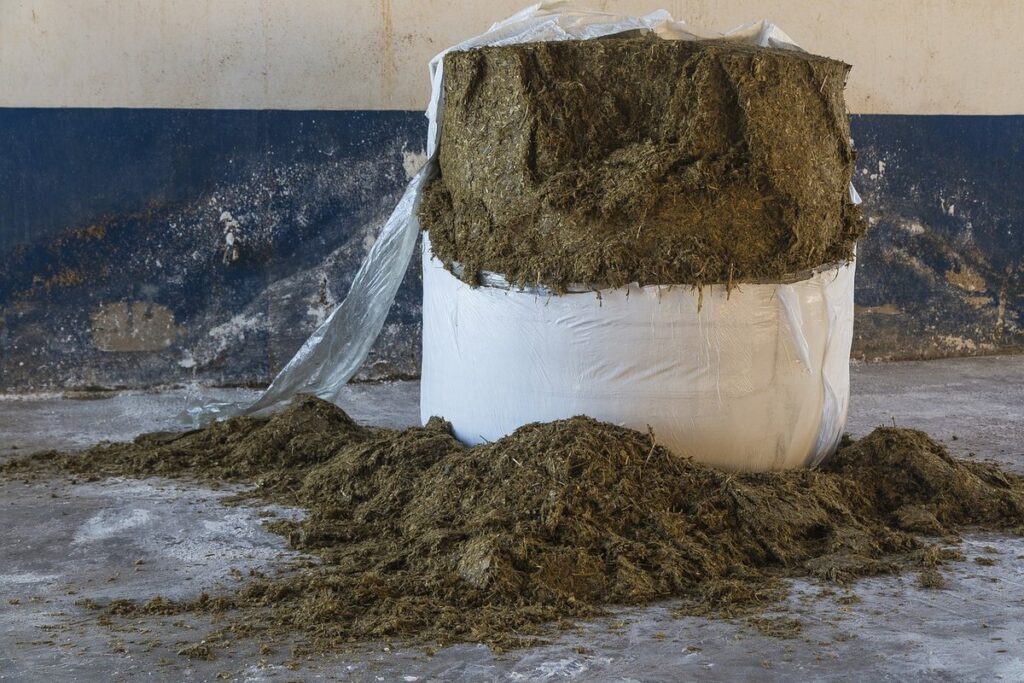
To maintain the quality and freshness of fodder, proper storage and transportation techniques are crucial. Fodder can quickly spoil if exposed to heat, moisture, or direct sunlight, which can lead to mold growth and a decrease in nutritional value.
Store harvested fodder in a cool, dry place with good ventilation. A root cellar or a shaded area with a roof is ideal. If you don’t have access to such a space, consider using a plastic bin or container with a lid to keep out pests and moisture. Keep the fodder away from direct sunlight and heat sources like ovens or radiators.
When transporting fodder, use containers that allow for airflow to prevent condensation buildup. You can also line containers with paper bags or burlap to absorb excess moisture. Handle fodder gently to avoid bruising or breaking the stems, which can lead to spoilage. For longer transportation distances, consider using insulated containers or packing fodder in a thermally controlled vehicle.
Aim to store and transport fodder within 24 hours of harvesting for optimal quality.
Ensuring Fodder Safety and Quality Control
When handling and processing fodder crops, it’s essential to maintain proper hygiene and cleanliness to prevent contamination. Start by washing your hands thoroughly before and after handling each crop. Clean and sanitize all equipment, including cutting tools, containers, and storage areas. Regularly inspect your crop for signs of mold, rot, or insect infestation.
To ensure quality control, regularly test your fodder crops for contaminants such as pesticides, heavy metals, and pathogens like E. coli. Consider using a third-party lab to analyze your samples, especially if you’re new to growing fodder. Keep accurate records of testing results, including dates, crop names, and any issues found.
Proper storage is also crucial for maintaining quality control. Store harvested crops in well-ventilated areas, protected from direct sunlight and moisture. Use airtight containers or bags to prevent spoilage and contamination. Label each container with the crop name, date harvested, and contents, making it easier to track your inventory.
When transporting fodder, ensure that containers are secure and won’t leak during transport. Regularly inspect stored crops for signs of spoilage or damage, discarding any affected material promptly.
Building a Fodder System
Growing fodder for chickens requires a solid foundation, and building a productive system starts with choosing the right crops and equipment. Let’s explore how to set up an efficient and profitable fodder operation.
Designing an Efficient Fodder System
When designing an efficient fodder system, consider the specific needs of your flock and the available space on your farm. Start by determining the ideal layout for your production area, taking into account factors such as sunlight, drainage, and accessibility. A well-planned layout can help you maximize yields while minimizing waste.
To optimize crop growth, ensure that each bed or tray has adequate access to water, air circulation, and nutrients. You may need to install irrigation systems, trellises, or other supporting structures depending on the type of crops you’re growing. For example, if you’re using barley or oats, consider installing a drip irrigation system to deliver precise amounts of water directly to the roots.
Consider the harvest-to-consumption cycle and plan accordingly. Aim for staggered harvests to maintain a steady supply of fresh fodder while minimizing waste. You may also want to establish a rotation schedule to maintain soil health and prevent overuse of specific nutrients. By taking these factors into account, you can design an efficient fodder system that meets the needs of your flock while keeping costs in check.
Setting Up a Fodder Production Area
When setting up a fodder production area, consider the space requirements carefully. Aim to allocate at least 1-2 square meters per person working on the system, and ensure there’s enough room for crops to grow without overcrowding. You’ll also need sufficient ventilation and natural light to promote healthy growth.
Equipment-wise, you’ll likely require irrigation systems, watering cans, and possibly a small tractor or trolley for transporting materials. Don’t forget about storage space for seeds, fertilizers, and other supplies. A nearby shed or covered area can be useful for protecting equipment from the elements.
To maximize crop yields and minimize waste, plan your crop rotation carefully. Consider planting fast-growing crops like oats or alfalfa in early seasons, followed by slower-growing varieties like clover or rye. This will help maintain soil fertility and reduce pest pressure. Be mindful of companion planting principles to ensure healthy growth and prevent diseases from spreading. Typically, you’ll want to plant new crops every 4-6 weeks to maintain a continuous supply of fresh fodder for your chickens.
Managing Water and Nutrient Resources
When designing a fodder system, water and nutrient management are crucial to optimize yields while minimizing waste and environmental impact. A well-planned irrigation schedule is essential; overwatering can lead to root rot and reduced growth, while underwatering stunts plant development. Consider installing drip irrigation or soaker hoses, which deliver water directly to the roots, reducing evaporation and runoff.
Nutrient management is equally important. Use a balanced fertilizer (10-10-10 N-P-K) during germination and seedling stages; switch to a high-phosphorus formula (15-30-15) when plants are about 1 foot tall. For crops like oats and barley, apply a micronutrient-rich fertilizer (e.g., Epsom salt) to promote healthy growth.
To minimize waste, collect and reuse water from the fodder production area for irrigation or other non-potable purposes. Consider implementing a rainwater harvesting system to supplement your water supply during dry spells. Regular soil testing helps ensure optimal nutrient levels; adjust fertilization schedules accordingly based on test results.
Integrating Fodder into Chicken Feed
Now that you have a lush crop of fodder, let’s talk about how to incorporate it safely and effectively into your chicken’s daily diet. We’ll cover tips for mixing and measuring the perfect blend.
Benefits of Fodder in Chicken Feed
When incorporated into chicken feed, fodder provides a rich source of essential nutrients that support optimal health and productivity. The high moisture content and diverse nutrient profile of fresh fodder make it an excellent supplement to commercial feed. One key benefit is improved nutrition, as fodder is rich in vitamins A, C, and E, as well as minerals like calcium and potassium.
Disease resistance is another significant advantage of feeding chickens with fodder. The complex mixture of phytochemicals and antioxidants present in fodder helps fortify the birds’ immune systems, reducing their susceptibility to common diseases. This can lead to a noticeable decrease in mortality rates and a reduction in veterinary costs. Furthermore, the increased availability of essential nutrients through fodder can boost egg production, particularly among layers.
In practical terms, incorporating 10-20% of fresh fodder into chicken feed can have a significant impact on overall health and performance. It’s essential to balance this with commercial feed to ensure the birds receive a well-rounded diet. Monitor your flock closely, adjusting the ratio of fodder to commercial feed as needed to achieve optimal results.
Best Practices for Mixing Fodder with Commercial Feed
When mixing fodder with commercial feed, it’s essential to balance the nutrient-dense fodder with the more energy-dense commercial feed. A general rule of thumb is to start by replacing 10-20% of the commercial feed with fodder, gradually increasing the proportion as the flock adjusts.
To ensure a balanced diet, consider the nutritional profile of the fodder crops you’re using. For example, if you’re growing wheat or oats, they are high in fiber and protein, making them an excellent addition to the flock’s diet. However, if you’re growing leafy greens like kale or spinach, their nutrient content is more variable.
When mixing, keep the following tips in mind: mix fodder with commercial feed immediately before feeding, avoid over-mixing which can lead to spoilage, and store any leftover mixed feed properly to prevent contamination. A simple ratio to start with is 1 part fodder to 4-6 parts commercial feed, adjusting as needed based on the flock’s response.
Remember that every farm or flock is unique, so it may take some experimentation to find the right balance for your birds. Keep a close eye on their health and performance, making adjustments accordingly.
Monitoring Chicken Health and Performance
When introducing fodder into your chickens’ diet, it’s essential to monitor their health and performance closely. Start by tracking changes in egg production, as this is often the first indicator of a healthy or struggling flock. Look for an increase in egg size, weight, and quality – typically within 1-2 weeks of adding fodder to their feed.
Pay attention to growth rates too: chickens fed with fodder tend to grow faster than those on commercial feed alone. Monitor your birds’ growth by weighing them regularly, ideally every week or two. Take note of any significant changes in appetite, droppings, or overall behavior – these can be signs that your flock is adapting well to the new diet.
Regularly inspect your chickens for signs of stress, disease, or parasite infestation. Keep an eye out for unusual behaviors like excessive pecking, feather loss, or lethargy. If you notice any of these symptoms, adjust their fodder intake or consult with a veterinarian to ensure they receive proper care.
Frequently Asked Questions
How long does it take to see improvements in chicken health and egg production after introducing fodder into their diet?
It can take anywhere from a few weeks to several months to notice significant improvements in chicken health and egg production. Factors such as the quality of the fodder, the age and size of the chickens, and the overall nutritional balance of the flock will influence the rate at which benefits are realized.
Can I mix different types of crops together to create a custom fodder blend for my chickens?
Yes, you can mix different types of crops together to create a custom fodder blend that meets the specific needs of your flock. However, it’s essential to consider the nutrient profiles and growth rates of each crop to ensure they complement each other rather than competing for resources.
How do I handle crop rotation in my fodder production area to maintain soil health and prevent pests and diseases?
Crop rotation is a crucial aspect of maintaining soil health and preventing pests and diseases. A good rule of thumb is to rotate crops every 2-3 years, using a combination of grasses, legumes, and other nutrient-rich plants to break disease cycles and improve soil fertility.
What if I’m new to growing fodder and don’t have experience with crop management? Are there any resources available to help me get started?
Yes, there are many resources available to help beginners learn about growing fodder. Online forums, local extension offices, and online courses can provide valuable guidance on everything from selecting the right crops to managing pests and diseases.
Can I use fodder as a complete replacement for commercial feed, or do my chickens still need some commercial feed in their diet?
Fodder should be used as a supplement to commercial feed, not a replacement. Fodder provides essential nutrients and fiber, but it may lack certain vitamins and minerals found in commercial feed. A balanced diet that combines fodder with commercial feed will provide the best possible nutrition for your flock.