Wheat is one of the most widely cultivated crops globally, providing sustenance for millions of people. However, its production can be challenging due to factors like climate variability and soil degradation. Effective wheat cultivation techniques are essential to ensure high yields while maintaining soil health. This article will guide you through the comprehensive process of cultivating wheat, from preparing the land to harvesting the crop. We’ll cover crucial aspects such as adapting to different climates, managing pests and diseases, and optimizing soil conditions for maximum yield. By following these expert tips, you’ll be able to develop a robust wheat cultivation strategy that minimizes risks and maximizes returns.
Understanding Wheat Cultivation Basics
Wheat cultivation is a complex process, but understanding its basics is essential for any farmer or enthusiast looking to grow wheat. This section will break down the fundamental steps involved in cultivating wheat.
Types of Wheat and Their Characteristics
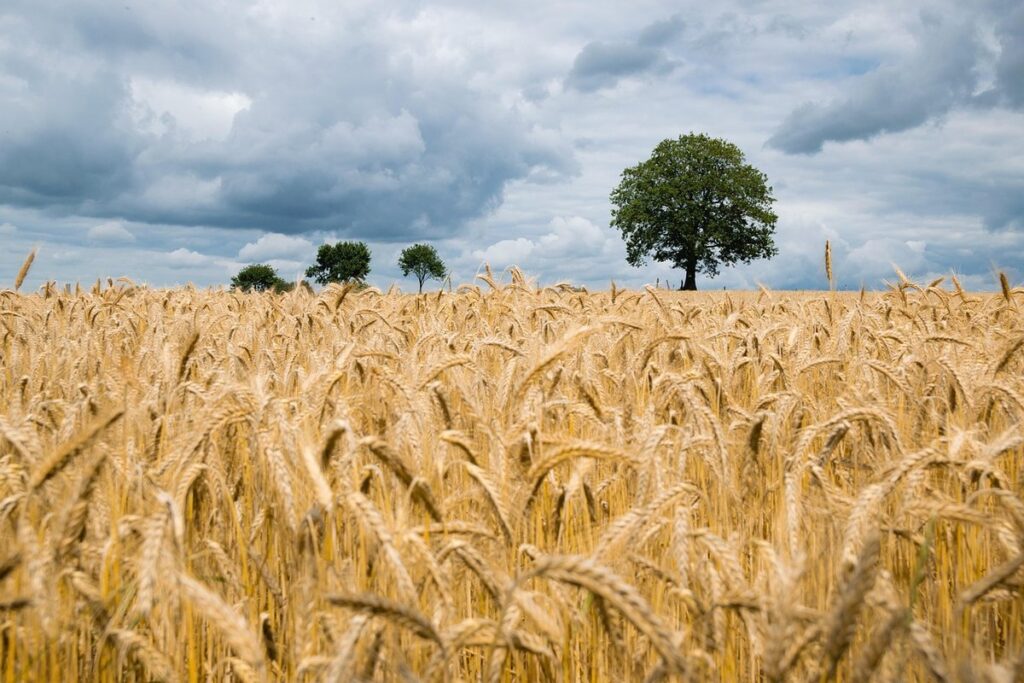
The primary types of wheat are Hard Red Winter (HRW), Hard Red Spring (HRS), Soft Red Winter (SRW), and White Wheat. Each type has distinct characteristics, making them suitable for various climates, soil conditions, and end-use applications.
Hard Red Winter (HRW) wheat is high in protein and has a hard texture, making it ideal for bread-making. It’s commonly grown in the Great Plains region of the United States due to its cold-tolerant nature. HRW typically contains 10-12% moisture levels, which can be challenging to dry post-harvest.
Hard Red Spring (HRS) wheat is also high in protein but has a slightly lower gluten strength compared to HRW. It’s well-suited for bread-making and often used as a substitute for all-purpose flour. HRS contains 10-12% moisture levels, similar to HRW.
Soft Red Winter (SRW) wheat is low in protein and has a soft texture, making it suitable for cake flour, pastry dough, and other delicate baked goods. It thrives in temperate climates with adequate moisture. SRW typically contains 13-15% moisture levels.
White Wheat, also known as Durum wheat, is high in protein and gluten strength but has a lower yield potential compared to the other types. It’s often used for pasta production due to its characteristic yellow color and semolina flour properties.
Climate and Soil Requirements for Wheat
Wheat requires a cool and temperate climate with moderate temperatures for optimal growth. The ideal temperature range for wheat cultivation is between 10°C to 25°C (50°F to 77°F). Temperatures above 30°C (86°F) can lead to heat stress, while prolonged exposure to temperatures below -2°C (28°F) can cause frost damage.
In terms of rainfall, wheat needs a well-distributed annual rainfall of around 600-800 mm. However, some wheat varieties are more drought-tolerant and can thrive in areas with lower rainfall. It’s essential to choose the right wheat variety based on your region’s climate and soil conditions.
Soil-wise, wheat prefers fertile, well-drained soils with a pH between 6.0 and 7.0. The soil should have adequate nitrogen, phosphorus, and potassium levels for optimal growth. Regular soil testing can help identify nutrient deficiencies and inform fertilizer applications. Wheat also requires a mix of sand, silt, and clay for good drainage and water-holding capacity.
To ensure healthy wheat growth, it’s crucial to maintain the right balance of nutrients in your soil. A general rule of thumb is to apply 100-150 kg/ha of nitrogen, 50-70 kg/ha of phosphorus, and 100-150 kg/ha of potassium per season.
Preparing the Land for Wheat Cultivation
Before planting wheat, it’s essential to prepare your land properly by assessing its soil type and pH level. This will ensure your crop gets off to a healthy start.
Land Selection and Preparation
When selecting land for wheat cultivation, several key factors come into play. Topography is a crucial consideration – sloping lands can be challenging to work with, as they may require additional labor and equipment to prevent soil erosion and ensure even moisture distribution. Conversely, flat lands can lead to waterlogged areas, which can negatively impact crop growth.
Soil type is another essential factor in land selection. Wheat thrives in well-draining soils with a pH between 6.0 and 7.0. Sandy loams are generally suitable for wheat cultivation, but clay soils can also work provided they’re well-structured. It’s essential to assess the soil’s nutrient profile, as wheat is a heavy feeder and requires adequate nitrogen, phosphorus, and potassium.
Previous crop usage is another vital consideration. Wheat typically does not follow other cereal crops in rotation, so it’s best to select land that has been used for legumes or other non-cereal crops in the previous cycle. This allows for optimal nutrient replenishment and minimizes the risk of pests and diseases transferring from one crop to the next.
Soil Testing and Fertilization
Soil testing and fertilization are crucial steps in preparing the land for wheat cultivation. The type of fertilizer used can significantly impact crop yields and soil health. Organic fertilizers like compost, manure, or green sand are excellent options as they improve soil structure, increase nutrient availability, and promote beneficial microbial activity.
Inorganic fertilizers, such as nitrogen-phosphorus-potassium (NPK) blends, provide a quick boost of essential nutrients but can lead to over-fertilization if not applied carefully. It’s essential to follow the recommended application rates and timing to avoid harming the soil or waterways. A balanced fertilizer with an NPK ratio suitable for wheat cultivation should be selected.
When applying fertilizers, consider the soil type and pH level. For example, acidic soils may require additional lime to adjust the pH before fertilization. The application method also matters – broadcast spreading, side-dressing, or foliar sprays can be used depending on the fertilizer type and crop growth stage. Conducting regular soil tests will help identify nutrient deficiencies and inform fertilizer selection, ensuring optimal wheat yields while maintaining soil health.
Planting Wheat: From Seeding to Emergence
Once you’ve prepared your soil, it’s time to plant wheat seeds. In this crucial stage of wheat cultivation, precise timing and technique are essential for successful germination and emergence.
Seed Selection and Treatment
When selecting wheat seed for cultivation, it’s essential to choose a variety that suits your climate and soil conditions. Different types of wheat have distinct characteristics, such as maturity days, yield potential, and disease resistance. For example, winter wheat is more suitable for regions with cold winters, while spring wheat thrives in temperate climates.
Proper seed treatment is also crucial to ensure healthy germination and establishment. Seed treatment typically involves applying fungicides or insecticides to protect the seeds from pests and diseases. This can be done through dry or liquid application methods, depending on the product and equipment available.
Storage of wheat seeds requires careful consideration as well. Seeds should be stored in a cool, dry place with good ventilation to maintain their viability. Moisture and temperature fluctuations can significantly impact seed quality, so proper storage is essential to prevent deterioration.
To ensure optimal performance, select high-quality seeds from reputable suppliers. Look for certification marks that indicate the seeds meet local standards or have undergone rigorous testing. Proper handling, storage, and treatment of wheat seeds will help minimize risks associated with poor yields, reduced crop quality, or disease susceptibility.
Planting Methods and Techniques
Drill seeding is a popular method for planting wheat, particularly on large-scale farms. This technique involves using a drill to sow seeds at a precise depth and spacing, usually in rows. The drill seeds are typically set 1-2 inches deep, depending on soil conditions and climate. This approach promotes efficient use of land and allows for uniform germination.
Broadcast seeding, on the other hand, disperses seeds over the entire field by hand or using machinery. While more labor-intensive than drill seeding, broadcast seeding can be effective in smaller-scale operations or when soil conditions make it difficult to achieve consistent depth with a drill. Seeds are usually spread 1/4 inch deep and spaced about 6-8 inches apart.
Transplanting wheat is less common but may be used in areas where seeds need extra protection from pests or harsh weather conditions. This method involves starting seeds in a nursery before transplanting them into the field when they have two to three sets of leaves. Plant spacing should be adjusted accordingly, typically 12-18 inches between plants.
In general, it’s essential to match planting methods with specific soil types and climate conditions.
Wheat Growth Stages: Management and Care
As you progress through the wheat cultivation process, it’s essential to understand how to manage and care for your crop at each stage of its growth. This involves careful planning and attention to detail to ensure optimal yields.
Germination and Emergence Stage
During the germination and emergence stage, wheat seeds begin to sprout and develop their first set of leaves. This critical period typically spans 7-14 days after planting, depending on weather conditions. To promote healthy growth, it’s essential to manage irrigation carefully.
Adequate moisture is crucial for wheat germination, but excessive water can lead to rot and other issues. Aim for about 1-2 inches of rainfall or supplemental irrigation during this stage. Monitor soil moisture levels closely, and avoid overwatering, which can cause root rot and other problems.
Weed control is also vital during this period. Emerging weeds can compete with wheat plants for water, nutrients, and light, hindering their development. Use a combination of cultural controls, such as timely planting and crop rotation, in conjunction with herbicides or mechanical weeding methods to minimize weed pressure. For example, consider using a pre-emergent herbicide that prevents weeds from germinating in the first place.
Some common weeds to watch out for include annual grasses like ryegrass and brome, which can quickly spread and crowd out wheat plants. By addressing these issues promptly, you’ll set your crop up for success during subsequent growth stages.
Tillering and Jointing Stage
During the tillering and jointing stages of wheat growth, you can expect to see a significant increase in plant density. Tillering is the process by which wheat plants produce additional shoots from their crown, while jointing refers to the formation of nodes on the stem where these new shoots emerge.
Several factors can impact these stages, including temperature, moisture levels, and nutrient availability. For instance, if temperatures are consistently high or low, it may slow down or speed up tillering. Similarly, drought stress can cause tillers to become weak and less productive. On the other hand, adequate water supply and balanced fertilization can promote healthy tiller growth.
Management strategies during this period focus on optimizing growing conditions. This involves maintaining optimal moisture levels through irrigation, if necessary, and ensuring sufficient nutrient uptake by monitoring soil pH and adjusting fertilizer applications as needed. You should also keep an eye out for signs of disease or pests, which can spread quickly at this stage. Regular scouting and prompt action can help minimize damage.
A few key considerations include:
• Monitoring temperature fluctuations to avoid stress on tillers
• Adjusting irrigation schedules based on weather forecasts
• Maintaining a balanced fertilization program to promote healthy growth
Pest and Disease Management in Wheat
Wheat cultivation is a delicate balance between promoting healthy growth and preventing common threats like pests and diseases. Effective management strategies are essential to protecting your crop from these risks.
Common Pests Affecting Wheat
Wheat is susceptible to various pests that can cause significant damage and reduce yields. Among the most common wheat pests are the Hessian fly (Mayetiola destructor) and the Russian wheat aphid (Diuraphis noxia). The Hessian fly completes its life cycle within a single generation, with females laying eggs on emerging wheat plants in late spring or early summer. These eggs hatch into larvae that feed on plant sap, causing damage to the growing point.
The Russian wheat aphid, on the other hand, has multiple generations per year and can be found on wheat plants at various growth stages. It feeds on sap, causing stunted growth and reduced yields. Management strategies for these pests include crop rotation, resistant varieties, and insecticides. Integrated pest management (IPM) approaches often combine physical barriers, biological controls, and cultural practices to minimize the use of chemical pesticides.
To effectively manage wheat pests, farmers should monitor their fields regularly for signs of infestation and implement control measures promptly. Regularly scouting for eggs, larvae, and adult insects can help prevent outbreaks. Additionally, using resistant varieties or planting them in rotation with other crops can reduce pest pressure and promote ecosystem balance.
Fungal Diseases and Bacterial Blights
Fungal diseases and bacterial blights are among the most prevalent threats to wheat cultivation worldwide. The main causes of these issues are excessive moisture, warm temperatures, and poor air circulation, which create an ideal environment for fungal pathogens to spread.
Some common fungal diseases affecting wheat include powdery mildew, rust, and leaf spot. These diseases manifest as white or yellowish patches on the leaves, stems, or grains, often accompanied by a fine powder or sticky substance. Early symptoms can be mistaken for nutrient deficiencies or pests, but a more severe outbreak will lead to reduced yields and lower grain quality.
To manage fungal diseases, focus on maintaining optimal moisture levels through efficient irrigation systems. Watering during early morning hours allows excess moisture to evaporate before nightfall, reducing the risk of fungal growth. Crop rotation is also crucial in breaking disease cycles – rotate wheat with non-susceptible crops like legumes or grasses.
Bacterial blights are often caused by Pseudomonas and Xanthomonas bacteria. These microorganisms typically infect through wounds created during harvest or cultivation, leading to lesions on the leaves and stems. Regular monitoring for symptoms, coupled with targeted fungicide applications and crop sanitation practices, can help mitigate bacterial outbreaks.
Harvesting and Post-Harvest Management
Proper harvesting and post-harvest management are crucial steps in wheat cultivation, ensuring high-quality grains that meet market standards. Effective handling techniques can make a significant difference in your crop’s yield and profitability.
Maturity Determination and Harvest Timing
Determining wheat maturity is crucial for optimal harvest timing. Farmers typically assess maturity by checking the seed moisture content and observing visual cues on the plant. For hard red winter wheat, which accounts for a significant portion of global production, maturity is usually reached when the kernel’s moisture drops to around 20%. This can be measured using a grain probe or by testing a sample at a local lab.
Weather conditions also play a vital role in determining harvest timing. Rainfall and temperature fluctuations can cause moisture content to spike, leading to potential spoilage if not harvested promptly. Conversely, prolonged dry spells may cause kernels to mature prematurely, affecting yield quality. Regular monitoring of weather forecasts helps farmers plan their harvesting schedule accordingly.
Farmers should monitor wheat fields regularly during the late growth stages for visual signs of maturity, such as yellowing leaves or a slight drooping of the head. This is often accompanied by a noticeable increase in kernel hardness and density. By combining moisture content checks with these visual cues, farmers can accurately determine when to harvest their wheat crop, ensuring maximum quality and minimizing post-harvest losses.
Storage and Handling Techniques
Proper storage and handling techniques are crucial to maintaining grain quality and minimizing losses during the post-harvest stage. When storing wheat, it’s essential to keep the grain cool and dry. A temperature range of 60-70°F (15-21°C) and a relative humidity below 60% will help prevent moisture accumulation and subsequent mold growth.
Grain should be stored in a well-ventilated area, with the top open for airflow. This can be achieved by using fans or ventilation systems specifically designed for grain storage. It’s also vital to maintain cleanliness within the storage facility, as dirt and debris can attract pests and contaminate the grain.
For handling techniques, it’s recommended to use a combination of air-jet or mechanical sweepers to remove chaff and other impurities from the grain surface. This will help prevent damage during transportation and storage. When loading grain into storage bins, do so slowly and evenly to avoid creating pressure points that can lead to grain compaction.
In terms of equipment maintenance, regularly inspect storage facilities for signs of wear and tear on equipment, such as cracked or damaged hoppers, and ensure all necessary repairs are made promptly to prevent accidents and potential losses.
Frequently Asked Questions
Can I grow wheat in containers or small plots?
Yes, it is possible to grow wheat in containers or small plots, but you’ll need to provide optimal growing conditions, including sufficient sunlight, water, and nutrient-rich soil. Container sizes should be at least 12 inches deep and wide to accommodate the wheat’s root system.
What if I notice fungal diseases on my wheat crop during germination?
Fungal diseases can be a major concern for wheat growers. If you notice symptoms during germination, remove infected plants immediately to prevent further spread. Use fungicides as a last resort and consider cultural controls like crop rotation, sanitation, and adjusting your irrigation schedule.
Is it necessary to rotate crops with wheat every season?
Crop rotation is highly recommended when growing wheat to maintain soil fertility and reduce the risk of pests and diseases building up in the soil. Rotate with non-brassica or cereal crops that have different nutrient requirements to optimize soil health.
Can I save wheat seeds from my harvested crop for next year’s planting?
Saving wheat seeds can be done, but it’s essential to ensure seed quality by selecting healthy plants and proper drying techniques. Store seeds in a cool, dry place away from direct sunlight to maintain viability. However, consider purchasing fresh seeds every 2-3 years to avoid potential genetic degradation.
What if I’m experiencing inconsistent yields or lower-than-expected grain quality?
Inconsistent yields or poor grain quality can be caused by various factors, including soil nutrient deficiencies, inadequate water management, or pests and diseases. Conduct a thorough analysis of your farming practices and consider seeking expert advice to identify the root cause and implement corrective measures.
How do I ensure proper storage conditions for my wheat crop after harvest?
Proper storage is crucial for maintaining grain quality and minimizing losses. Store harvested wheat in well-ventilated, dry areas with temperatures between 40°F to 60°F (4°C to 15°C). Use aeration systems or fans to maintain air circulation and keep the moisture level below 14%.
